InCountry logo
mobile-nav
Search
  • Products
    • Products
      • InCountry for Salesforce
      • Data Residency-as-a-Service
      • Alibaba Cloud InCountry Service
      • Compliance and security
    • Gateways
      • Email
      • Payment Vault
      • Web Forms
      • HTML
    • Developers
      • REST API
      • SDK
  • Solutions
    • Automotive
    • Energy
    • Financial services
    • Healthcare
    • Retail
    • Technology
    • Latest success story
      • IBM Consulting
  • Integrations
    • Cegid
    • Intertrust
    • MuleSoft
    • PayPal
    • Salesforce
    • ServiceNow
    • Stripe
    • Veeva Systems
    • Yandex
  • Resources
    • Country compliance
    • Documentation
    • Library
    • Partners
    • Pricing
  • About
    • News and Blog
    • Careers
    • Contact Us
    • FAQ
    • Leadership
  • Login
  • Schedule a Demo

›Administrator's guide

Home
  • InCountry Platform
Portal
  • Getting started
  • Documentation
    • Dashboard
    • Managing environments
    • Managing SDK credentials and services
    • Managing Border configuration
    • Managing payment vaults
    • Managing email gateways
    • Managing resident functions
    • Managing file imports
    • Managing profile and organization
    • Managing users
    • Managing encryption keys
  • Release notes
Border
  • Documentation
  • Release notes
REST API
  • Documentation
  • How to test CRUD requests through REST API
  • Release notes
Resident Functions
  • Documentation
Salesforce
  • About
  • Overview
  • Quick start guide for three-model package
  • Quick start guide for legacy package
  • Administrator's guide
    • Managing the package
    • Managing permissions
    • Managing OAuth2 authentication and authorization
    • Managing certificates
    • Registering CSP Trusted Sites
    • Managing InCountry Endpoints
    • Managing REST endpoints
    • Managing InCountry flags
    • Loading the application
    • Managing data regulation policies
    • Managing protected fields
    • Hashing the UserName field
    • Managing custom objects
    • Replacing standard elements
    • Configuring record search
    • Managing components
    • Setting up Salesforce Experience Cloud
    • Managing resident functions
    • Managing InCountry cache
    • Managing Apex triggers
    • Managing record synchronization
    • Managing web forms
    • Tracking changes to data regulation policies and regulated fields
    • Using Email-to-Case feature
    • Debugging
    • Migrating data from one Salesforce organization to another
  • Developer’s guide
    • Apex SDK
    • JavaScript API
    • Retrieving record statistics
    • Tracking field history
  • User's guide
    • Working with protected fields
    • Sending compliant email messages
    • Importing data into Salesforce
    • Migrating records
    • Managing audit reports
    • Converting leads
    • Managing reports
    • Using formula fields
    • Using frontend validations
    • FAQ
    • Release notes
Payment Vault
  • Documentation
BYOK
  • Documentation
FAQ
  • Get started with the platform
  • Integration options
  • Data regulation models
  • Limits and quotas
  • Video tutorials
Service Status
  • Status

Replacing standard elements

Replacing tabs within apps

note

These instructions are applicable to the three-model package for all the models supported by it.

To show records with protected fields according to the redaction data regulation policy, you need to hide standard Salesforce tabs from the app. This can be achieved in two ways:

  • configuring restrictions to tabs in user profiles

  • replacing standard tabs with customized tabs

Configuring restrictions to tabs in user profiles

  1. Log in to Salesforce as a system administrator.

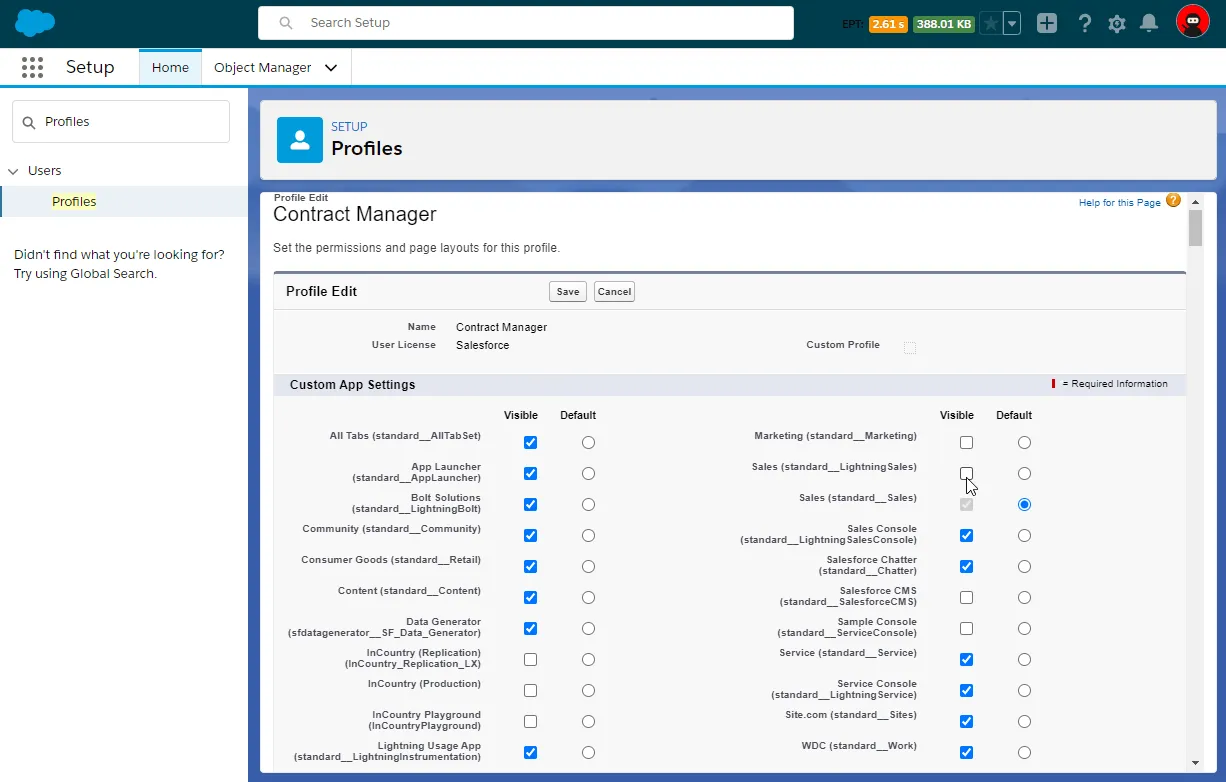
  2. From Setup, click Users and then select Profiles.

  3. On the list with user profiles, locate the profile for which you want to hide standard tabs.

    Locate Profile

  4. Click Edit for this user profile.

    Edit Profile

  5. On the list with tabs, locate the standard tabs which are used for showing Salesforce objects with protected fields.

  6. Clear the boxes for these tabs.

  7. Check the boxes for custom tabs with the components from the InCountry Data Residency for Salesforce package.

  8. When complete, click Save.

You may need to repeat similar operations for other user profiles.

Replacing standard tabs with customized tabs

  1. Log in to Salesforce as a system administrator.

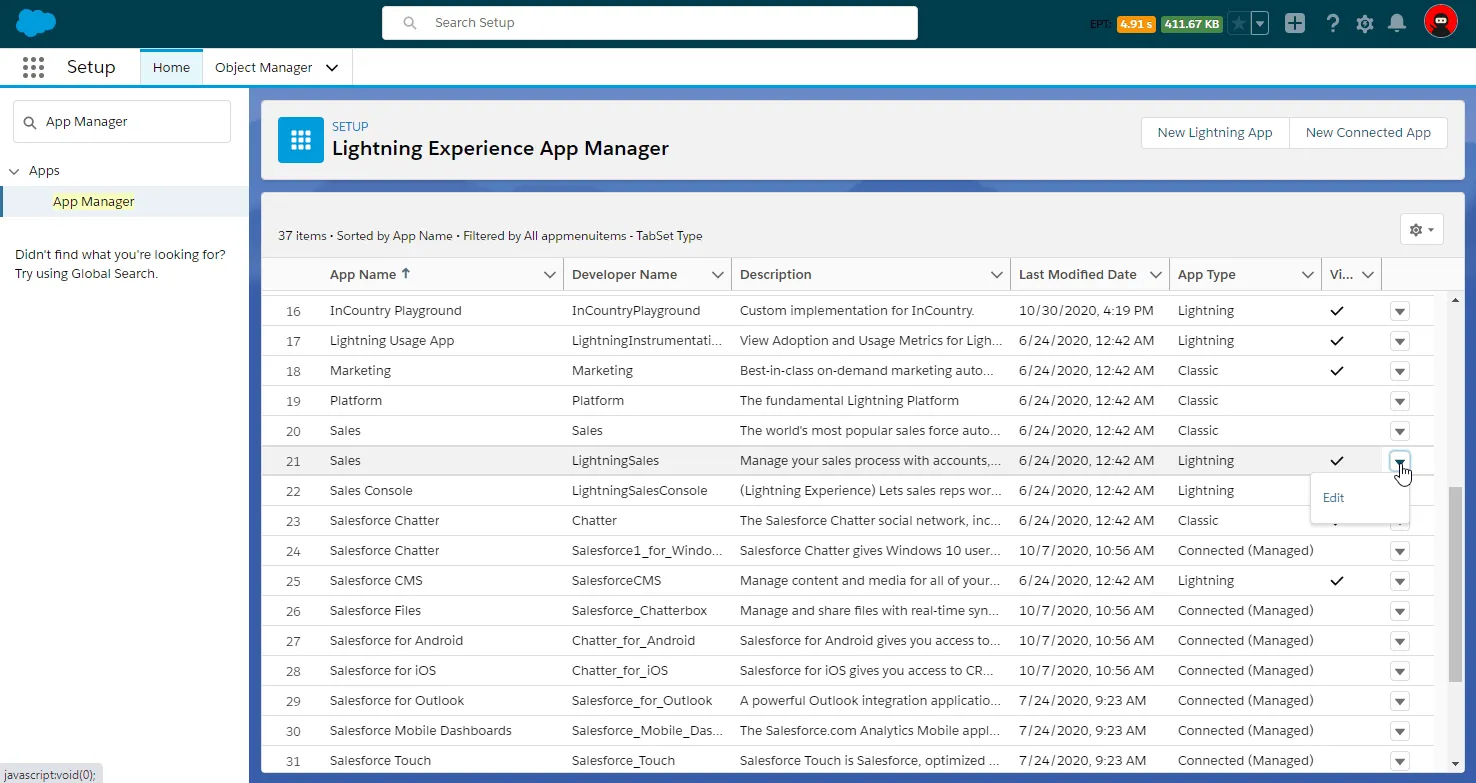
  2. From Setup, click Apps and then select App Manager.

  3. On the list with apps, locate the app in which you want to replace the standard tabs with customized tabs and click Edit.

    Edit

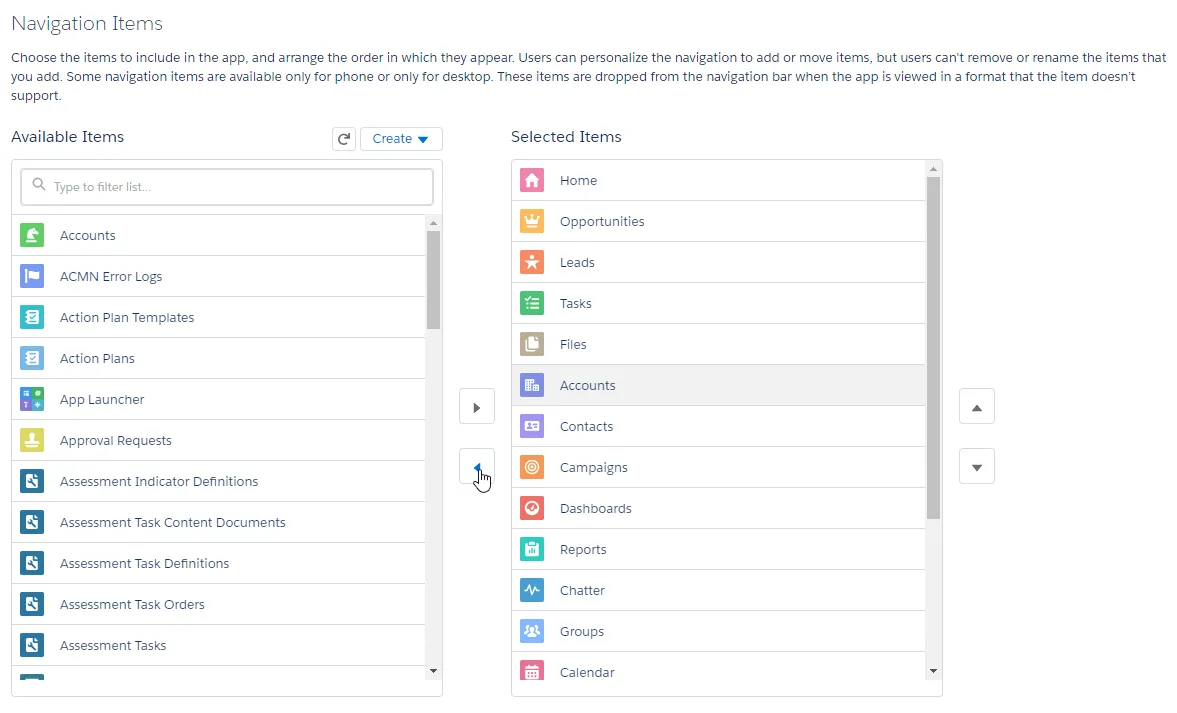
  4. Within the app settings, select Navigation Items.

  5. On the Selected Items list, locate the tab with standard components and select it, then click the Remove button.

    Remove

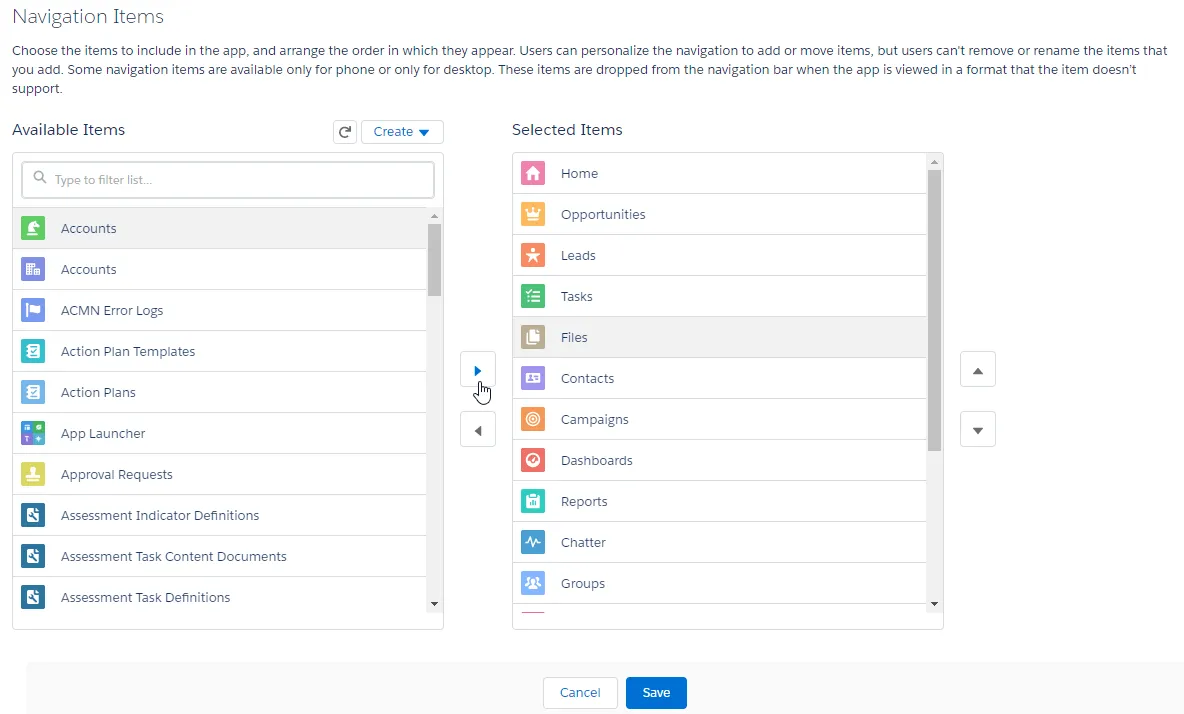
  6. On the Available Items list, locate the tab with customized components and select it, then click the Add button.

    Add

  7. When complete, click Save.

Adding a custom component

note

These instructions are applicable to the three-model package for all the models supported by it.

The InCountry Poller custom Lightning web component automatically refreshes values on the user's screen once records with protected fields have been synchronized with the InCountry platform.

  1. In the Settings section, add the PII policy and protected fields for a particular Salesforce object.

    Settings

  2. Open the list view for this Salesforce object.

    Salesforce object

  3. Select any record and click the Gear icon.

    Gear

  4. From the contextual menu, select Edit page or navigate to the App Builder.

    Edit page

  5. On the the Record’s View Flexipage, locate the list with components.

    Record

  6. On the Components list, look up the InCountry Poller component from the managed package and drag it to any place on the screen.

    Components

  7. Click Save.

  8. Click Activation, then click Activate.

  9. Click Assign as Org Default.

    Assign

  10. In the Assign form factor form, select Desktop and click Next.

    Assign form

  11. Click Save.

  12. Exit App Builder by clicking the Back arrow.

    Back

  13. Repeat this procedure for all Salesforce objects having protected fields.

← Managing custom objectsConfiguring record search →
  • Replacing tabs within apps
    • Configuring restrictions to tabs in user profiles
    • Replacing standard tabs with customized tabs
  • Adding a custom component
InCountry logo blue
© InCountry 2022.
All rights reserved. InCountry, Inc
  • PRIVACY POLICY
  • TERMS OF SERVICE
  • Social share
    • YouTube logo
    • Facebook logo
    • Twitter logo
    • LinkedIn
  • Column 1
    • Products
      • Products
        • InCountry for Salesforce
        • Data Residency-as-a-Service
        • Alibaba Cloud InCountry Service
        • Compliance and security
      • Gateways
        • Email
        • Payment Vault
        • Web Forms
        • HTML
      • Developers
        • REST API
        • SDK
  • Column 2
    • Solutions
      • Automotive
      • Energy
      • Financial services
      • Healthcare
      • Retail
      • Technology
    • Integrations
      • Cegid
      • Intertrust
      • MuleSoft
      • PayPal
      • Salesforce
      • ServiceNow
      • Stripe
      • Veeva Systems
      • Yandex
  • Column 3
    • Resources
      • Country compliance
      • Documentation
      • Library
      • Partners
      • Pricing
    • About
      • News and Blog
      • Careers
      • Contact Us
      • FAQ
      • Leadership