Managing Record Synchronization
Synchronization of regulated records is supported in the legacy package and in the three-model package.
The InCountry Data Residency for Salesforce package provides two types of record synchronization:
-
Standard synchronization uses the mechanism which instantly transfers the regulated data from Salesforce to the InCountry Platform for all records of a specific Salesforce object.
-
Scheduled synchronization is performed on a weekly or monthly basis based on a configured schedule.
There are two modes for record synchronization:
-
Initial synchronization
-
Safe synchronization
Before using a specific synchronization option, please consider its specifics.
When to use initial synchronization
Initial synchronization is a bit faster than safe synchronization for large amounts of data because it does not check for the existence of records on the InCountry platform, creating them from scratch or rewriting existing records. It also does not recognize whether the fields of synchronized records already store or contain clear-text values, which may cause the accidental rewriting of clear-text values with their hashed values.
Initial synchronization may cause the partial or complete corruption of regulated records because of saving hashed values on the InCountry platform, so please consider this while launching it.
Use initial synchronization only after checking that records pending synchronization do not exist on the InCountry platform, otherwise use safe synchronization. To narrow down the scope of regulated records when performing initial synchronization, please use filters.
When to use safe synchronization
Safe synchronization is a bit slower than initial synchronization for large amounts of data because it checks for the existence of records on the InCountry platform and does not immediately create them from scratch or rewrite existing records. It compares the scope of fields for the records stored on the InCountry platform against the current field configuration defined within the package and synchronizes only the field difference.
Use safe synchronization when you need to synchronize regulated records that already exist.
How synchronization works
The following table outlines how each synchronization mode works and how regulated data records are processed during synchronization.
| Step | Initial synchronization | Safe synchronization |
|---|---|---|
| 1 | Fetches regulated Salesforce records for synchronization. Either all records or records filtered against specific criteria can be synchronized. | |
| 2 | Does not query the InCountry platform to identify regulated records that already exist. | Queries the InCountry platform to identify regulated records (by profile key) that already exist. Data query requests to the InCountry platform are performed through REST API calls. |
| 3 | Does not compare fields of regulated records saved on the InCountry platform against the current field configuration defined in the package settings. | Compares if fields of regulated records saved on the InCountry platform are identical to the current field configuration defined in the package settings. If fields differ, additional checks are performed. The synchronization mechanism then checks the following: 1. the number of fields in the package settings is greater than the number of fields in records stored on the InCountry platform: all the missing fields will be synchronized from Salesforce to the InCountry platform. 2. the number of fields in the package settings is fewer than the number of fields in records stored on the InCountry platform: the excess fields available on the InCountry platform will be preserved as-is. 3. the number of fields in the package settings is equal to the number of fields in records stored on the InCountry platform, but fields differ: all the missing fields will be synchronized from Salesforce to the InCountry platform and the excess fields available on the InCountry platform will be preserved as-is. 4. the number of fields in the package settings is equal to the number of fields in records stored on the InCountry platform, but field types differ: field values are preserved as-is without re-saving under another field type on the InCountry platform. 5. the number of fields in the package settings is equal to the number of fields in records stored on the InCountry platforms and field types match, but values in Salesforce and on the InCountry platform differ: field values are not synchronized with the InCountry platform as hashed values are stored in the Salesforce database. |
| 4 | Fetches regulated records with their protected fields, including their current values from Salesforce, and puts them into a request payload. | |
| 5 | Transfers current regulated records to the InCountry platform and saves new records to the InCountry platform without considering whether a record already exists.
| Transfers current regulated records to the InCountry platform considering the fields that are missing within records stored on the InCountry platform. Only missing fields are synchronized between Salesforce and the InCountry platform. |
| 6 | Hashes values of protected fields for regulated records and saves them to the Saleforce database. | |
| 7 | Runs a DML operation to update synchronized records with the newly generated hashes (step 6). This rewrites clear-text values with hashes in the Saleforce database. | |
InCountry indexed keys behavior during safe synchronization
| Case | Action | Result |
|---|---|---|
| 1 | Add a new indexed key. Example: We mark the field “Phone” as "key3". Before synchronization we have the “null” value for "key3".The indexed keys before synchronization: "key3":null | Write a new indexed key value on the InCountry platform Example: "key3" has a value from the field “Phone”.The indexed keys after synchronization: "key3":"55445566" |
| 2 | Swap the existing indexed keys with each other. Example: We replace the indexed keys between the fields “Field A” (key10) and “Field B” (key9). The indexed keys before synchronization: "key9":"field b value","key10":"field a value | The indexed key values will be replaced on the InCountry platform (Values are taken from the InCountry platform). Example: “Field A” is key9 and “Field B” is key10 now. After synchronization, the values of key9 and key10 have been changed. The indexed keys after synchronization: "key9":"field a value","key10":"field b value" |
| 3 | Remove the existing key. Example: We remove key3 from settings. The indexed keys before synchronization: "key3":"55445566" | Value of the removed key will remain on the InCountry platform. The indexed keys after synchronization: "key3":"55445566" |
| 4 | Replace the existing indexed key with a new indexed key. Example: We replace indexed keys between the fields “Field A” (key9 → key 11) and “Field C” (key6 now, not indexed field before). The indexed keys before synchronization: "key6":null,"key9":"field a value","key10":"field b value","key11":null | The indexed key values will be replaced in the InCountry platform. Example: “Field A” is key11 and “Field C” is key6 now. After synchronization, the values of key11 and key6 have been changed, but key9 still stores the value of the field. The indexed keys after synchronization: "key6":"field c value","key9":"field a value","key10":"field b value","key11":"field a value" |
Running standard synchronization
Once you have configured all the data regulation policies and protected fields for Salesforce objects, you can instantly synchronize them between Salesforce and the InCountry Platform. In this case, the synchronization mechanism will transfer the regulated data from Salesforce to the InCountry Platform for all the records of a specific Salesforce object.
-
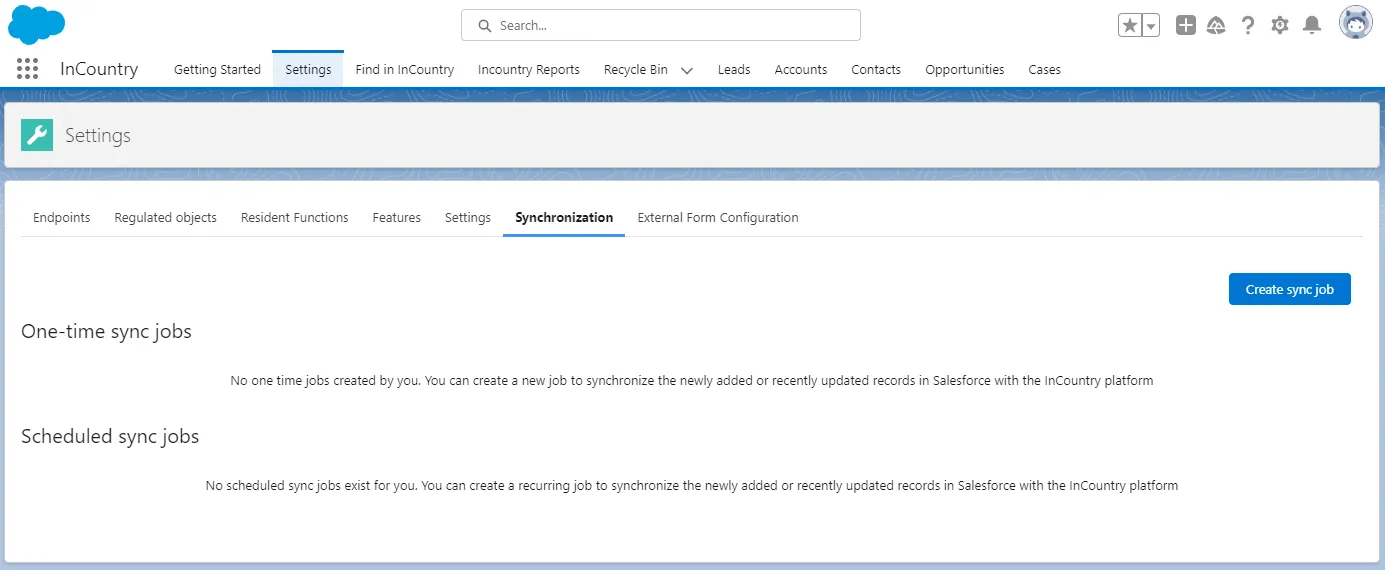
On the menu, select Settings and then select the Synchronization tab.
-
Click Create sync job.

-
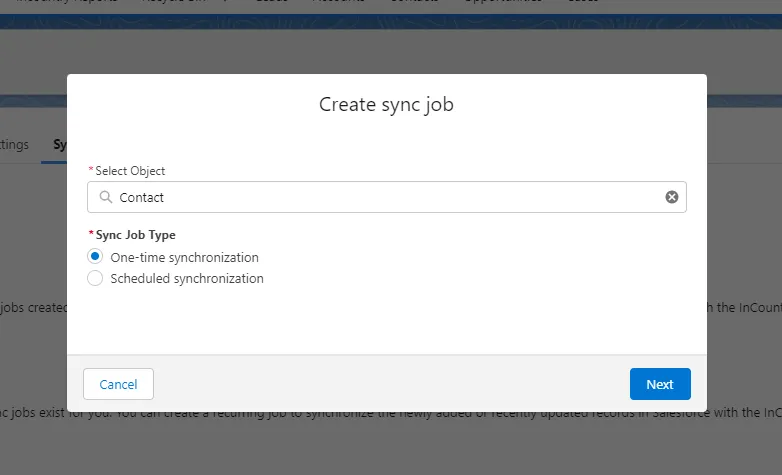
In the Create sync job form, select the Salesforce object whose records you want to synchronize.
-
Select One-time synchronization.
-
Click Next.
-
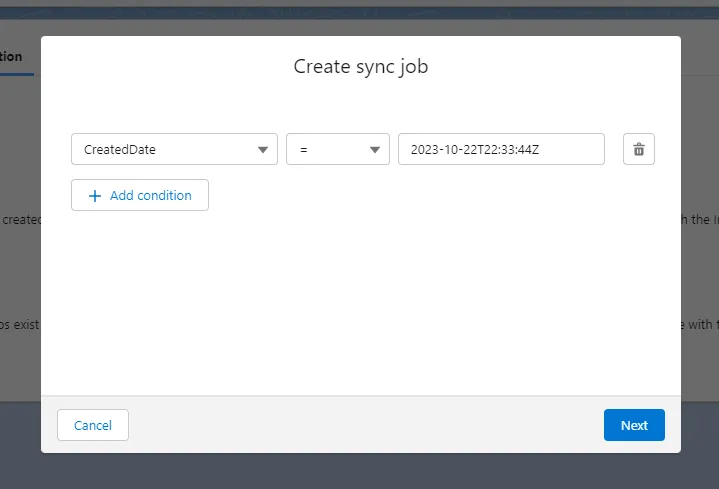
In the Create sync job form, define the filtration criteria to synchronize only specific records. Use the plus icon to add filters based on record fields. Use the Delete icon to delete any filters you no longer need.
-
Click Next.
-
Verify the synchronization settings.
-
Click Create.
-
Wait, as it may take some time to synchronize records.
After the data synchronization, regulated data may be shown as tokenized when using the redaction policy.
The status of a data synchronization will be shown in the One-time sync jobs block. If the data synchronization is interrupted by the occurrence of an error, please check the configuration of your data fields or contact the InCountry support team.
Upon a successful data synchronization, an email with synchronization details will be delivered to your mailbox. After the data synchronization, you can proceed to the management of records within the synchronized Salesforce object.
Validation rules, duplication rules, and other automations that deal with PII data of records pending synchronization might cause issues during their synchronization. To exclude such issues during synchronization with Data Loader, please follow the steps below:
-
Disable triggers, validation rules, duplicate rules, workflow rules, flows in Salesforce.
-
Load or update records to Salesforce via Data Loader.
-
In Salesforce, run batch synchronization from the Settings page.
-
Re-enable all triggers, validation rules, and duplicate rules.
Setting up scheduled record synchronization
The InCountry Data Residency for Salesforce package supports the scheduled synchronization of records between Salesforce and the InCountry platform. The package can perform the scheduled synchronization on a weekly or monthly basis, depending on your needs.
Safe synchronization is required when you use the redaction and restriction data regulation policies for Salesforce objects and records. When using the replication policy, this option is not needed.
Before enabling the scheduled synchronization of records, please ensure that the Safe record synchronization flag is activated in the InCountry Settings block. If you do not activate this flag, the package may replace values with their hashes after several cycles of synchronization when using the redaction or restriction data regulation policies.
Safe synchronization integrates all the protected fields that are not available within the record on the InCountry platform and does not synchronize protected fields that are already available within the record on the InCountry platform. Standard synchronization integrates all the protected fields (as they are stored in Salesforce) and does not consider whether a clear-text value or hash is stored in them.
-
On the menu, select Settings and then select the Synchronization tab.
-
Click Create sync job.
-
In the Create sync job form, select the Salesforce object whose records you want to synchronize.
-
Select Scheduled synchronization.
-
Click Next.
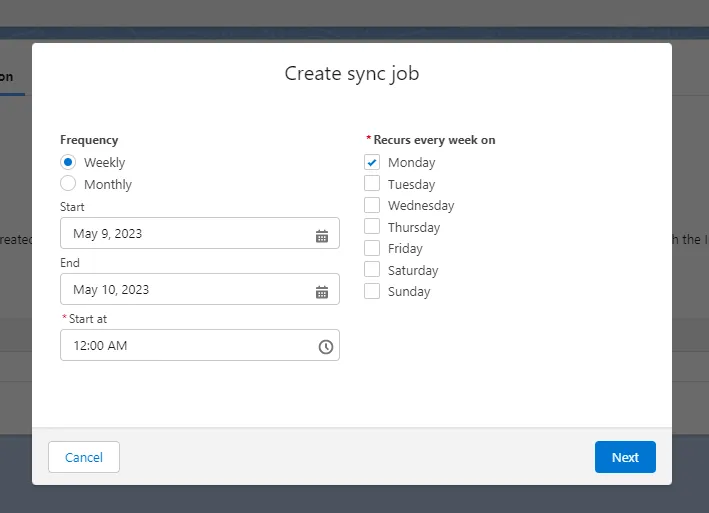
-
Select the frequency to perform the scheduled record synchronization:
-
Weekly - scheduled synchronization is performed on a weekly basis. You can select days of the week when scheduled synchronization is performed.
-
Monthly - scheduled synchronization is performed on a monthly basis. You can select the day of the month when scheduled synchronization is performed.
-
-
In the Start and End boxes, select the dates when scheduled synchronization will start and end.
-
In the Start at box, select the time when scheduled synchronization will start.
-
Click Next.
-
In the Create sync job form, define the filtration criteria to synchronize only specific records. Use the plus icon to add filters based on record fields. Use the Delete icon to delete any filters you no longer need.
-
Click Next.
-
Verify the synchronization settings.
-
Click Create.

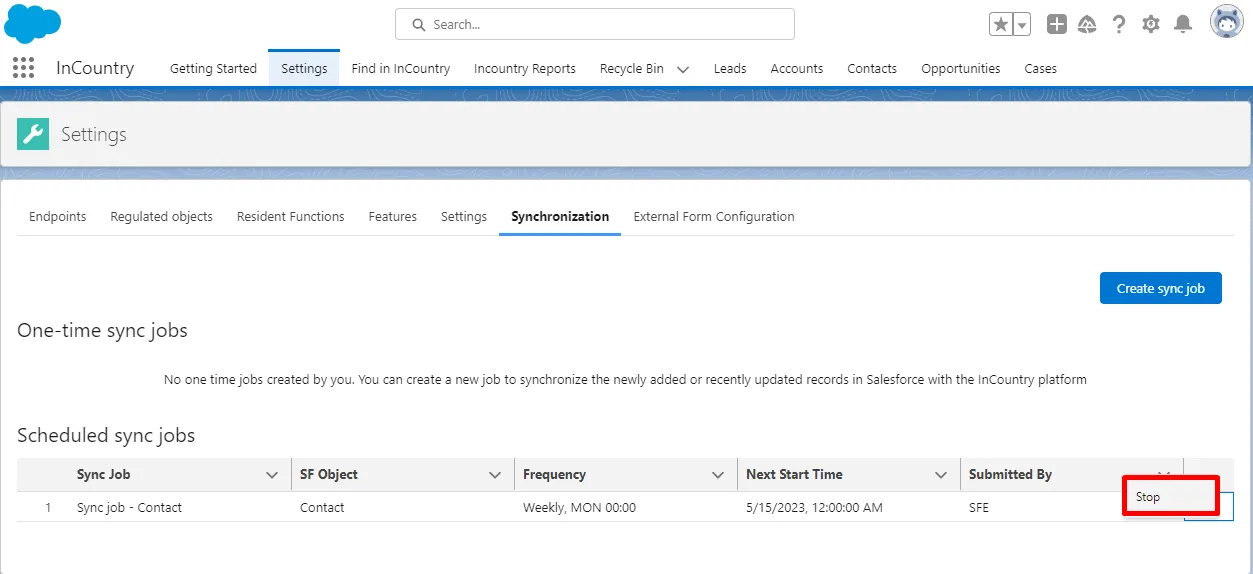
The scheduled synchronization job will appear on the Scheduled sync jobs list.
To stop scheduled synchronization, click the down arrow icon and select Stop.
Another option for scheduled synchronization is to write a custom scheduler that will use the Apex SDK. The reason for doing that can be a need to build a more complex SOQL than can be created using only the InCountry UI.
In the replication model, filtration of records for scheduled synchronization is not supported, but you can manage record synchronization by running a custom script in the Developer console. An example of such script is shown below:
String sObjectName = 'Lead';
String whereClause = 'CreatedDate = LAST_90_DAYS';
Database.executeBatch(new InCountrySyncBatch(sObjectName, whereClause), 30);
It includes the three parts:
-
String sObjectName = 'Lead'- defines which Salesforce object is synchronized. -
String whereClause = 'CreatedDate = LAST_90_DAYS'- defines the time period for record synchronization. -
Database.executeBatch(new InCountrySyncBatch(sObjectName, whereClause), 30)- defines a batch apex job for execution corresponding to the specified object, the time period object, and the number of records in a batch.
Advantages of using custom scripts
Running the Sync button checks for the existence of records on the InCountry platform, compares the scope of fields for the records stored on the InCountry platform against the current field configuration defined within the package and synchronizes the field difference which makes the synchronization process very long. It is redundant to check all records multiple times, once for each batch of records added to the InCountry platform.
Using custom scripts allows you to synchronize records based on customized, user-defined triggers: the object and the time period and skip rest of the records, which saves you time and effort.
Synchronizing files
You can synchronize files between Salesforce and the InCountry platform. Files include attachments, notes, or content versions.
The maximum file size that you can synchronize is 11MB.
-
On the menu, select Settings.
-
In the Select Object box, enter the Salesforce object whose files you want to synchronize.
-
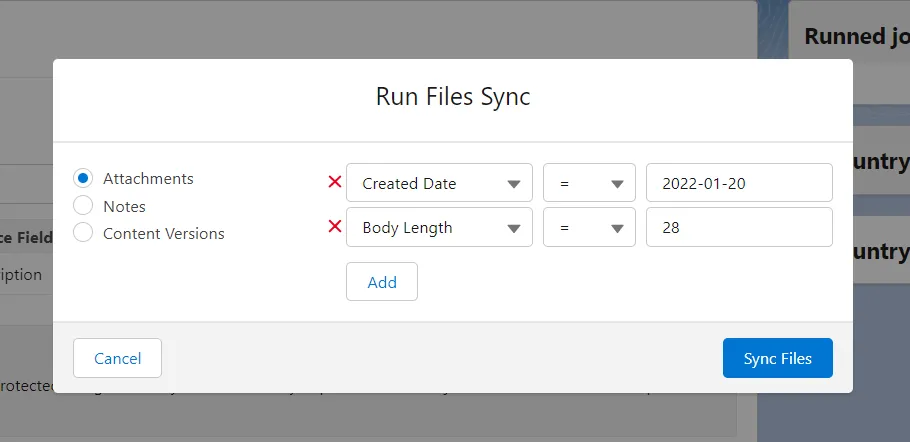
Click Run Files Sync.
-
Select the file type (Attachment, Note, or Content Version) and add a filter if necessary.
-
Click Sync Files.
-
Wait, as it may take some time to synchronize files.
Upon a successful synchronization, an email with synchronization details will be delivered to your mailbox.
Using file synchronization tools
These instructions are applicable to the three-model package.
The three-model package supports two options to upload attachments to the InCountry platform using the InCountry Attachments component and the Apex SDK.
| InCountry tool | File size (max MB) | Duplicate file uploading | Explanations |
|---|---|---|---|
| InCountry Attachments component | 10 Mb per uploading | Yes | When a duplicate file is uploaded, the InCountry adds a timestamp to the file name. The file name will be unique for the same file. |
| Apex SDK | 8 Mb per transaction | Yes | The uploaded file will not have a unique name. The old file will be replaced with the new one. |
Synchronizing files with Apex SDK
This approach is generally used to implement custom business processes by customers with the involvement of developers. The Apex SDK provides methods for synchronizing files at the code level according to the law and specific business requirements.
How to use
To attach a file via the Apex SDK, you need to use the following code:
InCountry sdk = InCountry.getInstance();

Id recordId = 'xxx000000000000';
String fileName = 'Sample Name';
Blob fileBody = Blob.valueOf('Sample body');
Boolean deleteAfterSync = false;

InCountry.FileData attachFileResult = sdk.attachFile(recordId, fileName, fileBody, deleteAfterSync);
Below are the parameters for the attachFile() method:
Id recordId;              /** record to which the file should be attached. **/
String fileName;          /** the name of the file. **/
Blob fileBody;            /** the content of the file as blob. **/
Boolean deleteAfterSync;  /** should be record deleted after sync or not? **/
The properties of the FileData wrapper:
    @JsonAccess(serializable='always' deserializable='always')
    global class FileData {
        @AuraEnabled global String file_id;
        @AuraEnabled global String filename;
        @AuraEnabled global String hash;
        @AuraEnabled global String mime_type;
        @AuraEnabled global Integer size;
        @AuraEnabled global String created_at;
        @AuraEnabled global String updated_at;
        @AuraEnabled global String download_link;
        @AuraEnabled global String error;
    }
Limitations
The maximum file size that you can synchronize should not exceed 8 Mb.
Working with duplicates
For the Apex SDK approach, duplicates can be stored on the InCountry platform.
The InCountry platform can store duplicated files. The Apex SDK generates the unique name for every file by adding a timestamp to the name of the file.
Example of generated file name:
timestamp001__fileName.pdf
How do I check the files are successfully synchronized with the InCountry platform?
Build a report by using this example:
1. Run the following command:
testIncountry1.InCountry.FileData attachFileResult = sdk.attachFile(aItem.ParentId, aItem.Name, aItem.Body, false);
...
if (attachFileResult.error != null) {
You will get information about synchronization errors. Our recommendation is to send an email with the failed files.
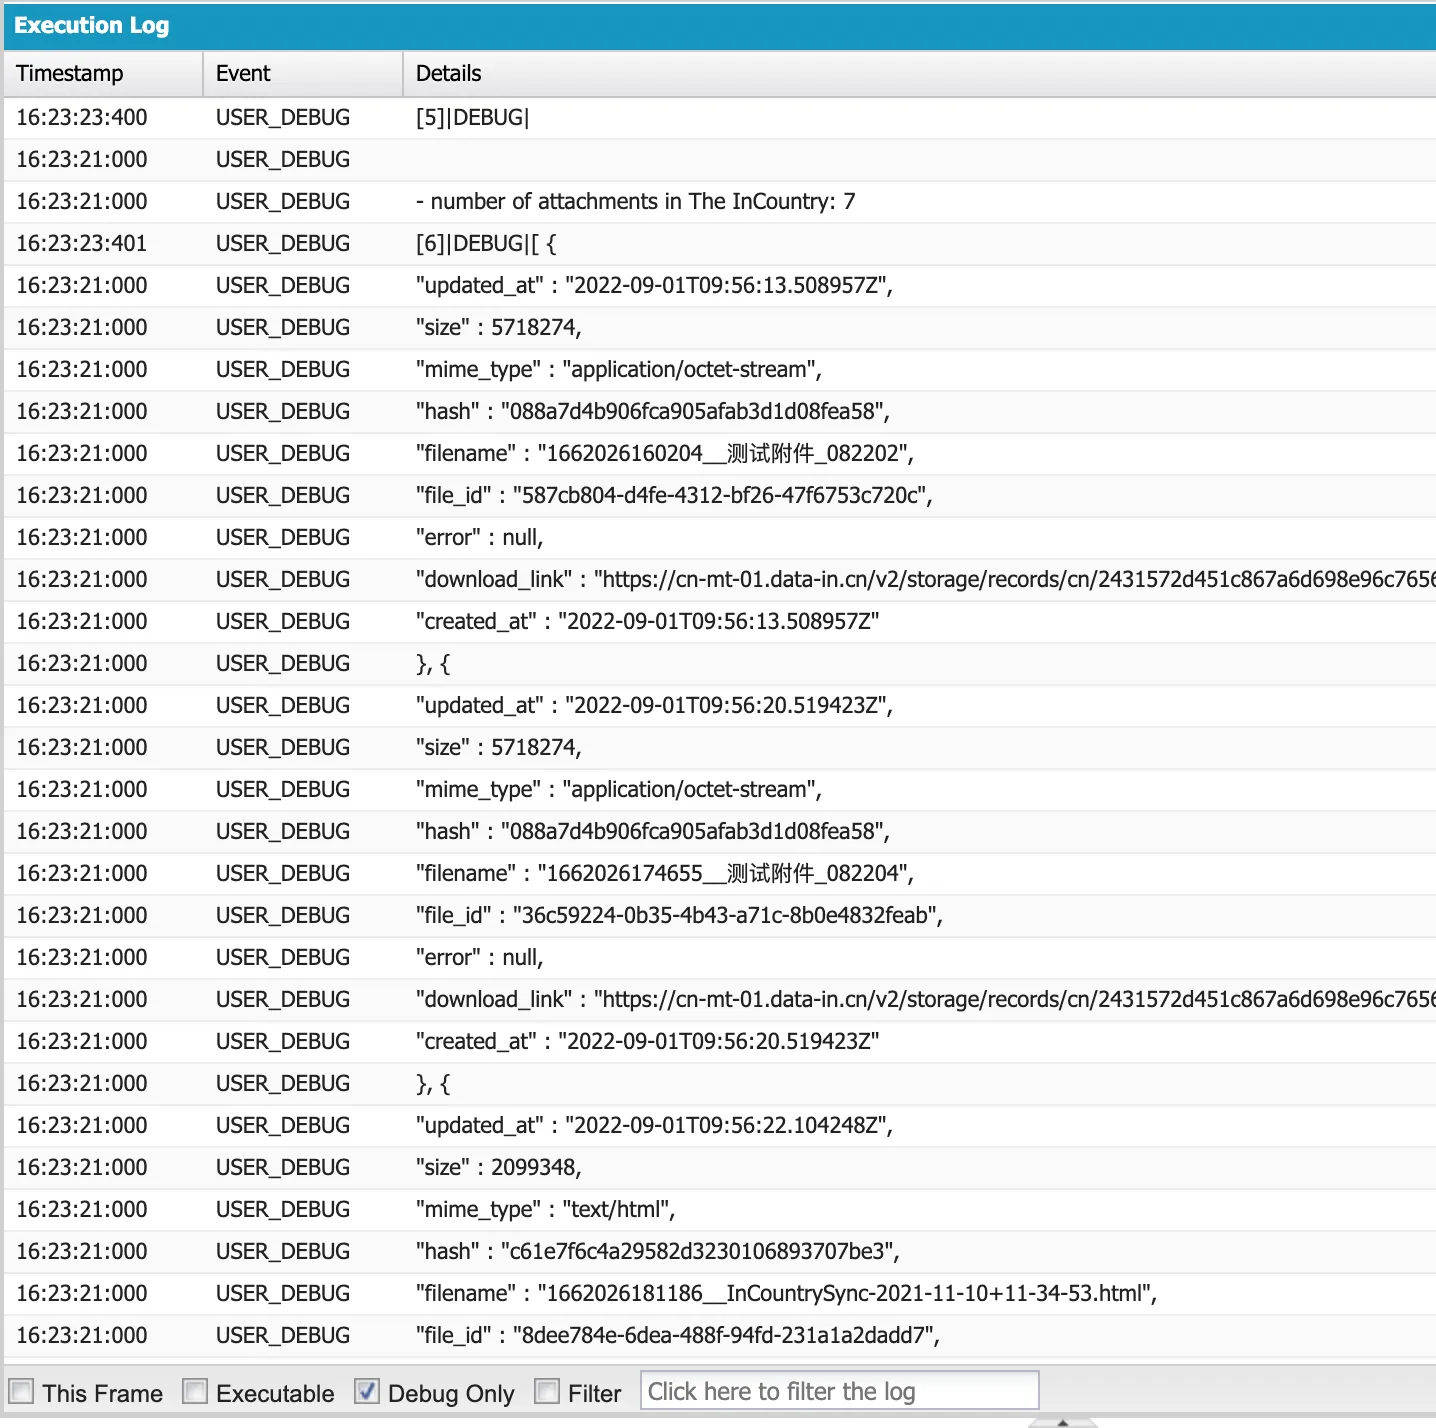
2. Run the following command:
testInCountry1.InCountry service = testInCountry1.InCountry.getInstance();
Set<Id> input = new Set<Id>{'00QN000000AVTb8'};
List<testInCountry1.InCountry.FindResult> results = service.find(input);
System.debug('\n\n - number of attachments in The InCountry: ' + results[0].data[0].attachments.size());
System.debug(JSON.serializePretty(results[0].data[0].attachments));
The code will show you what attachments are related to a given record.