Tracking Changes to Data Regulation Policies and Regulated Fields
The InCountry Data Residency for Salesforce package allows you to monitor changes to the data regulation policies and regulated fields using the field history tracking feature and reports. The field history tracking is performed for the custom objects: data residency policy and regulated field.
Tracking field history for data residency policies
To enable field history tracking for data residency policies, follow these instructions:
-
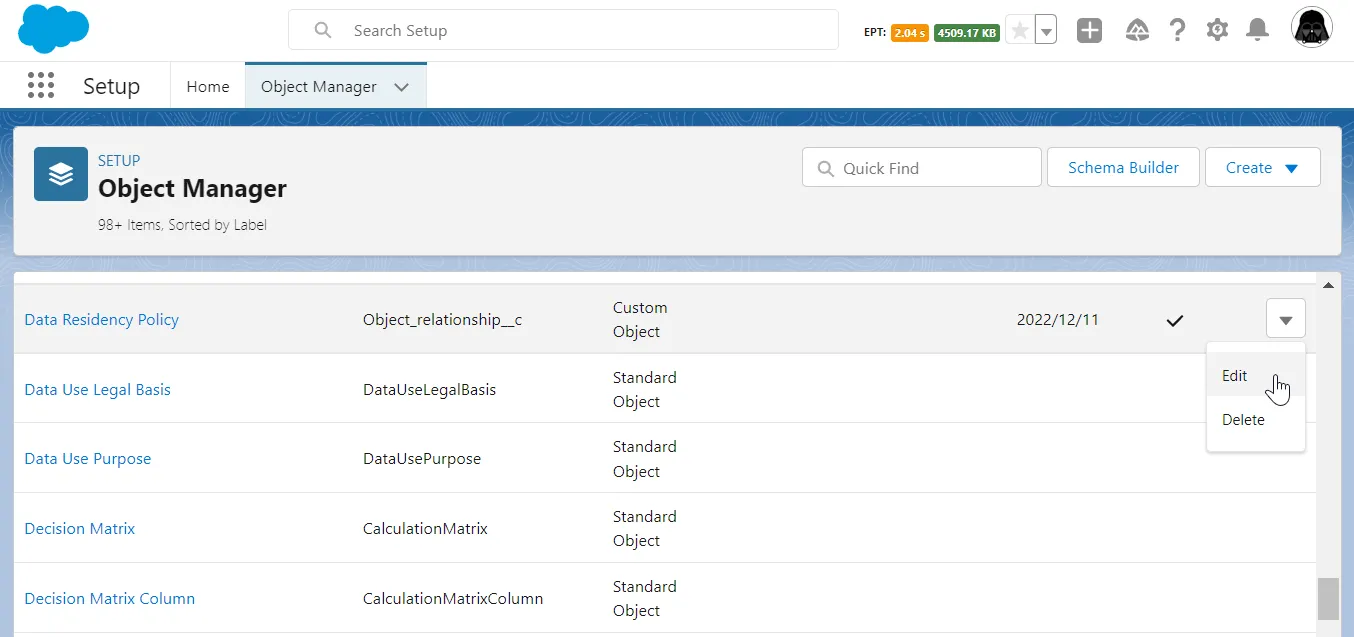
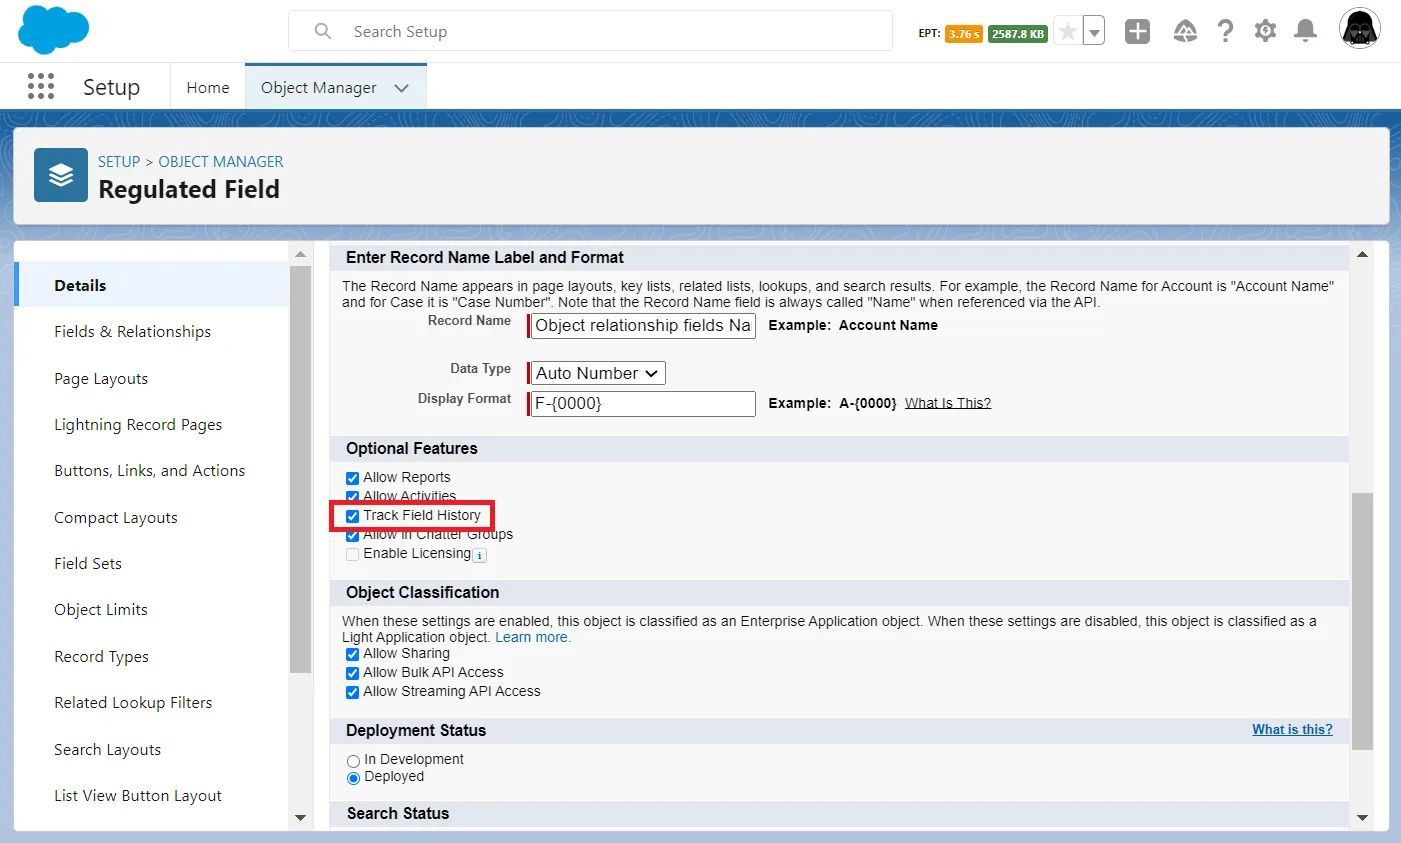
From Setup, select Object Manager.
-
On the list with objects, search for the
Object_relationship__ccustom object by its system name and click the down arrow icon. The actual object name may vary depending on the package version.
-
From the action menu, select Edit.
-
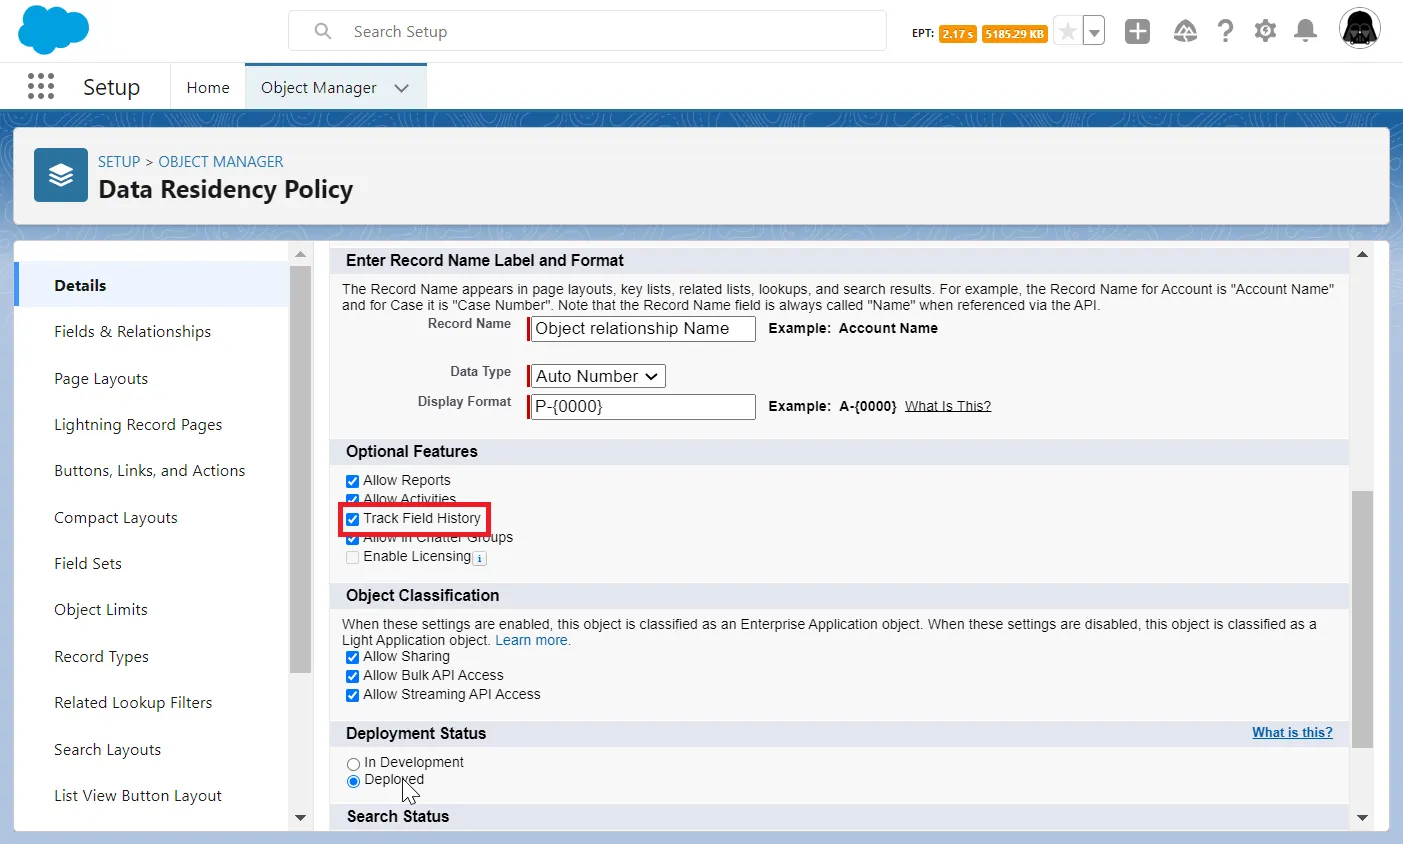
In the Optional Features section, check the Track Field History box to activate the field history tracking for this custom Salesforce object.
-
When complete, click Save.
-
Open the
Object_relationship__ccustom object. -
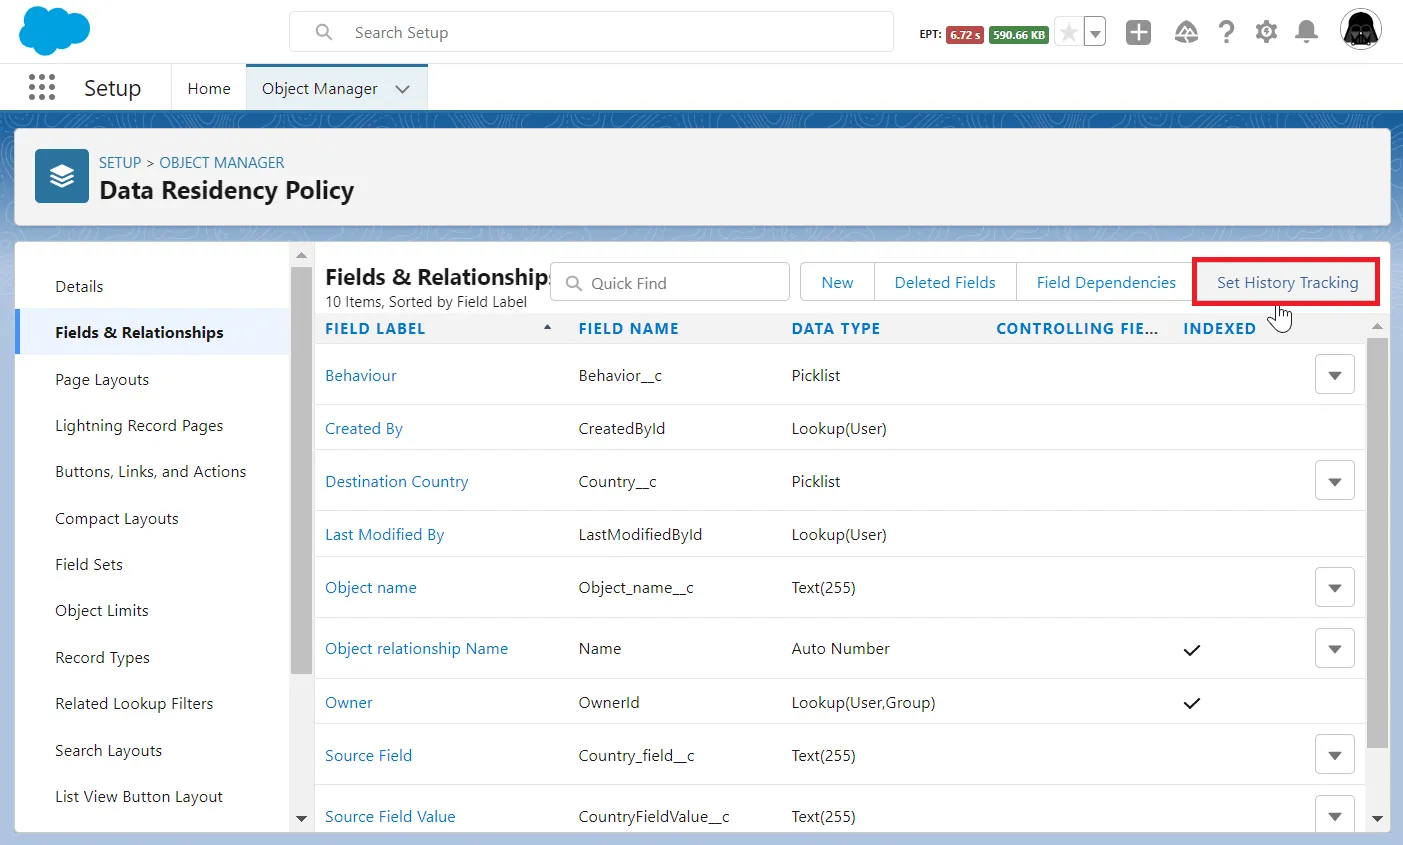
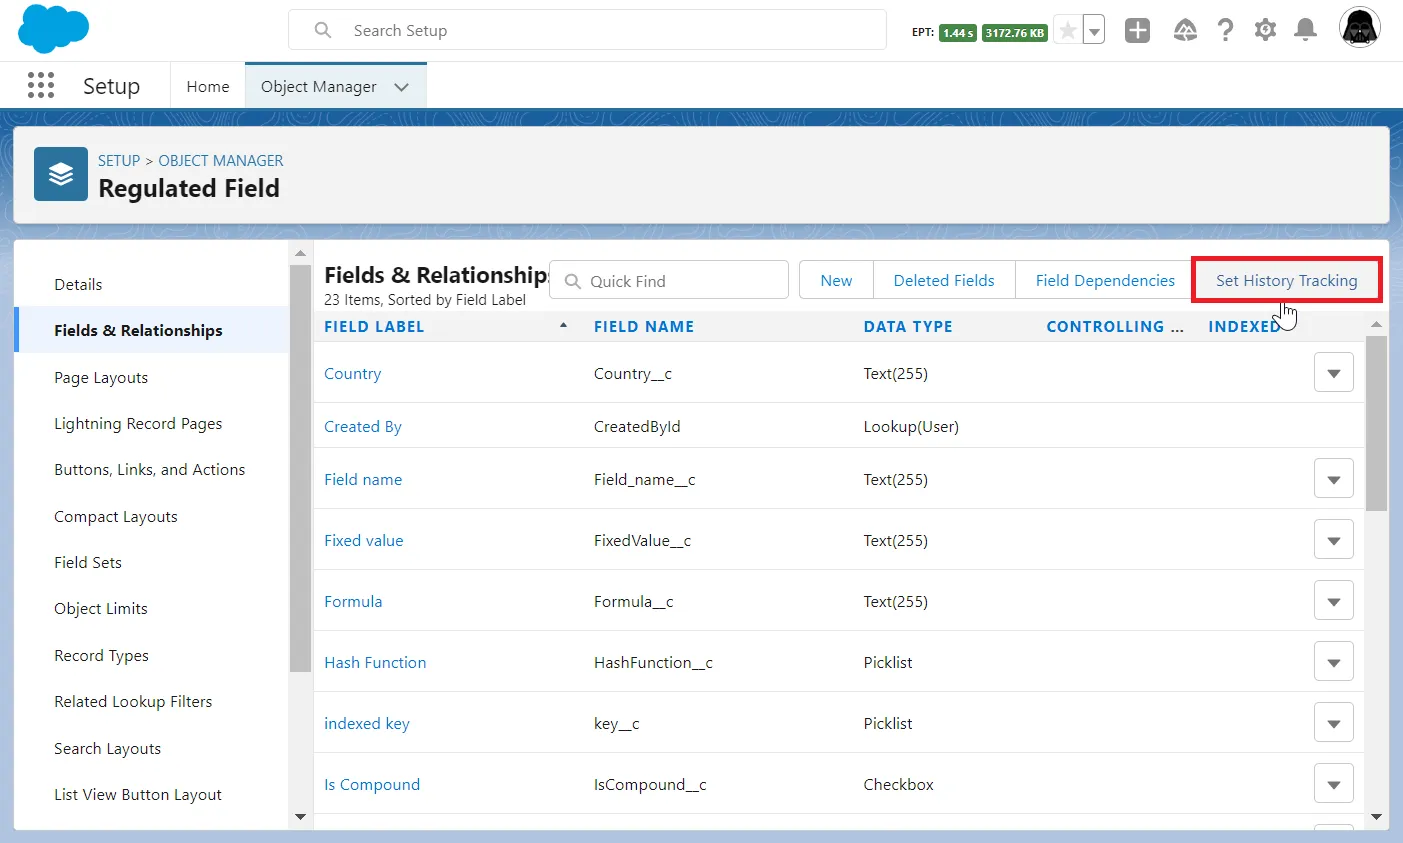
On the sidebar, click Fields & Relationships.
-
In the top right part of the screen, locate the Set History Tracking button and click it.
-
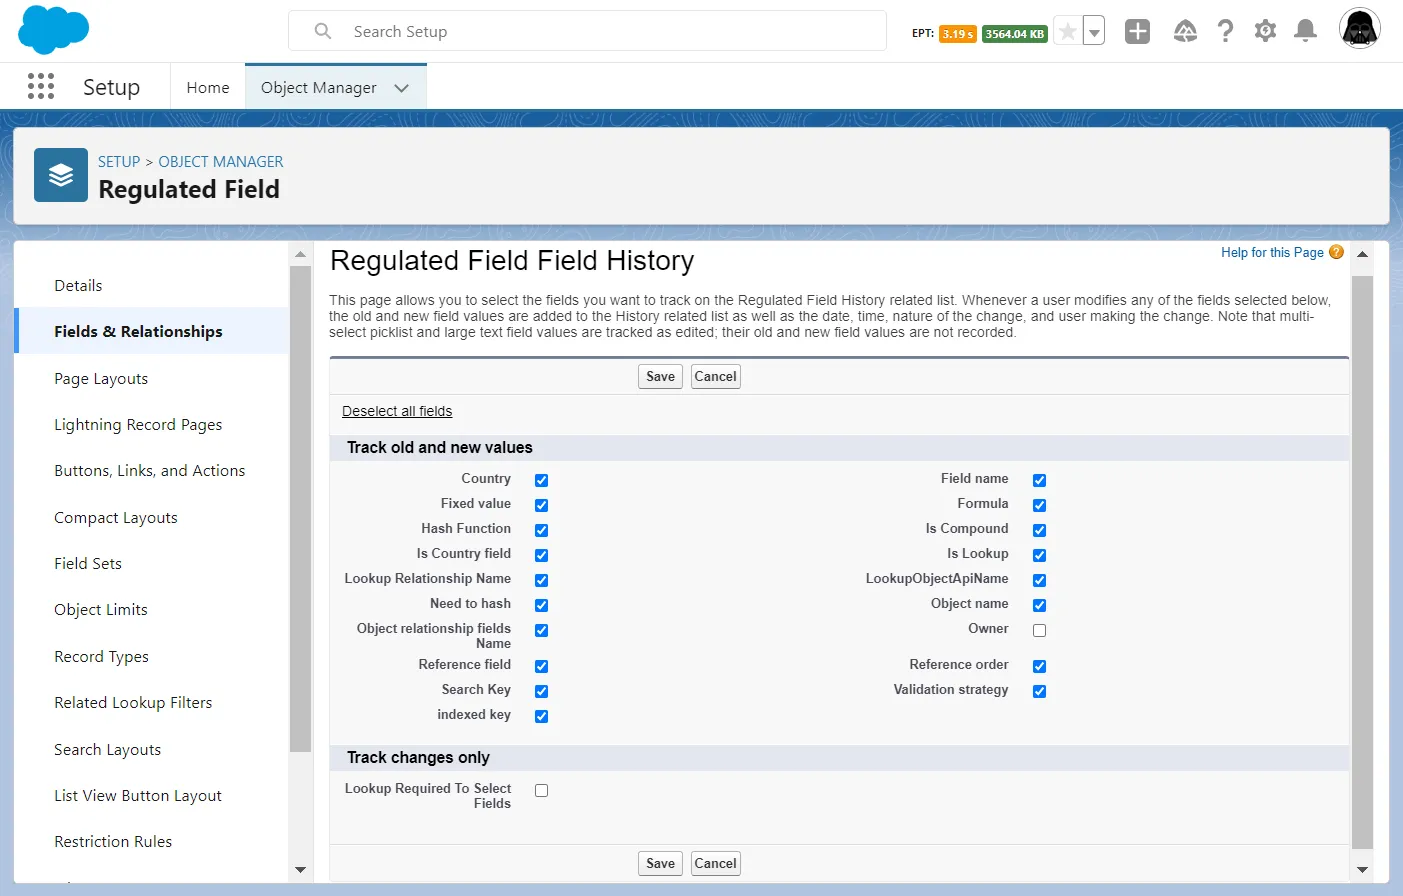
Select the fields you want to track for this custom object (data residency policy).
-
When complete, click Save.

Tracking field history for regulated fields
To enable field history tracking for regulated fields, follow these instructions:
-
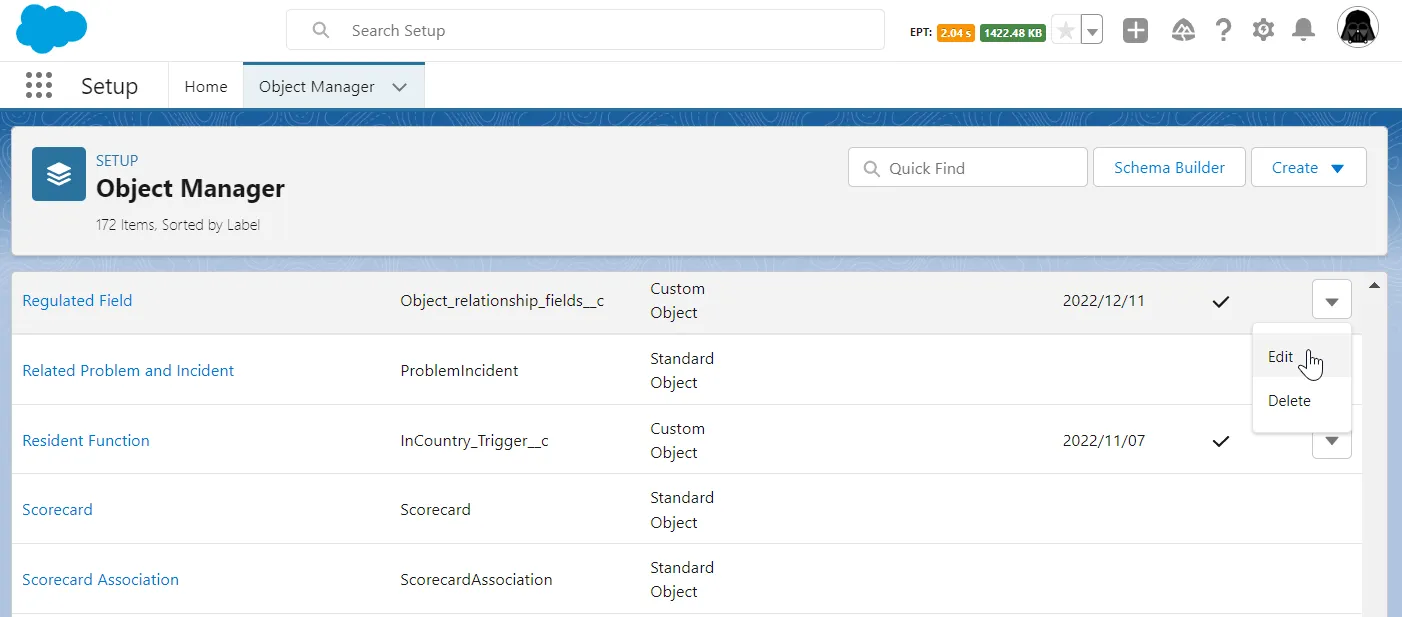
From Setup, select Object Manager.
-
On the list with objects, search for the
Object_relationship_fields__ccustom object by its system name and click the down arrow icon. The actual object name may vary depending on the package version. -
From the action menu, select Edit.
-
In the Optional Features section, check the Track Field History box to activate the field history tracking for this custom Salesforce object.
-
When complete, click Save.
-
Open the
Object_relationship_fields__ccustom object. -
On the sidebar, click Fields & Relationships.
-
In the top right part of the screen, locate the Set History Tracking button and click it.
-
Select the fields you want to track for this custom object (regulated field).
-
When complete, click Save.
Creating tracking reports
Once you have enabled the field history tracking for data residency policies and protected fields, you can create reports that will display changes made to the fields of these objects. Besides viewing reports, you can subscribe to daily updates that will deliver a report on field changes to your mailbox.
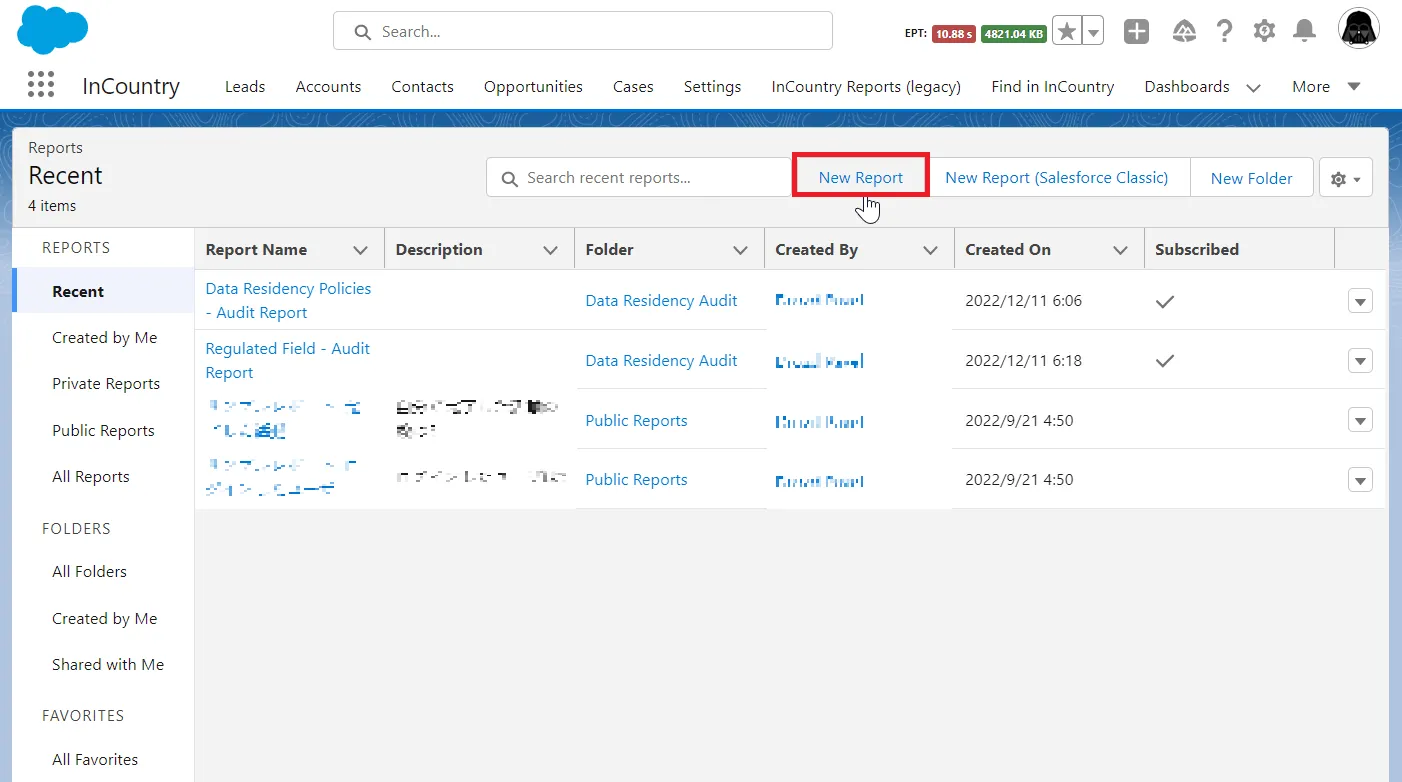
To create a report, follow these instructions:
-
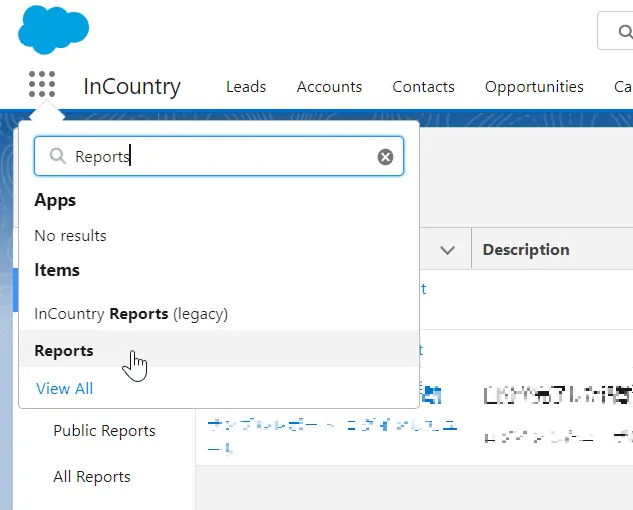
Click the App Launcher icon.
-
Select Reports.
-
Click New report.
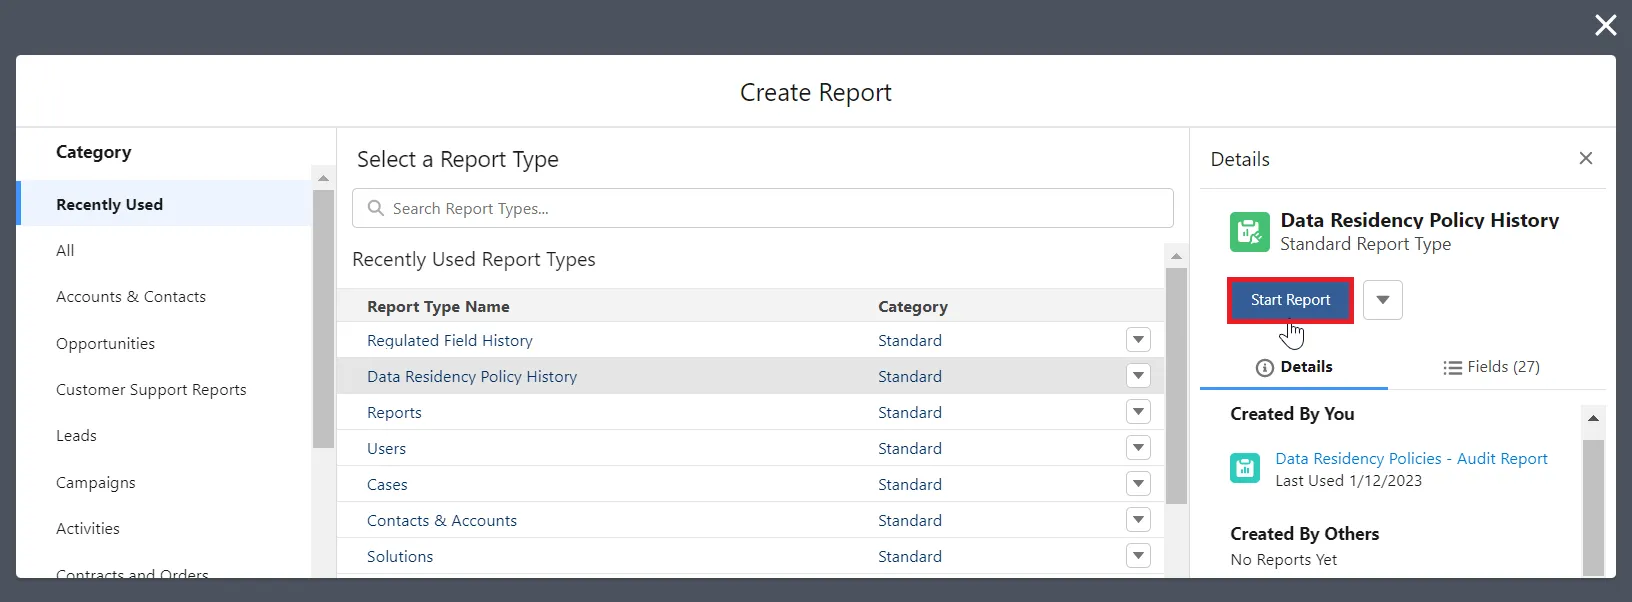
-
Select the the Data Residency Policy History or Regulated Field History report type depending on your needs.
-
Click Start Report.
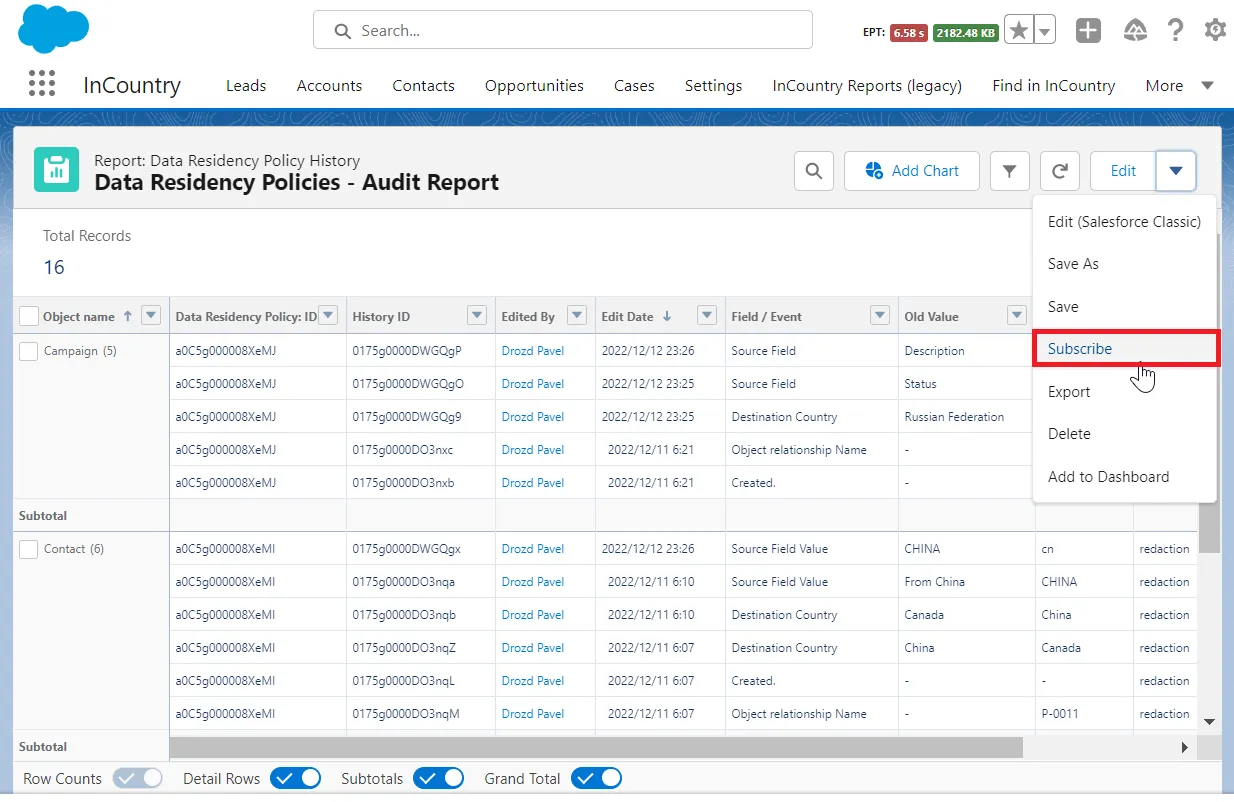
Subscribing to reports
To subscribe to a report, follow these instructions:
-
Click the App Launcher icon.
-
Select Reports.
-
Open the report tracking changes in data regulation policies or protected fields you want to subscribe to.
-
In the top right part of the page, locate the Edit button and click the down arrow icon (next to it) and select Subscribe.
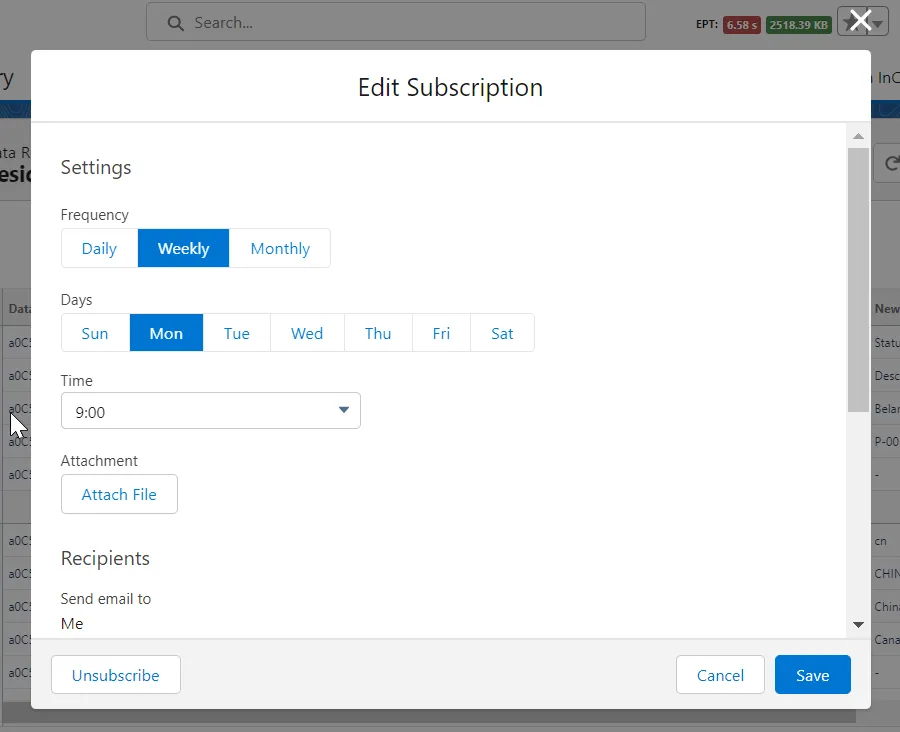
-
In the Edit Subscription form, adjust the subscription settings for the report and specify recipients.
-
Click Save.
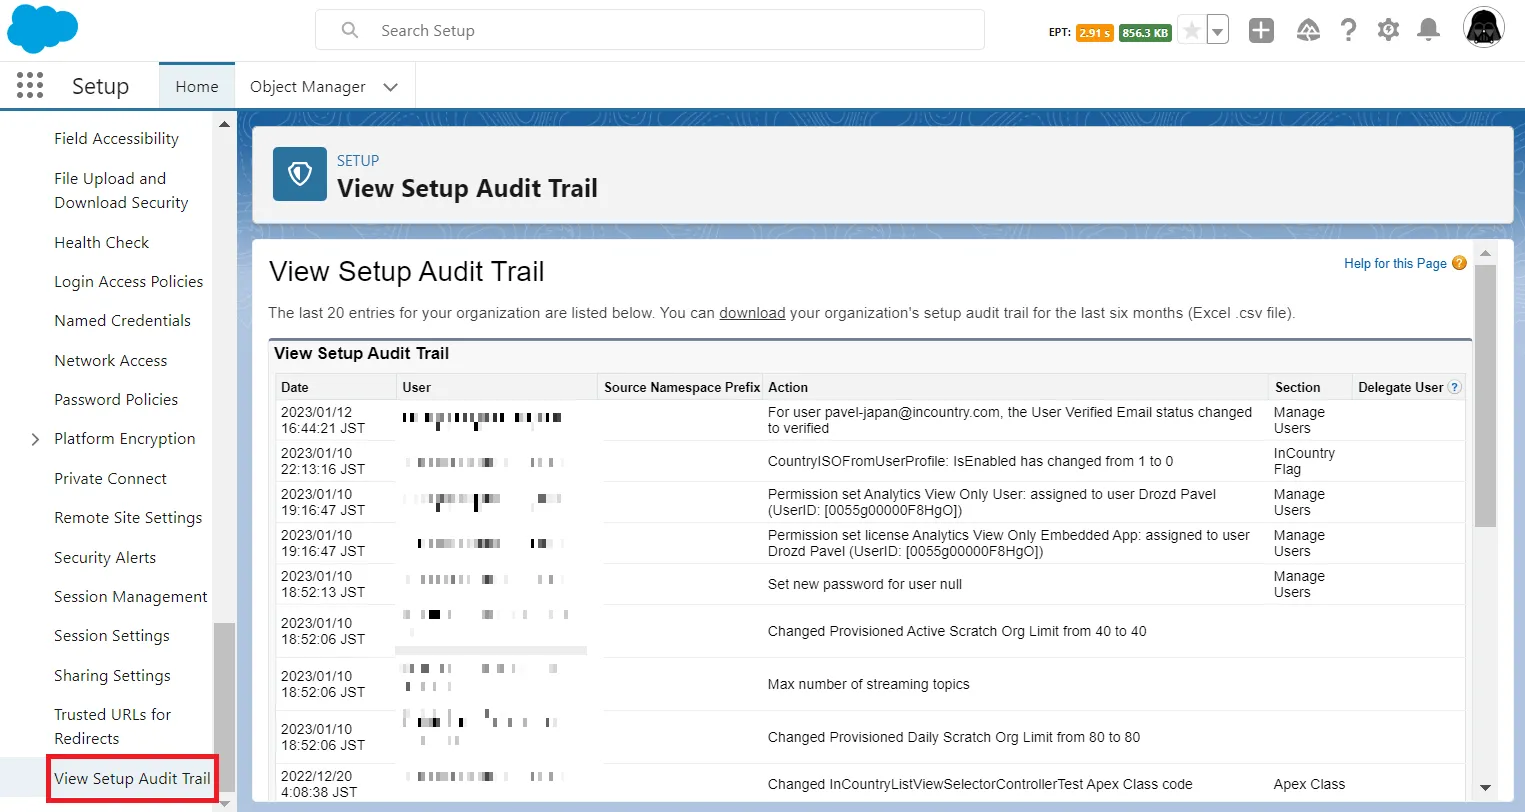
Viewing changes in custom metadata
The InCountry Data Residency for Salesforce package also introduces some settings and parameters whose changes you can also track in Salesforce. These settings and parameters are stored in metadata, so you can track changes in them through Setup Audit Trail.
To view changes in custom metadata, follow these instructions:
- From Setup, click Security, and then select View Setup Audit Trail.
You can download Setup Audit Trail for the last six months in a CSV or XLS format.