Using Formula Fields
You can use formula fields to manipulate Salesforce data and perform some basic validations and calculations on the basis of protected fields storing regulated data. These fields allow you to create simple and complex formulas based on PII data from a record and from its related records.
To use formula fields with protected fields on a Salesforce object (for example, Account), please do the following:
-
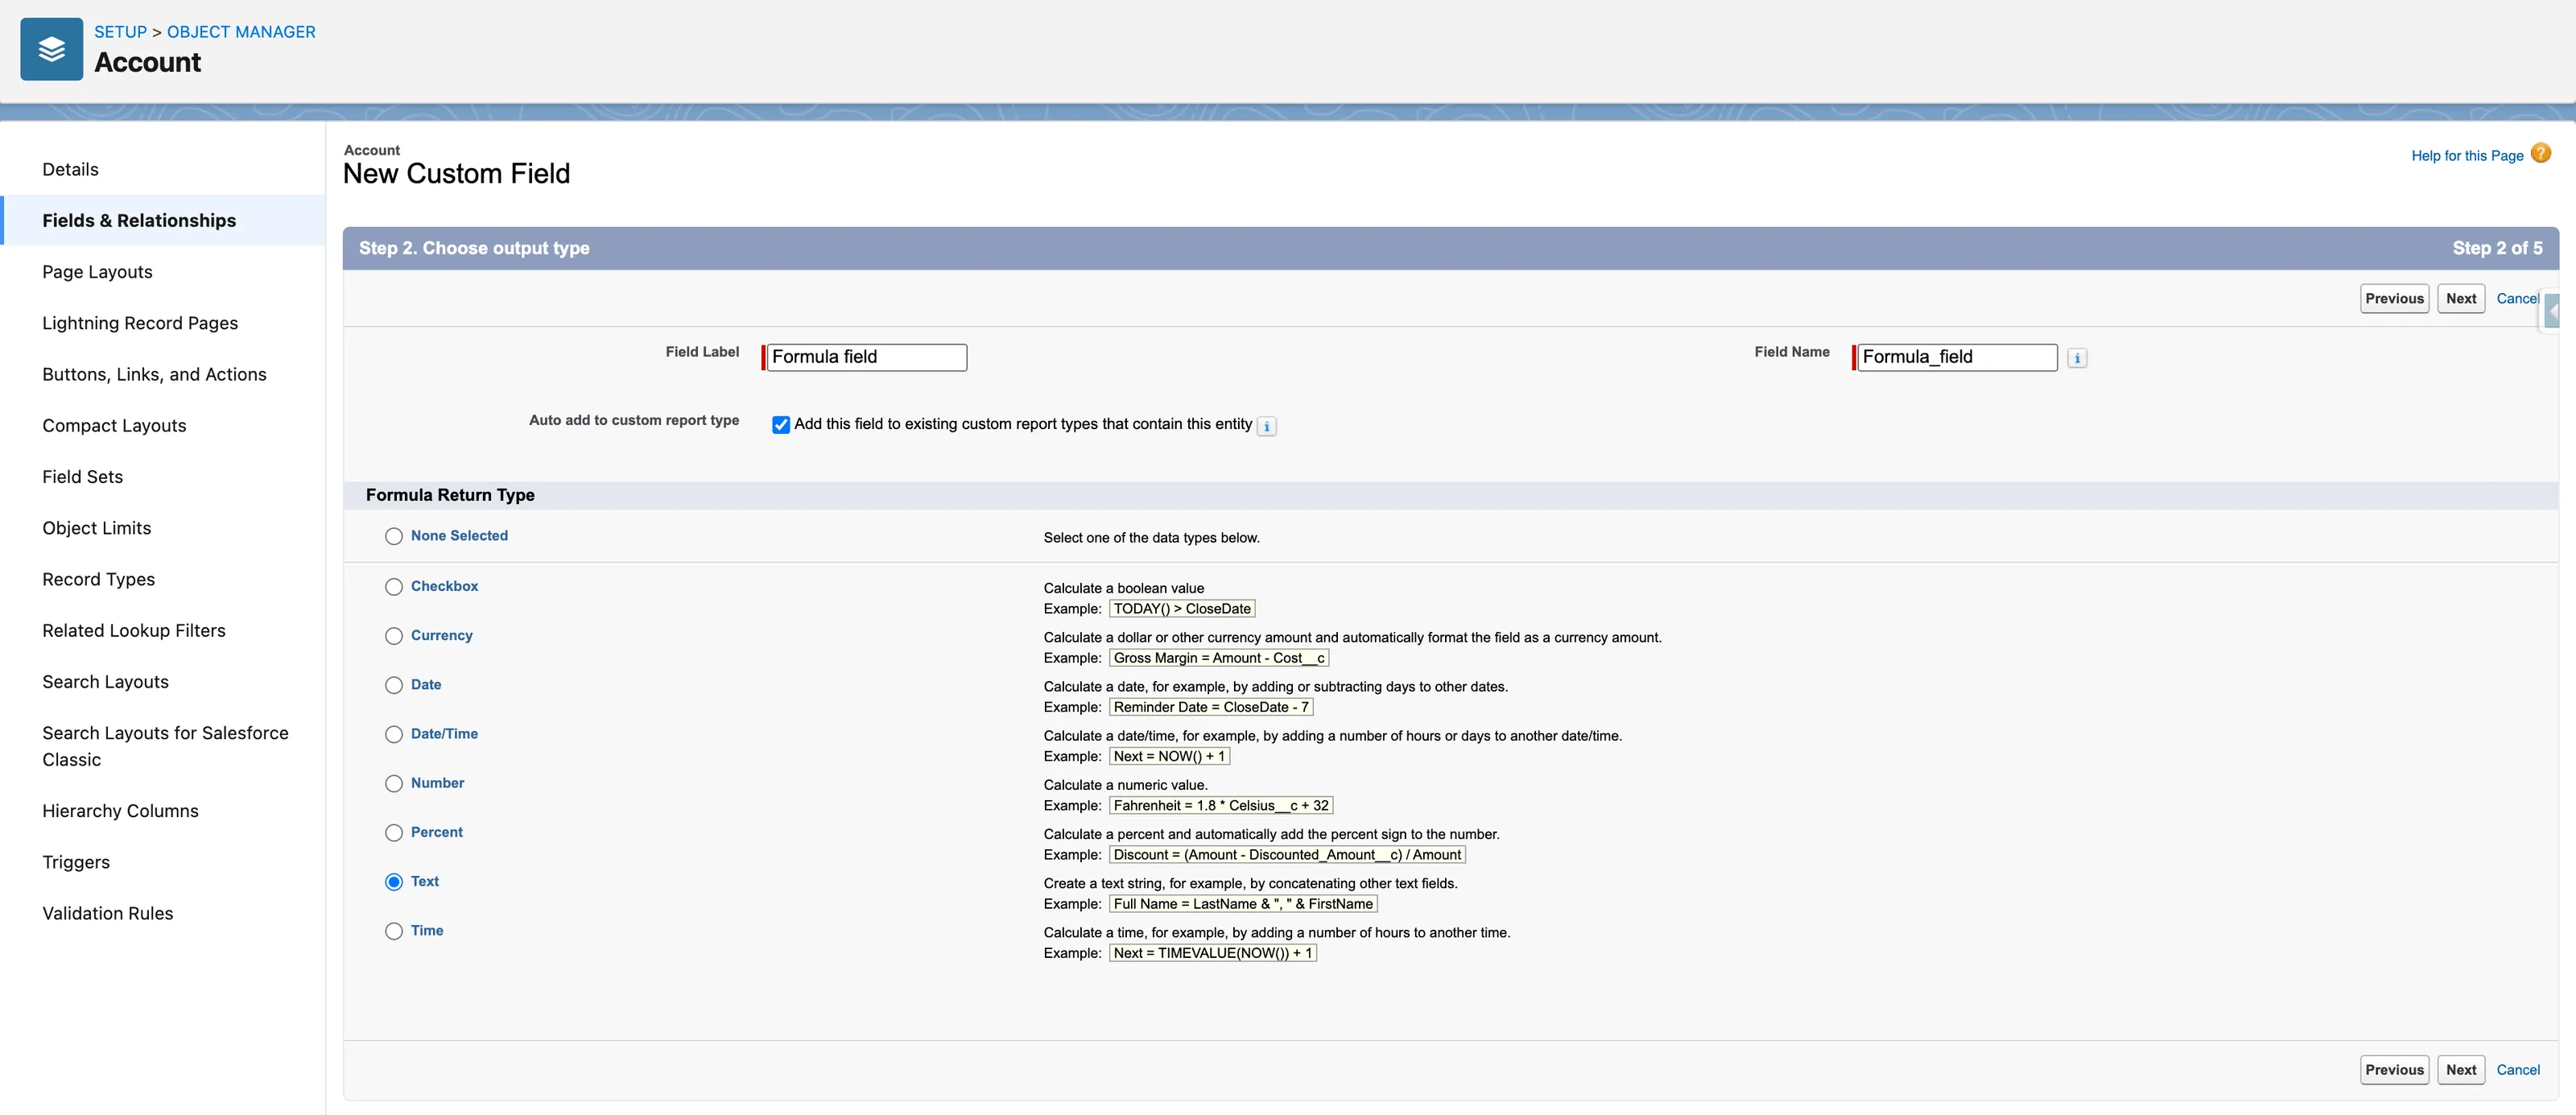
From Setup, select Object Manager.
-
Select Account.
-
Within the Account object, click Fields & Relationships then click New.
-
Select the Formula data type.
-
Click Next.
-
Fill out the the Field Label and Field Name fields.
-
Select Formula Return Type (for example Text).
-
Click Next.

-
Enter a formula (for example “Name & ', ' & Phone & ', Created at: ' & TEXT(DATETIMEVALUE(CreatedDate))” )
-
Click Check Syntax.
-
Click Next two times.
-
Click Save.

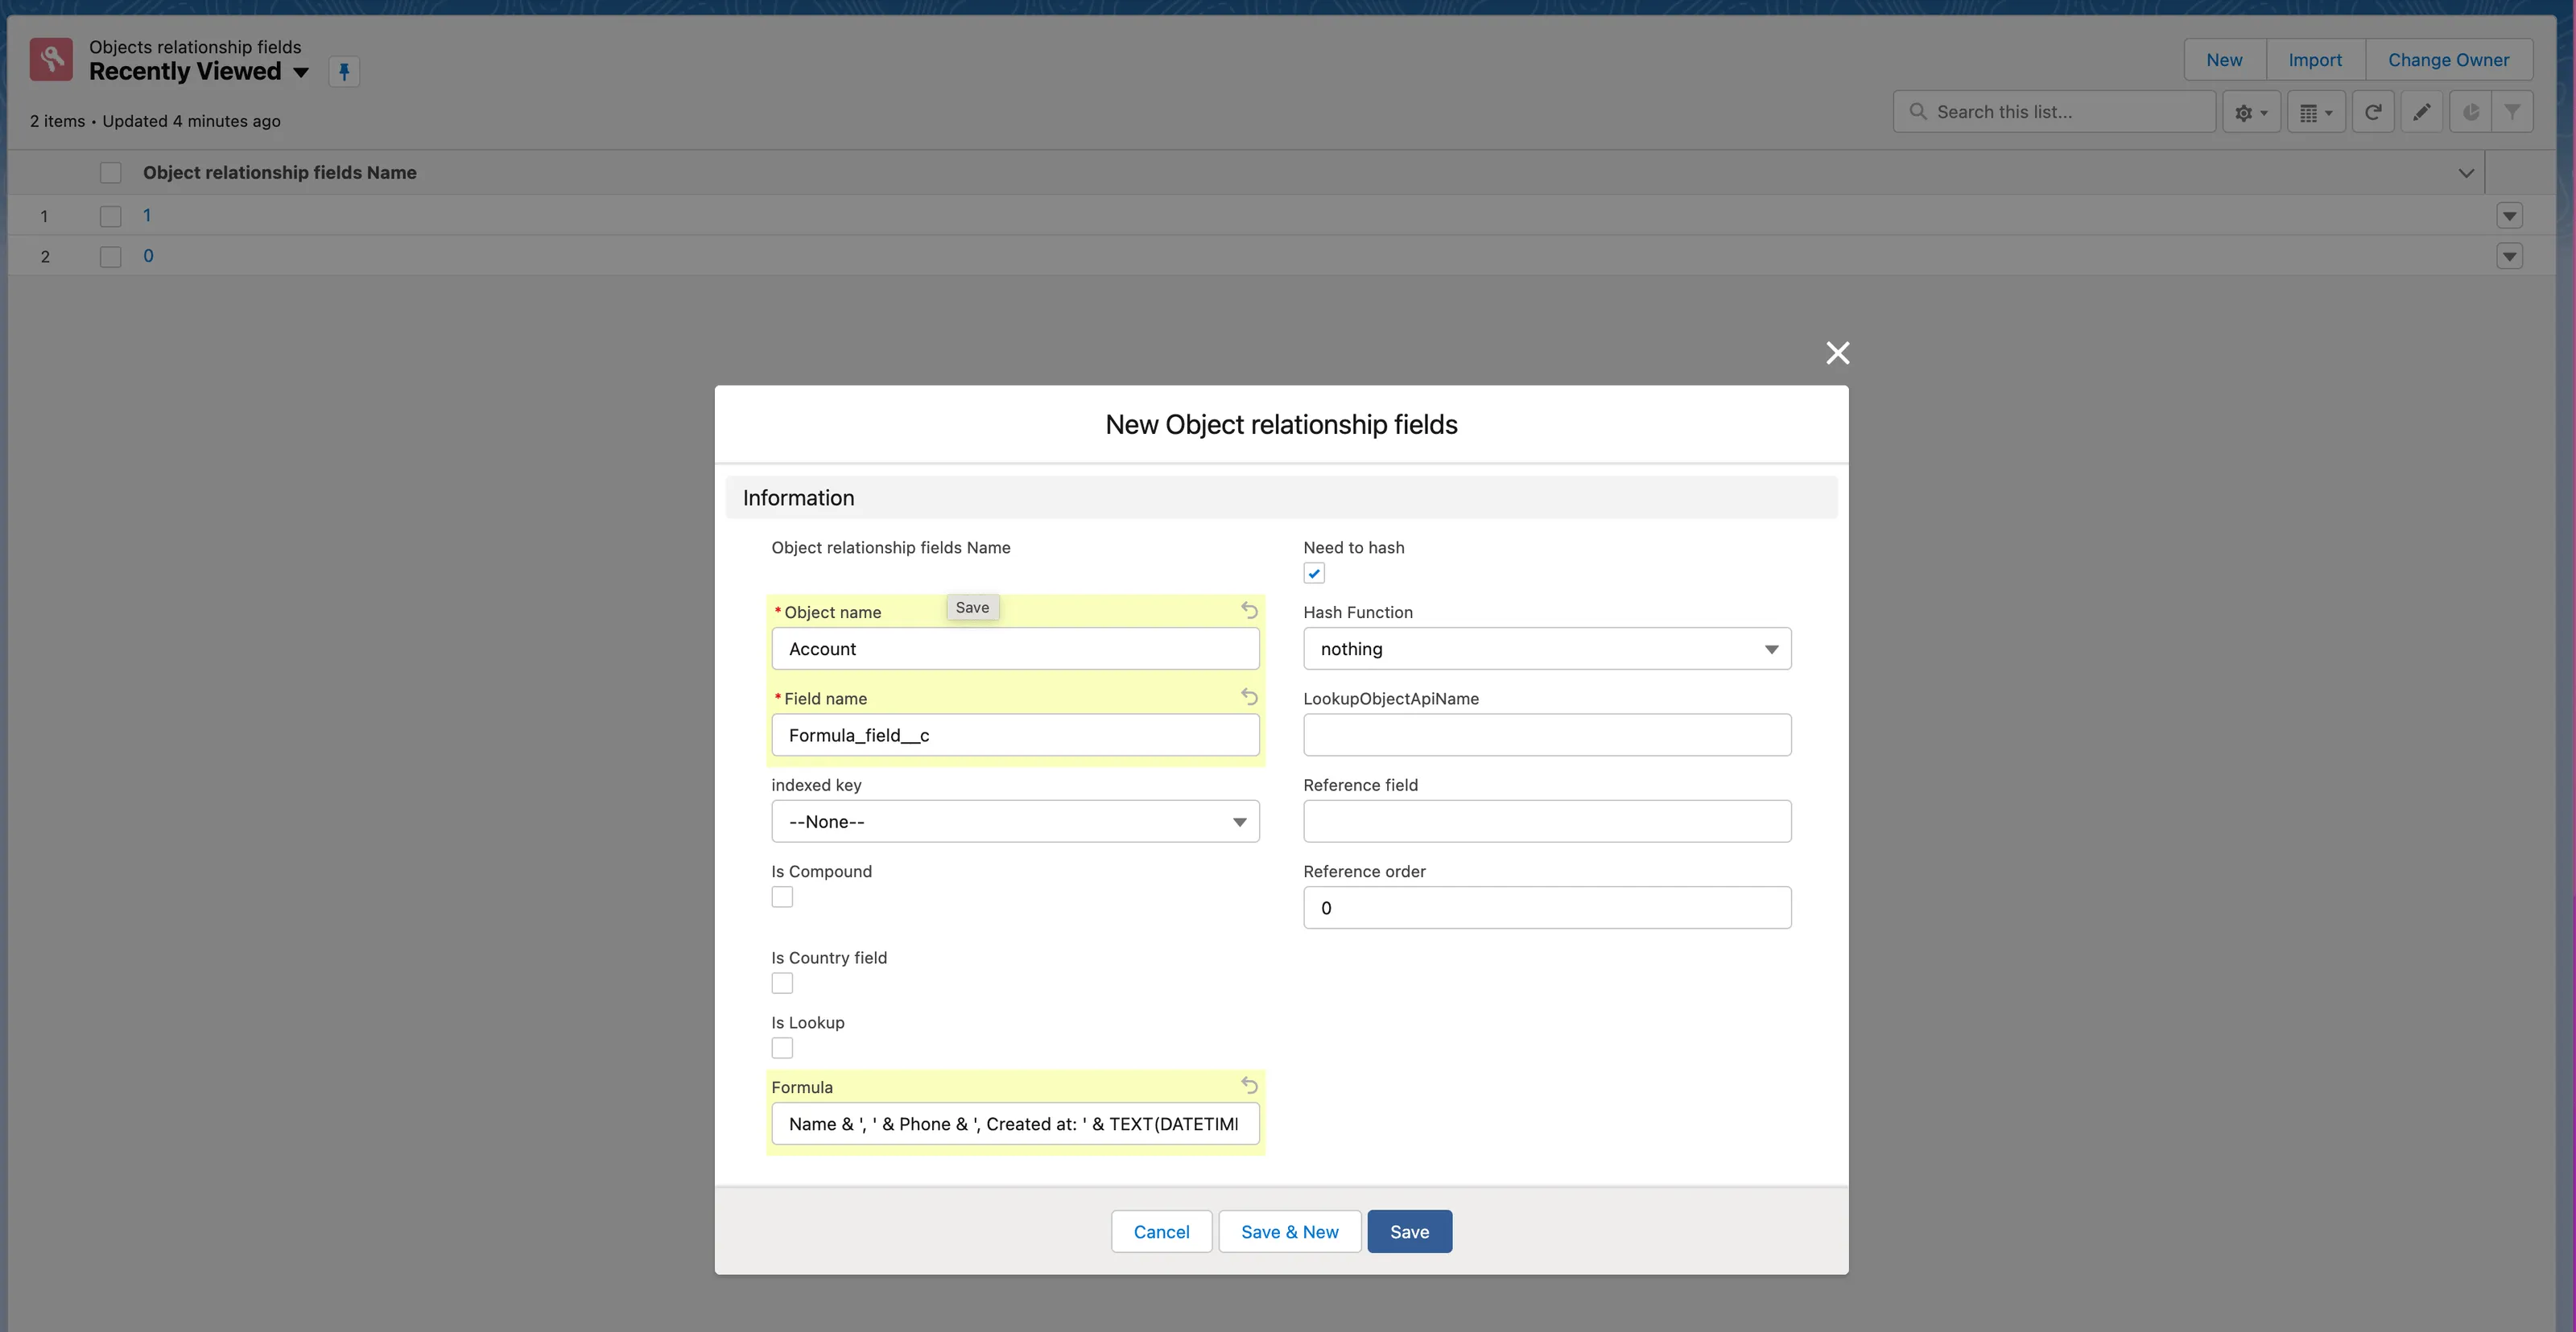
Creating the Object Relationship fields
The following instructions explain how to create the Object Relationship field for the Account object. The same flow can be used for other Salesforce with minor changes in the configuration.
-
Click the App Launcher icon.
-
Select the Object Relationship fields list view.
-
Click the New button.
-
Fill out the following fields:
- Object name: Account
- Field name: Formula_field__c
- Formula: Enter the formula created before Name & ', ' & Phone & ', Created at: ' & TEXT(DATETIMEVALUE(CreatedDate))
-
Click Save.
-
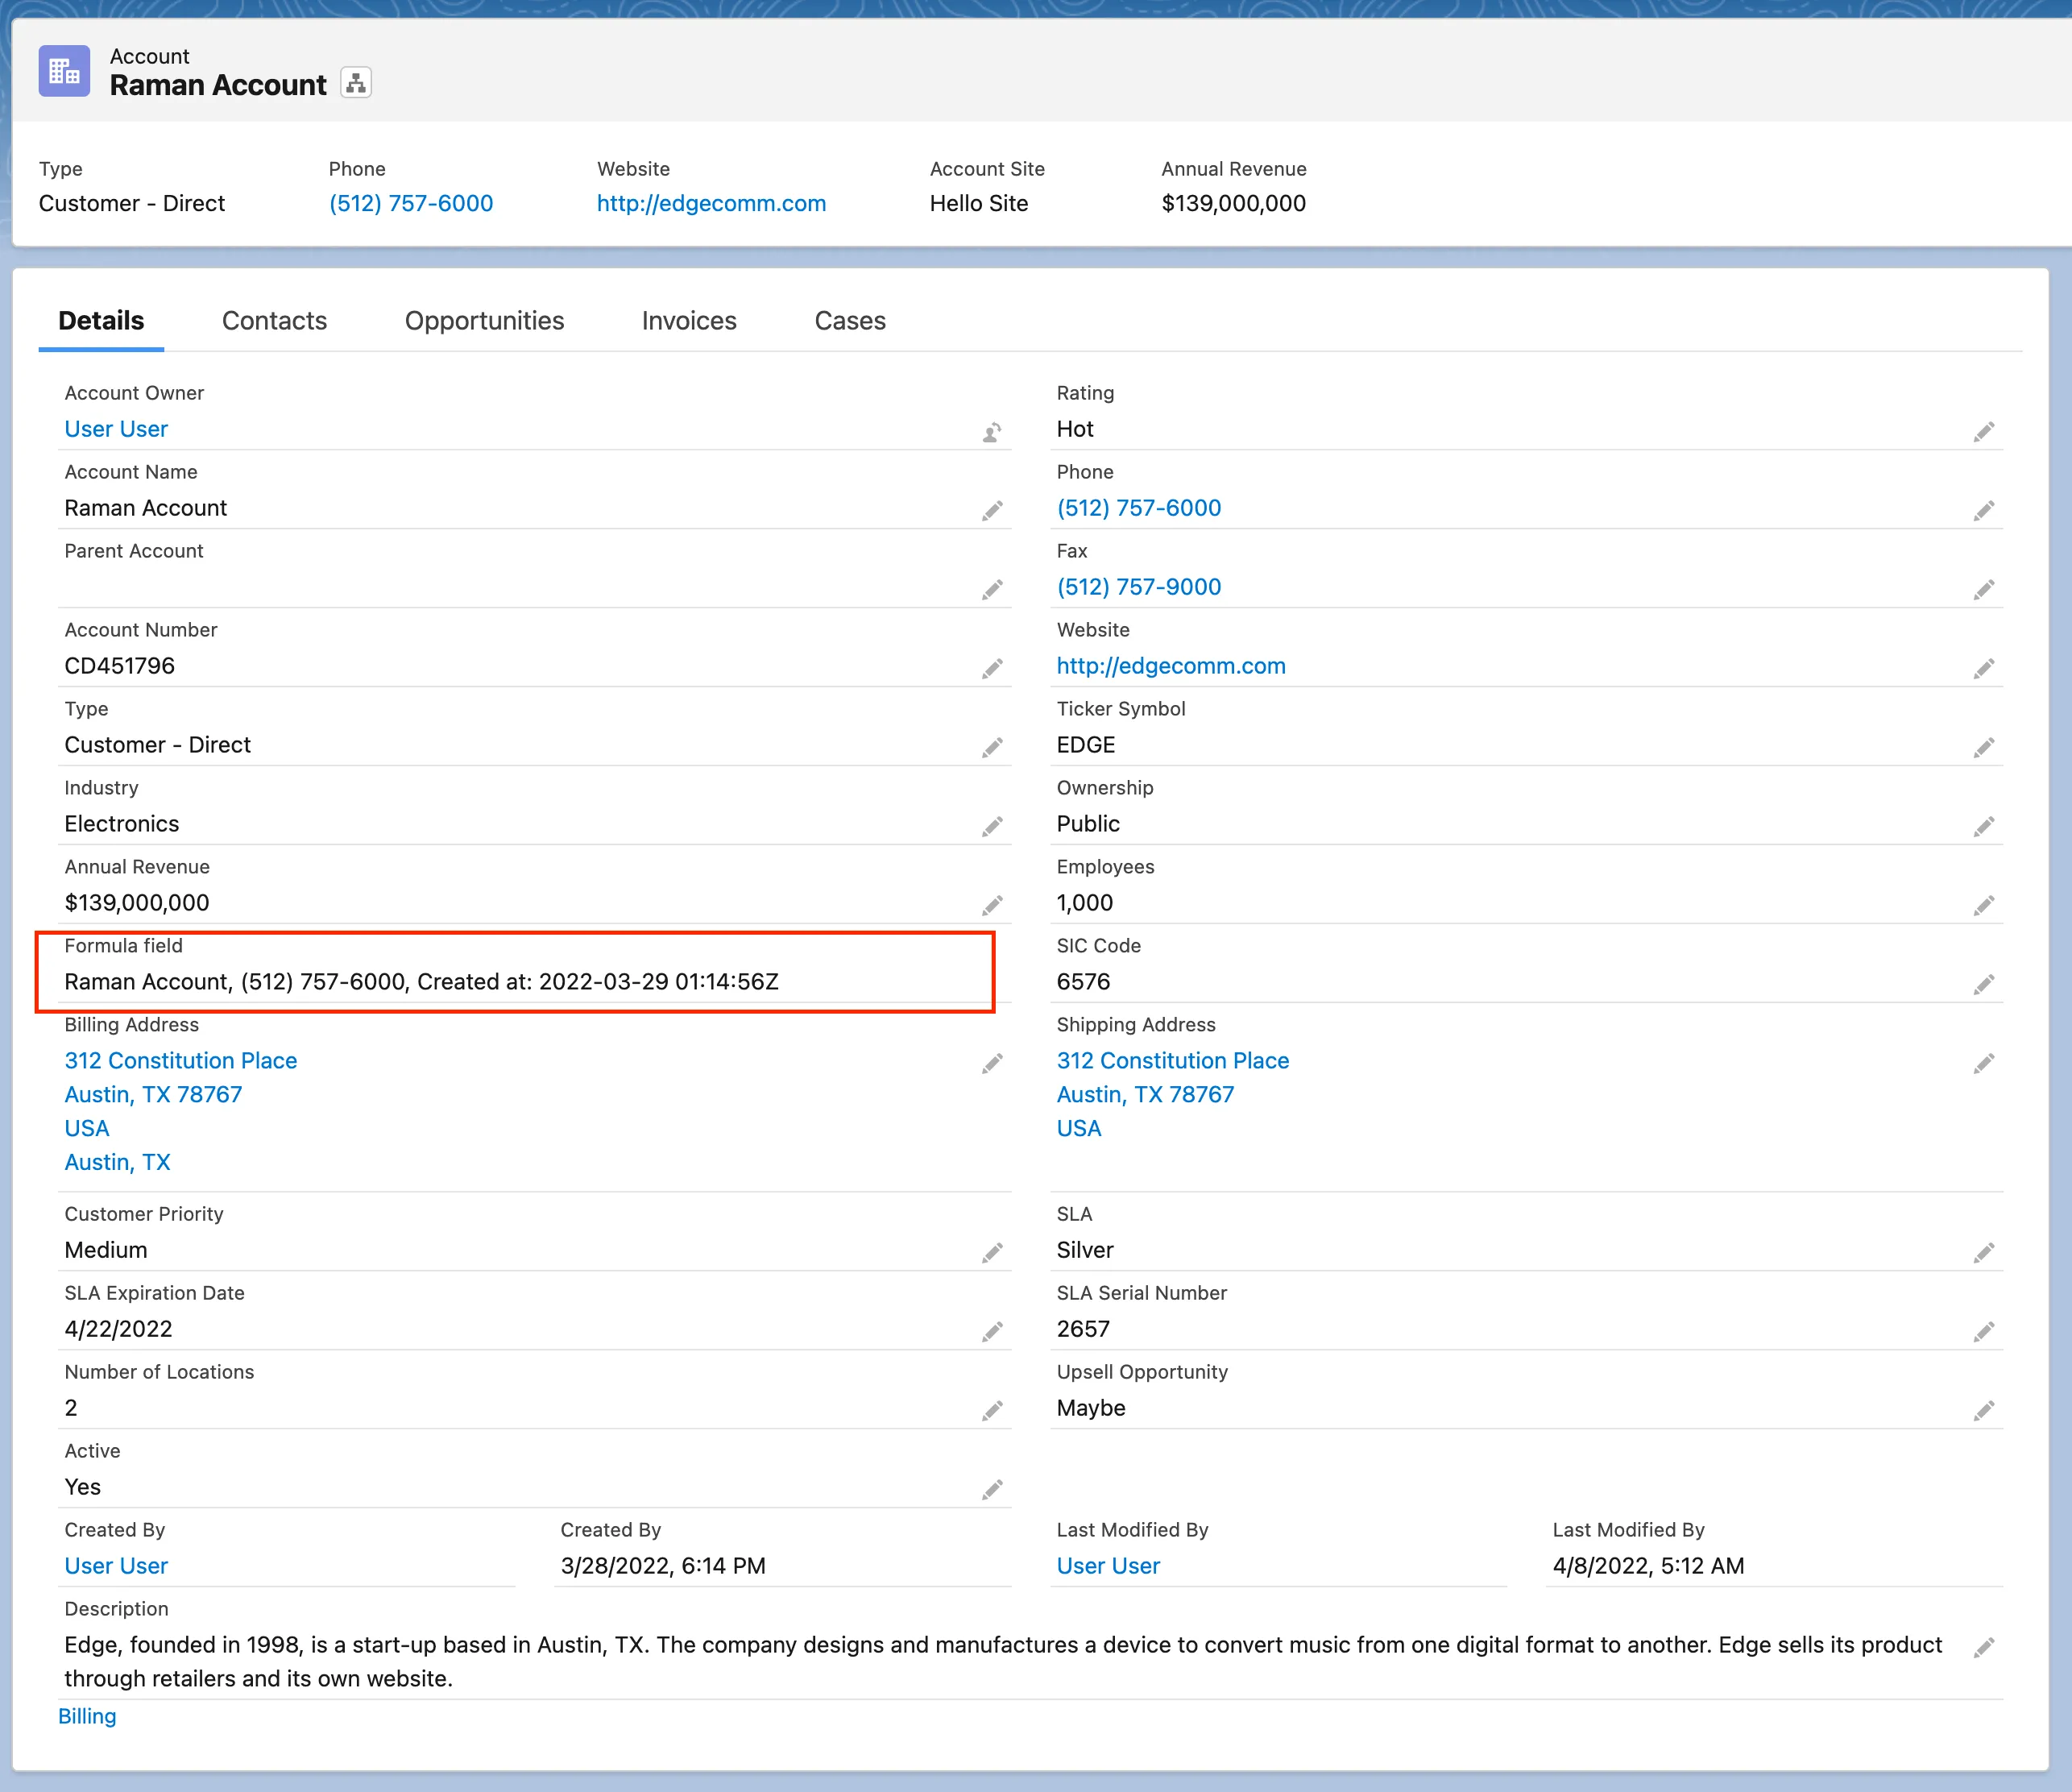
Go to the record of the Account type and make sure the formula field is created: