Inbound (Email-to-Case)
To enable the Email-to-Case feature, please follow the next steps:
-
Set up the Inbound (Email-to-Case) feature in Salesforce. Activation of the Email-to-Case functionality in Salesforce is a multi-step process. Please follow the instructions for each step.
-
Add information about the case owner.
-
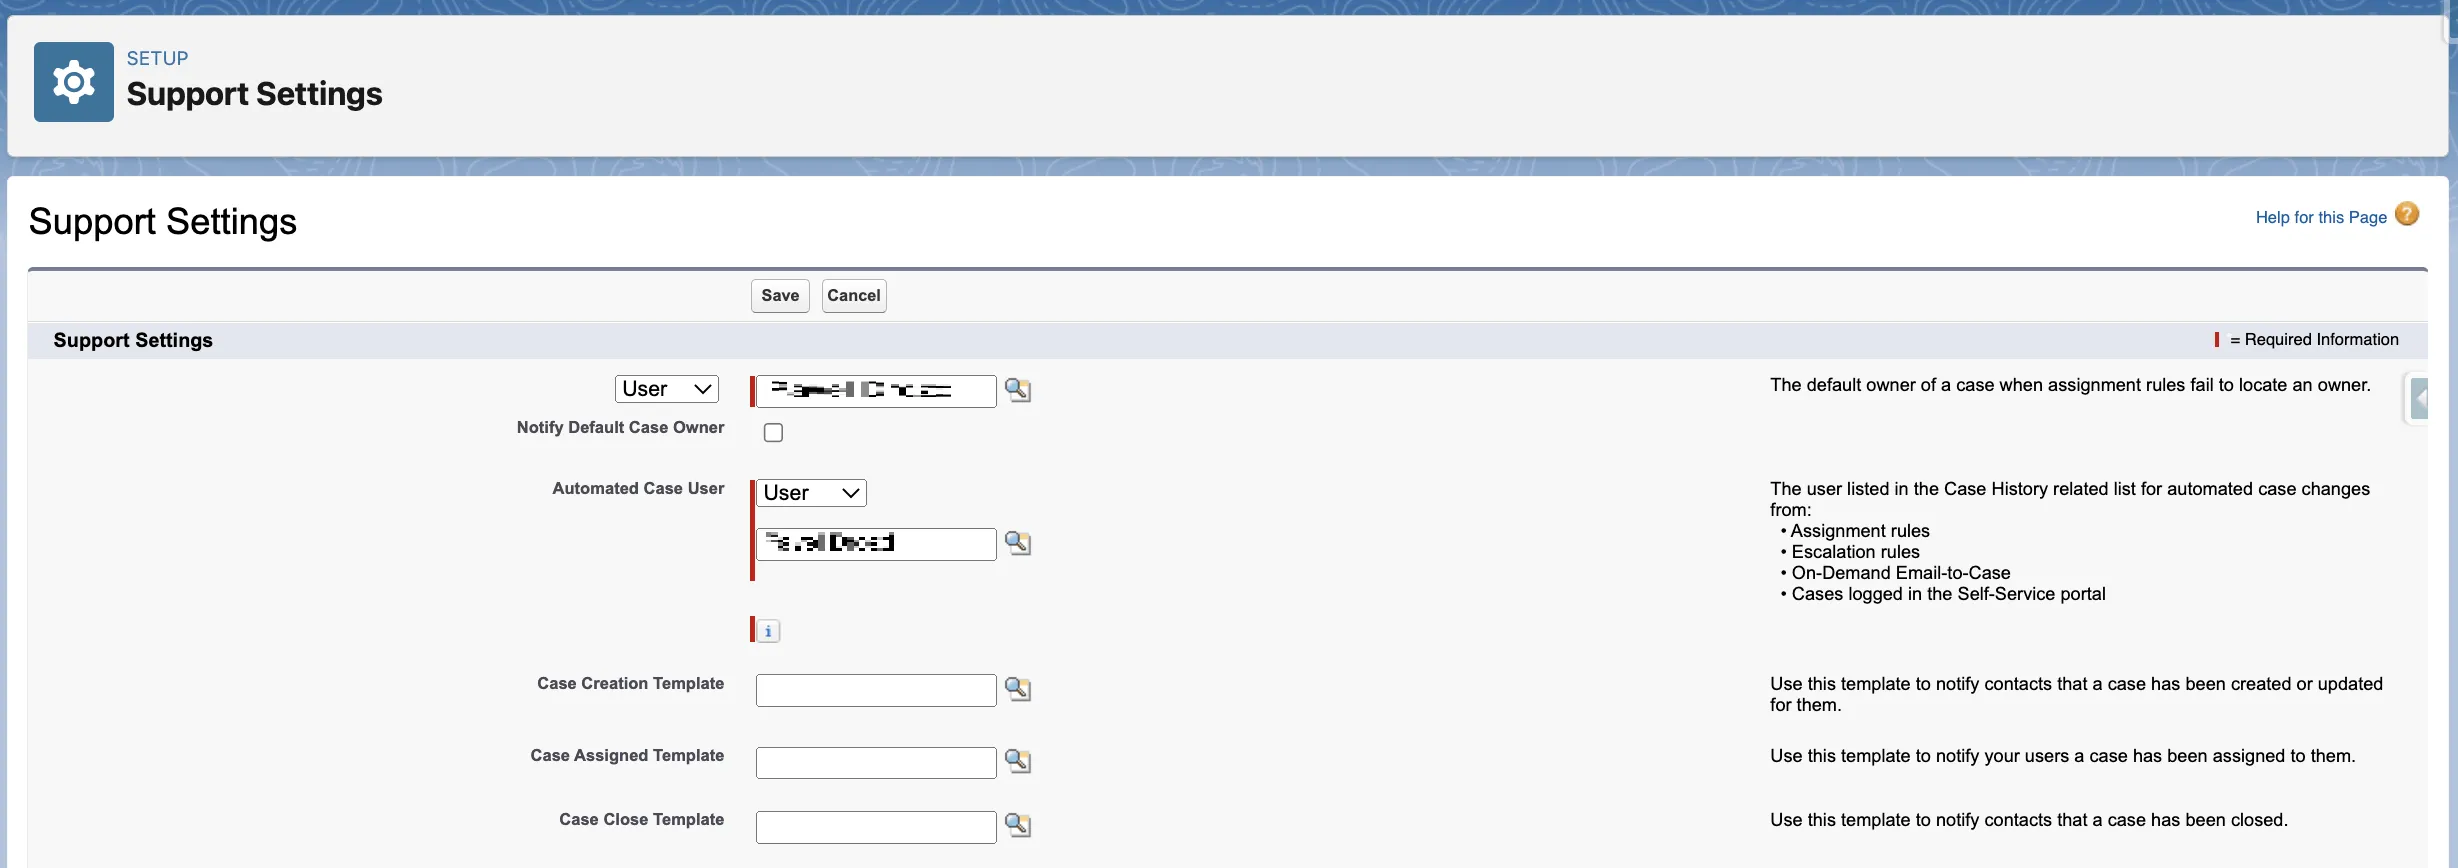
From Setup, select Feature Settings, then select Service, finally, click Support Settings.

-
Click Edit.
-
Add information about the case owner. Created cases will be assigned to this user by default if no assignment rules are found.
-
Click Save.
-
-
Activate the Email-to-Case feature.
-
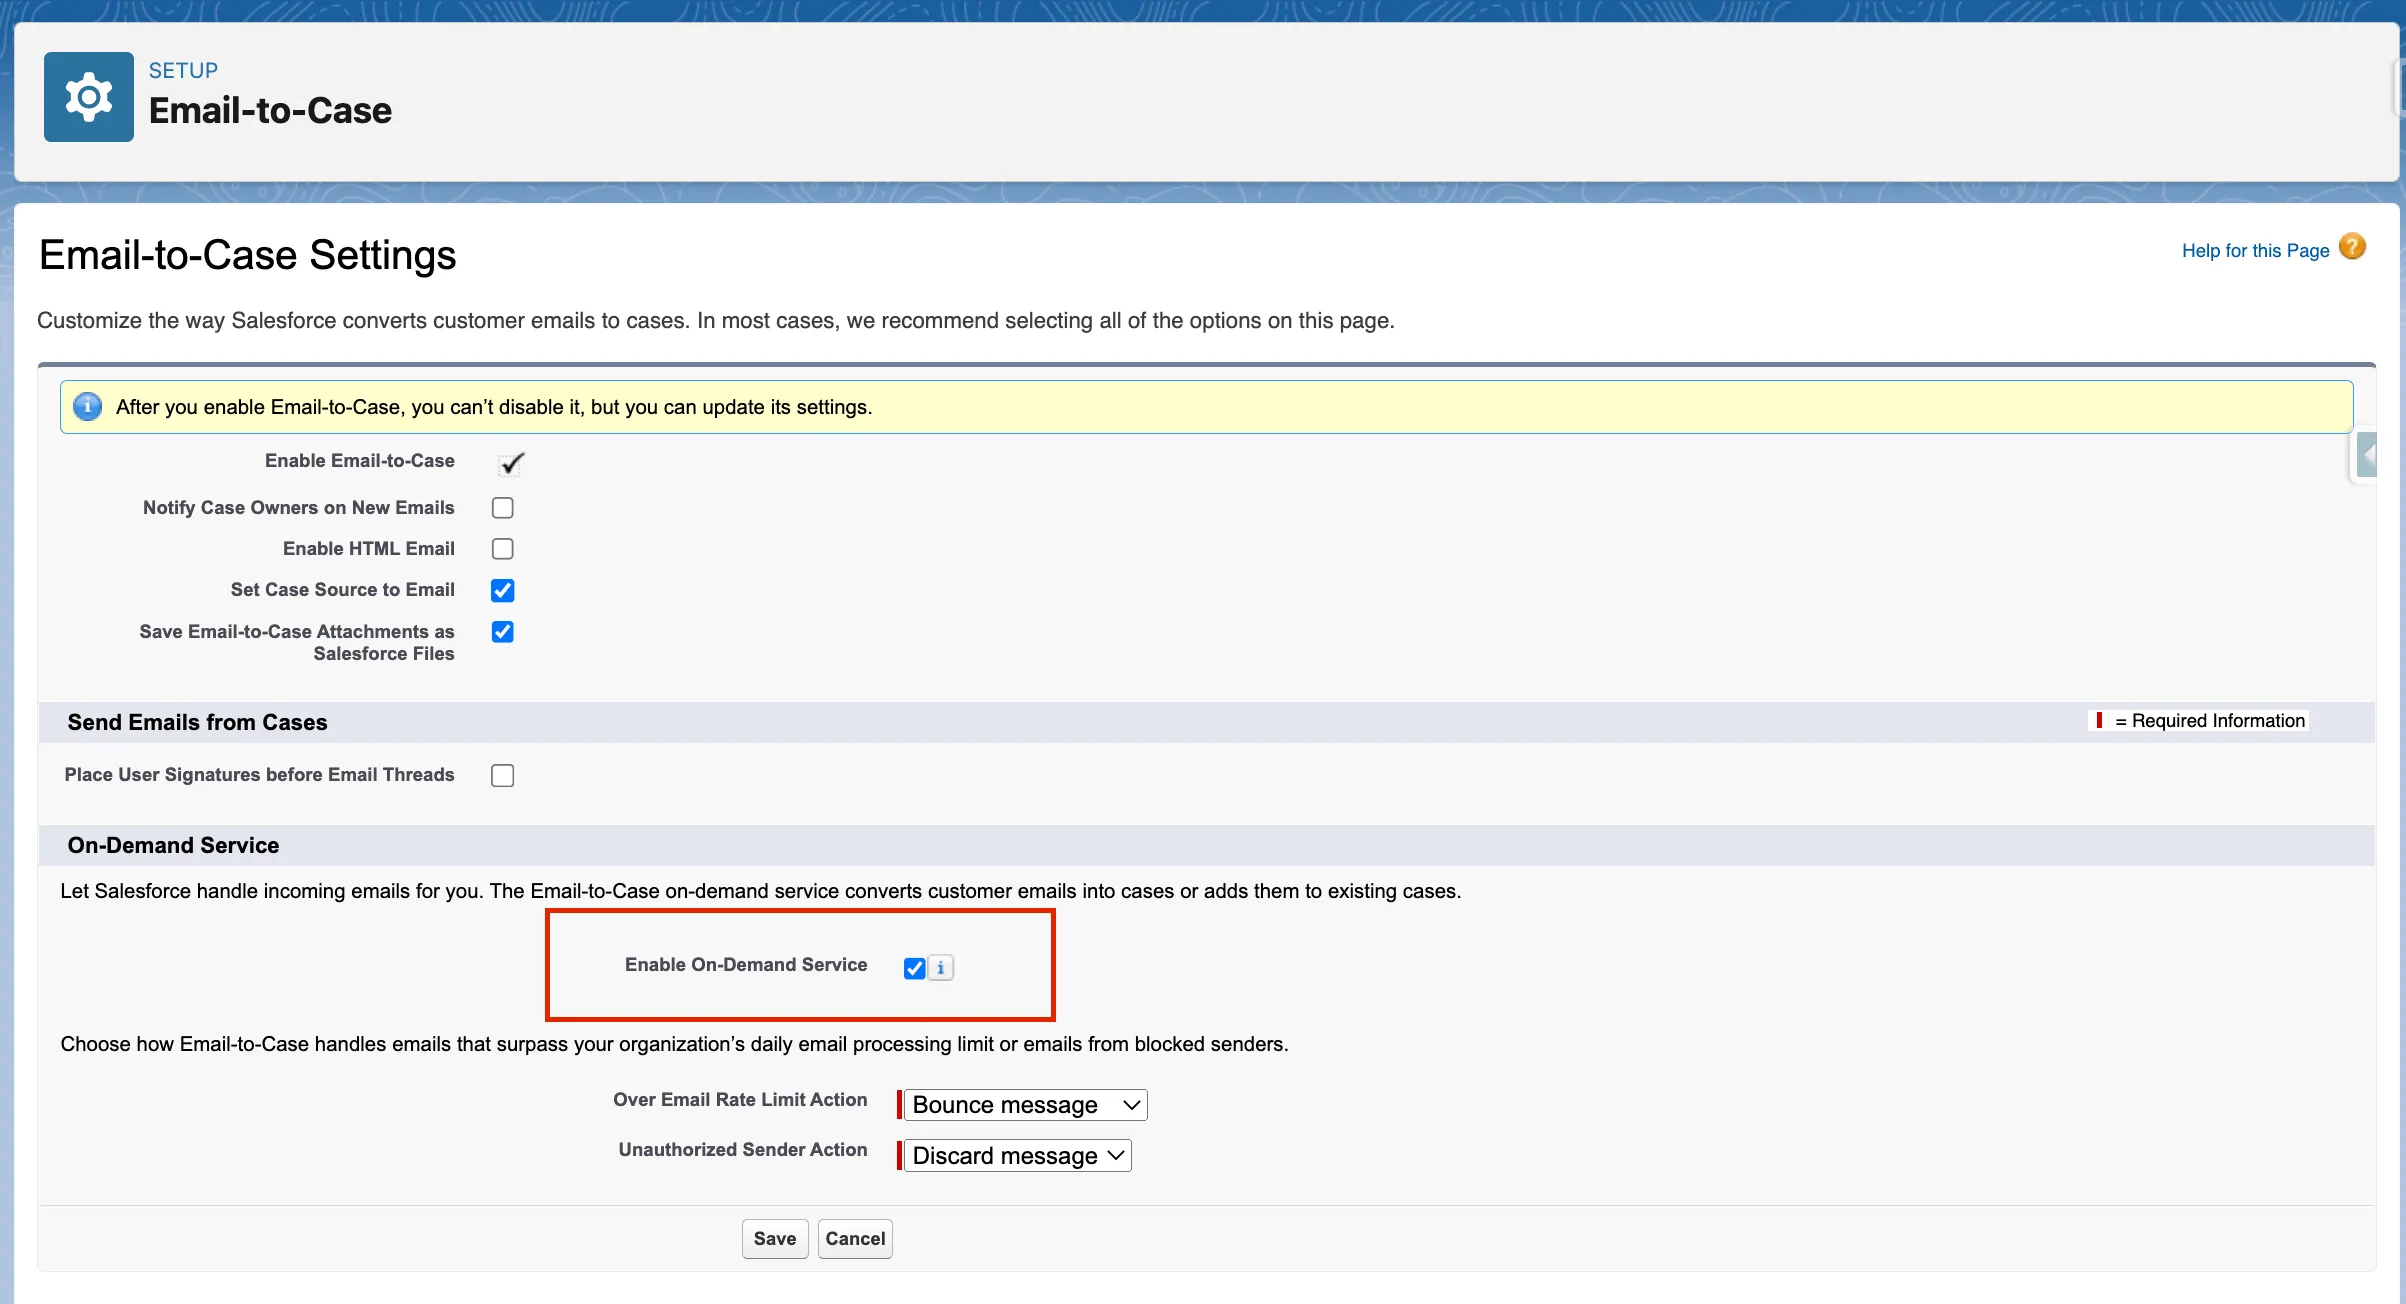
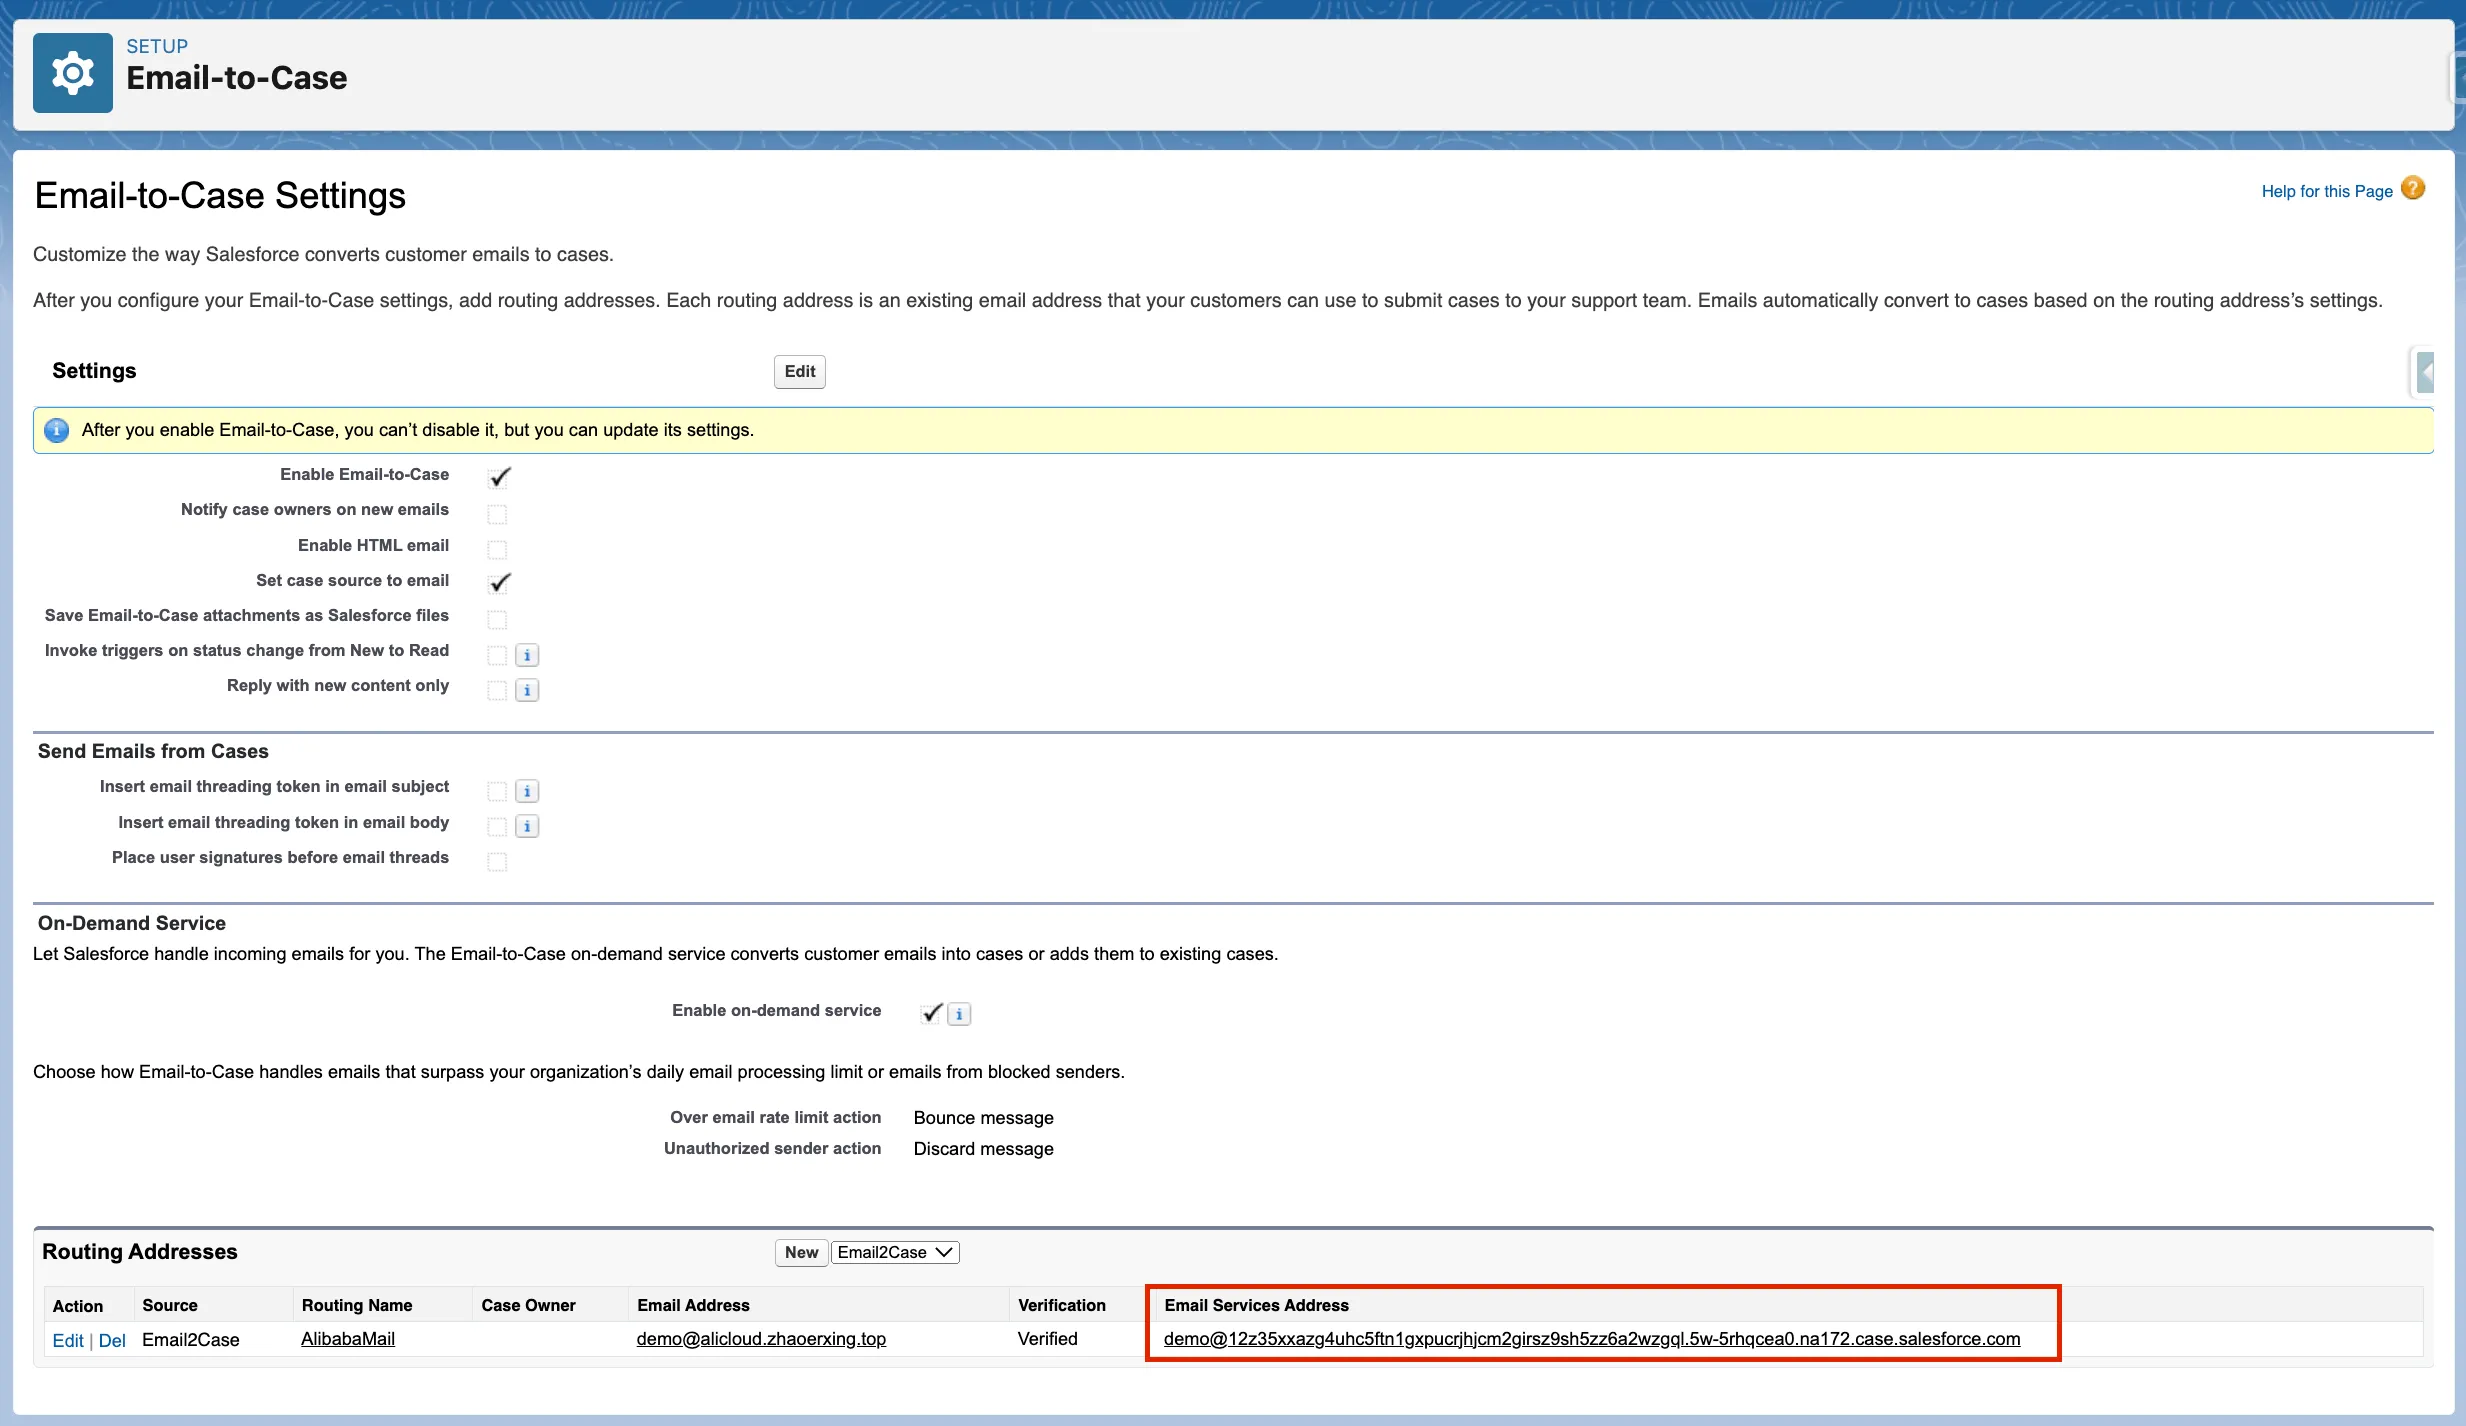
From Setup, select Feature Settings, then select Service, finally, click Email-to-Case.
-
Check the Enable On-Demand Service box to activate the Email-to-Case feature.

-
Click Save.
-
-
Create routing addresses.
-
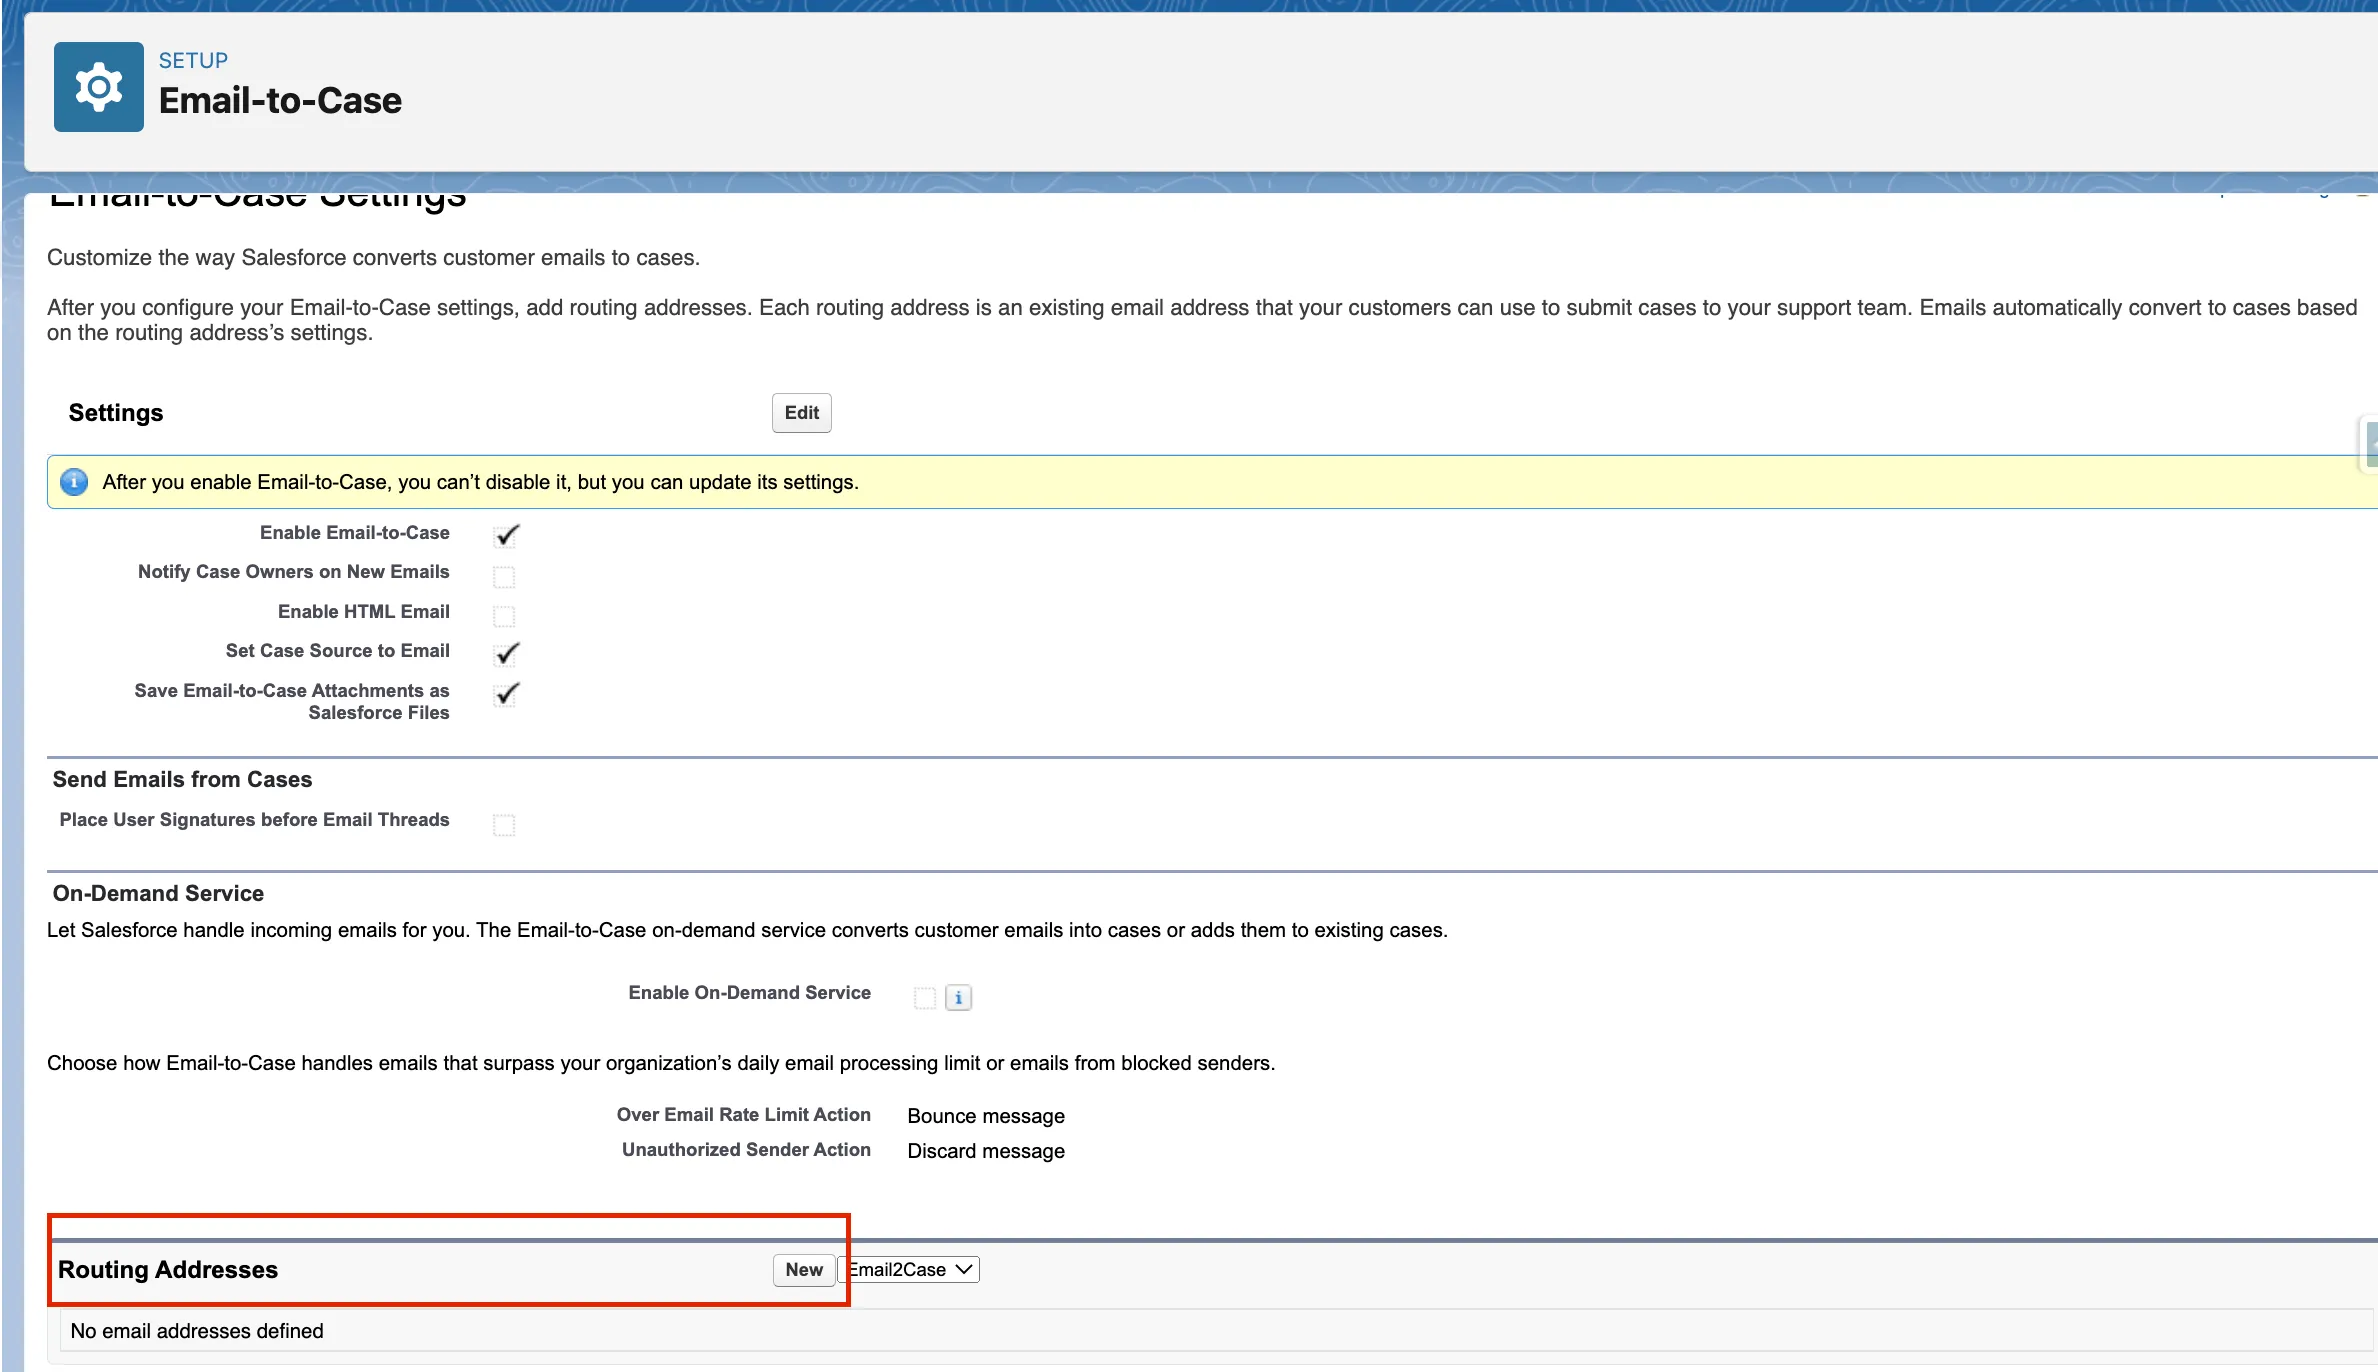
From Setup, select Feature Settings, then select Service, finally, click Email-to-Case.
-
On the Email-to-Case page, locate the Routing Addresses section.
-
In the Routing Addresses section, click New.

-
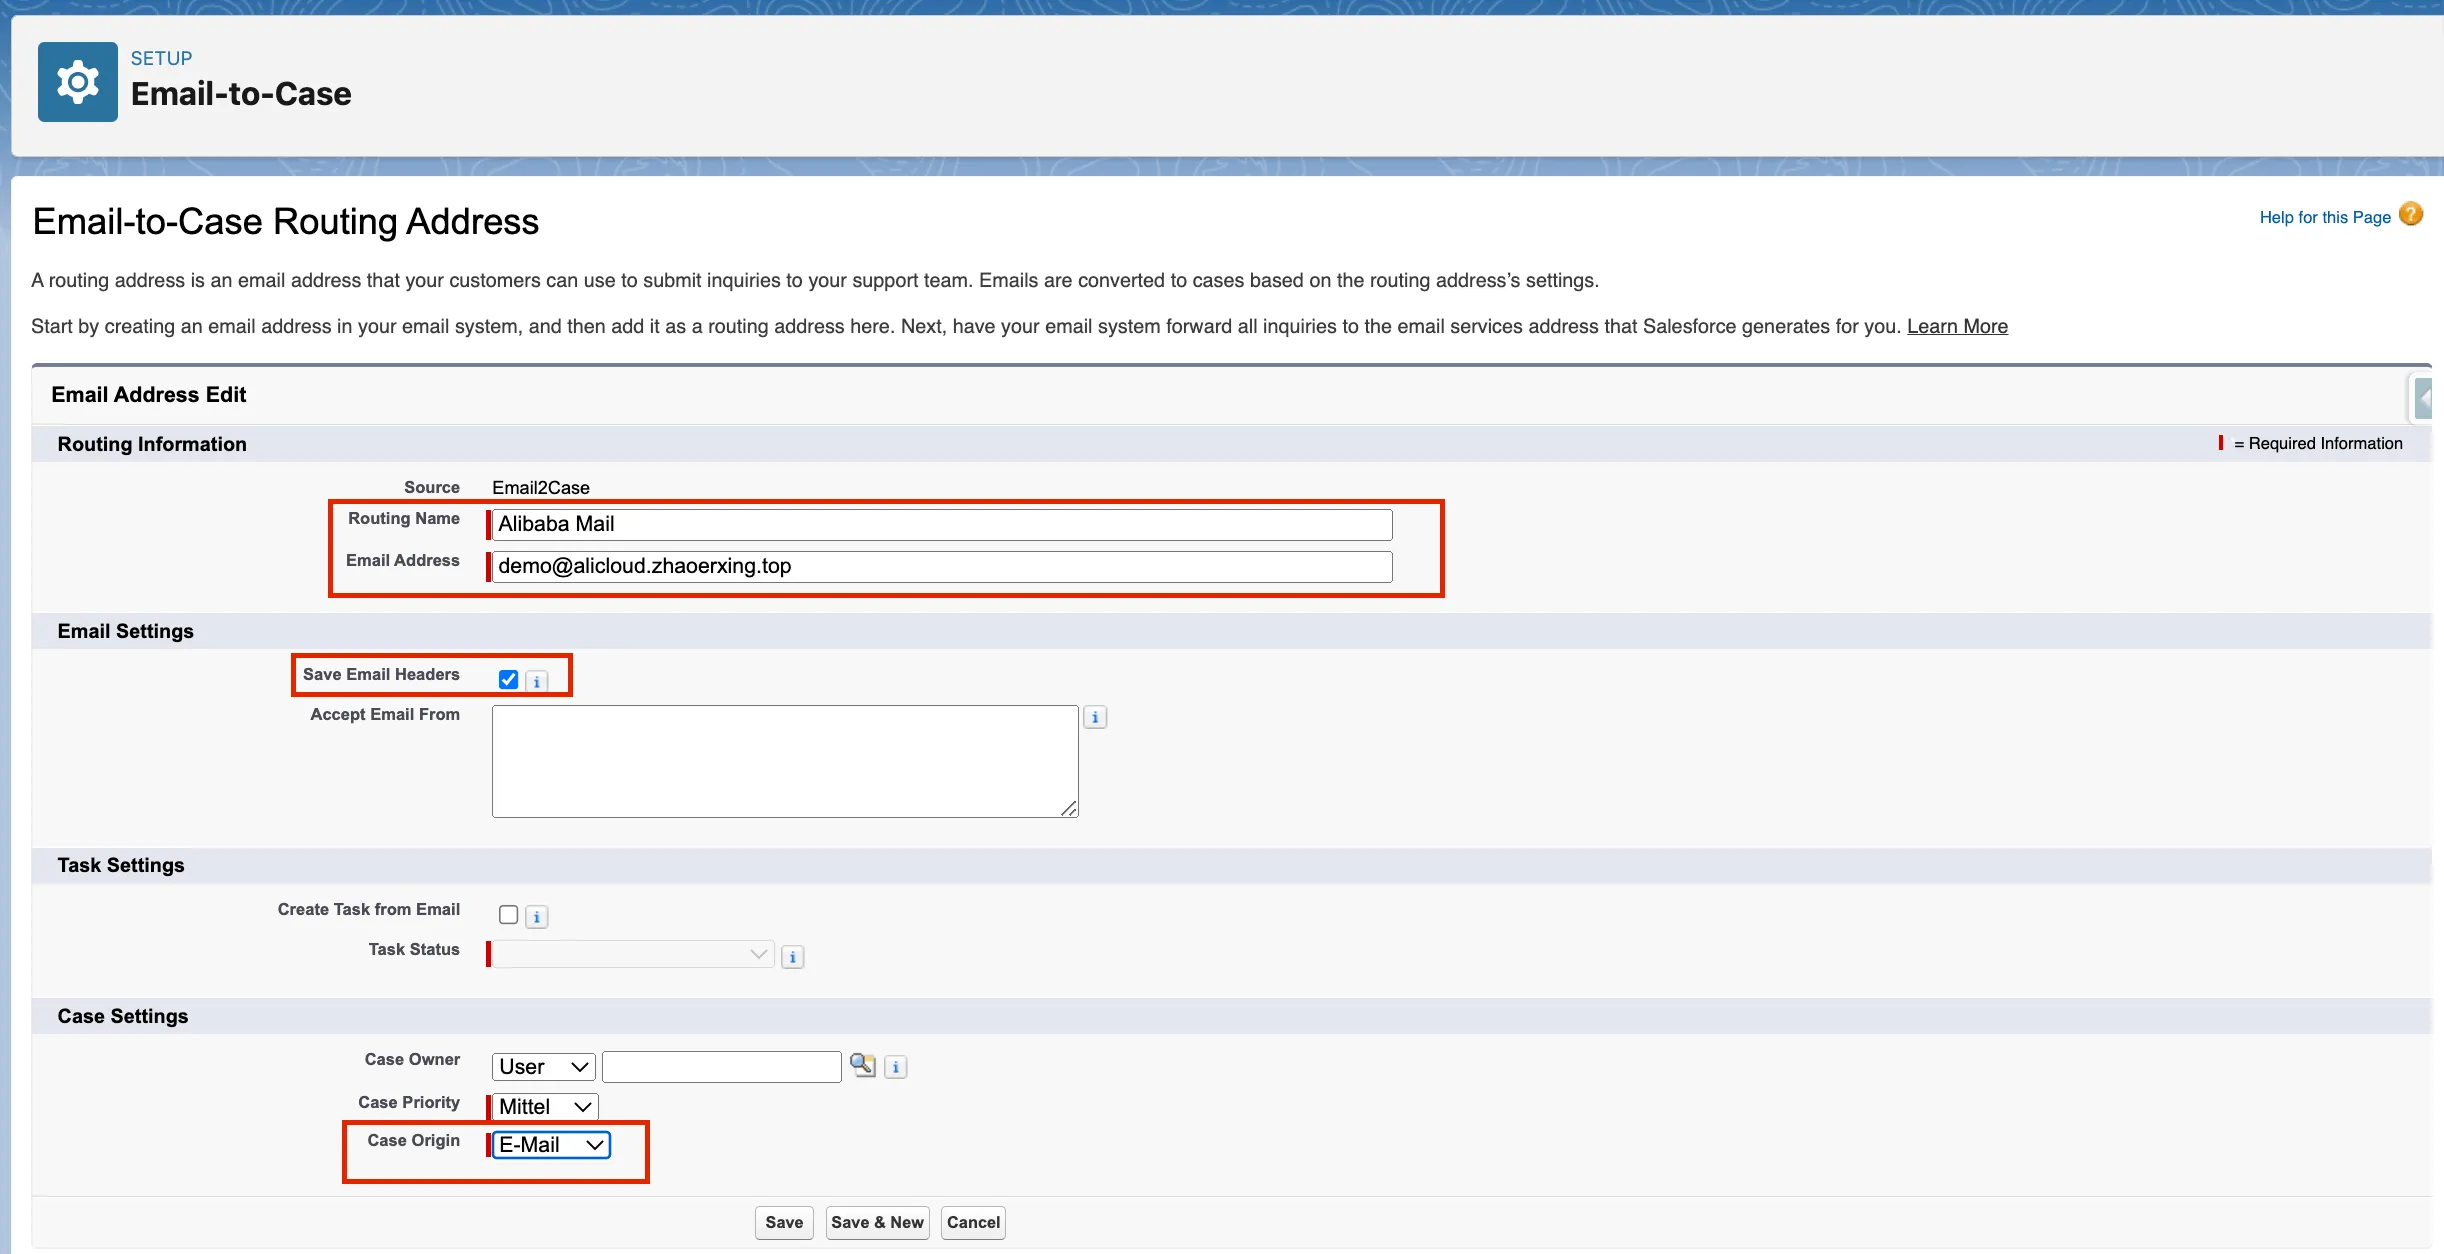
Configure the Email-to-Case routing address as follows:
-
Routing Name - enter the name for the routing email address.
-
Email Address - enter the inbound email address for this Email-to-Case routing address. Emails from this address will be routed to the allocated Salesforce email address for converting emails into cases.
-
Save Email Headers - check the box to save email headers.
-
Case Origin - select E-Mail.

-
-
Click Save.
-
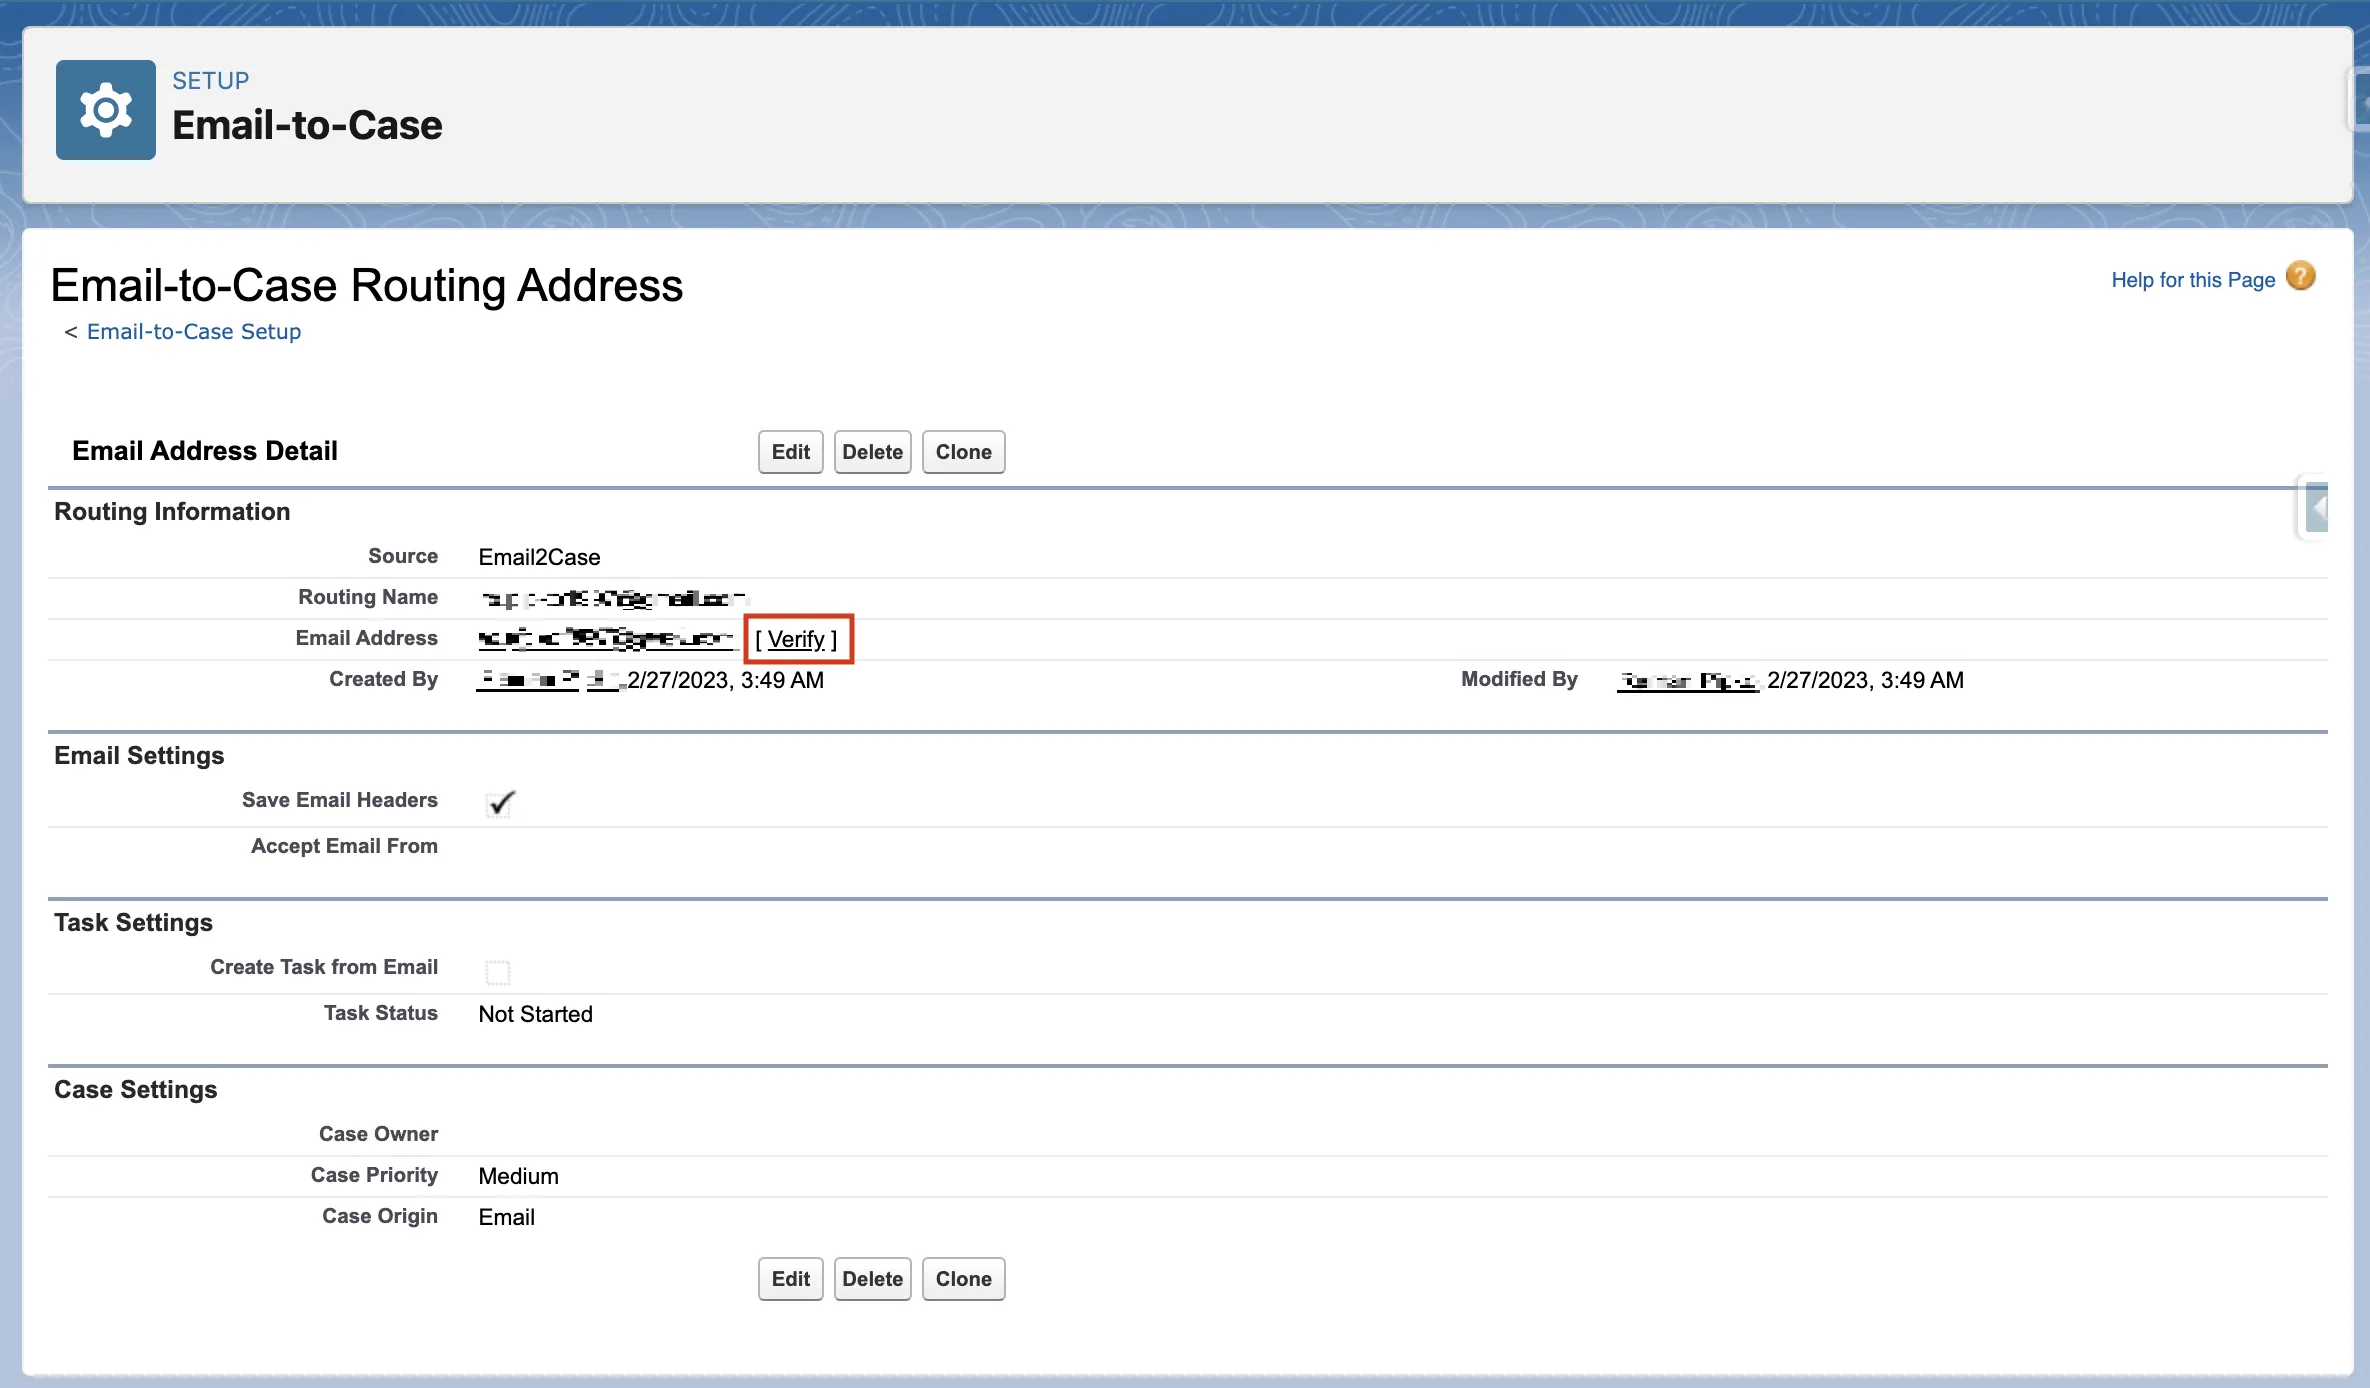
On the Email-to-Case Routing Address page, locate the email address and click Verify.

Once this step is complete, your email will be verified.

-
-
Generate a deterministic tokenization key in Salesforce org.
-
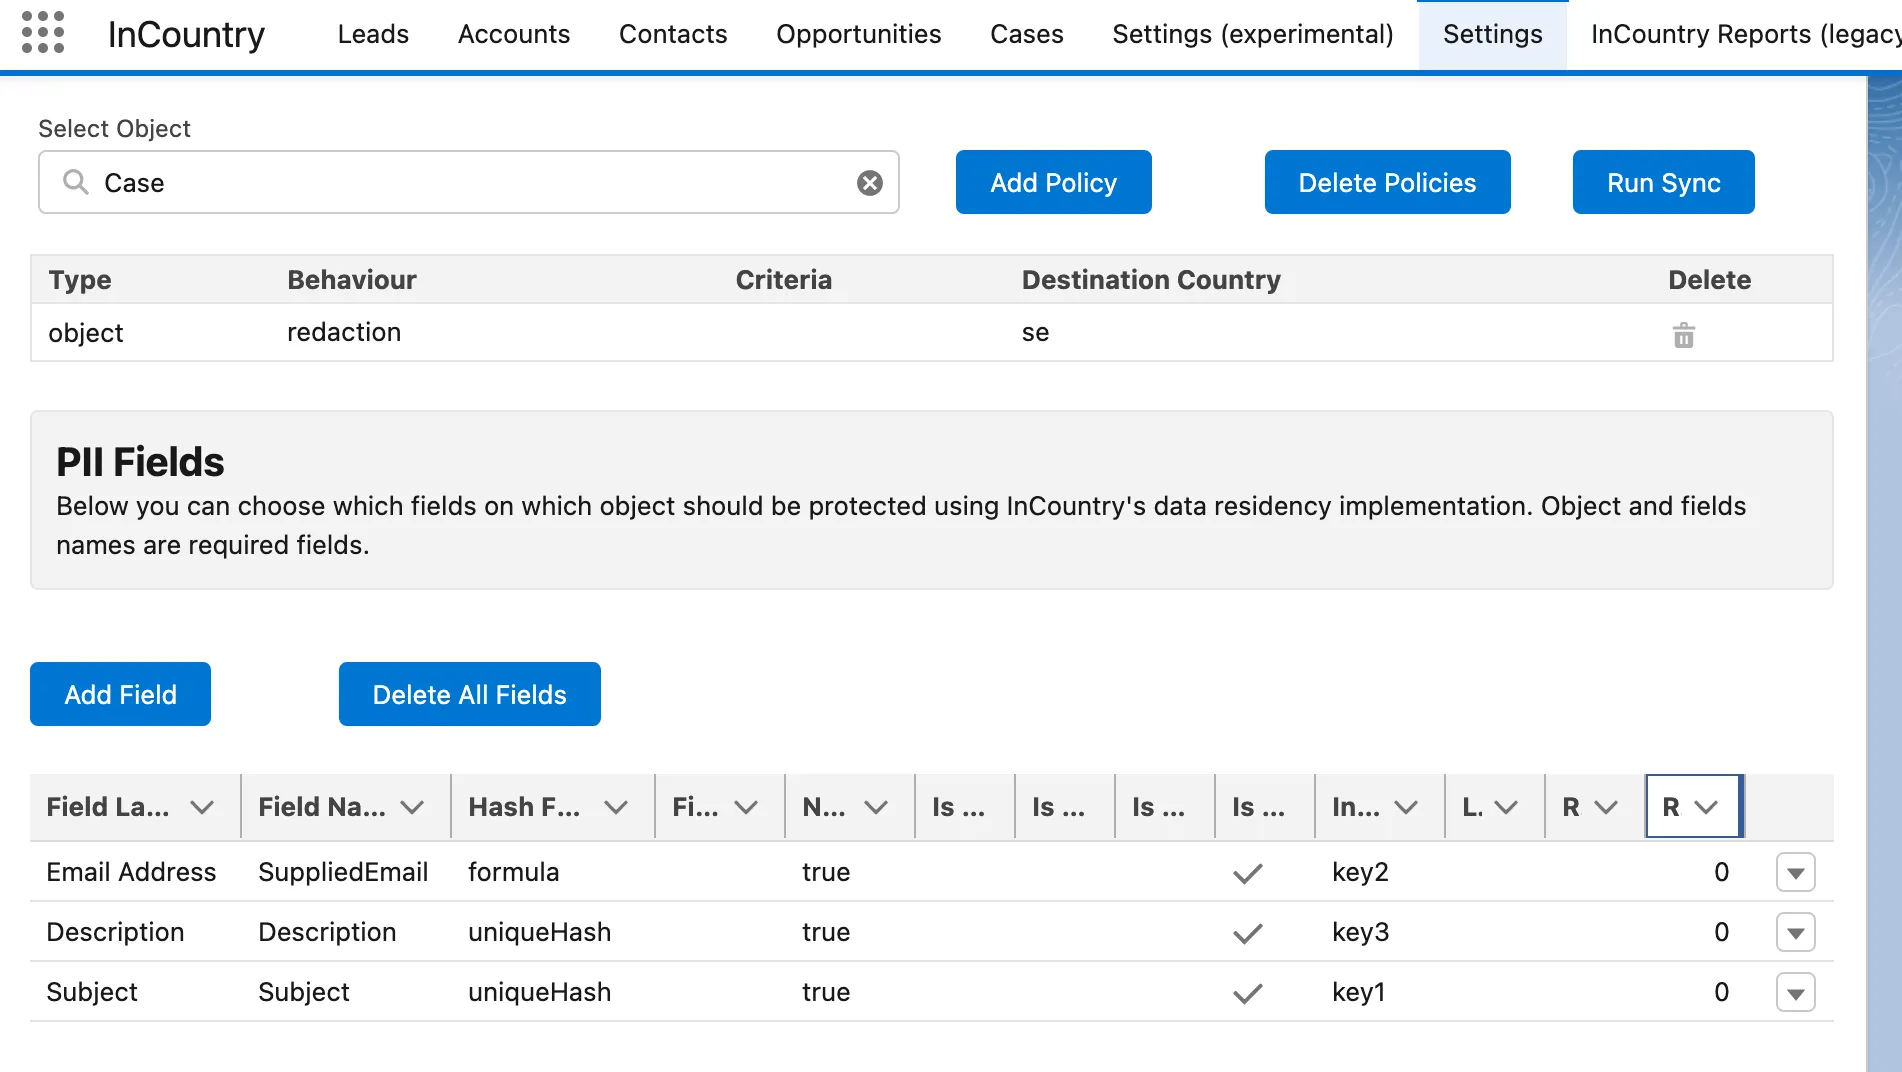
Create protected fields for the Case object.
-
On the menu, select Settings.
-
Select the Case object.
-
Configure the protected fields as follows:
Field Hash function Searchable Description uniqueHash
Subject uniqueHash
Email Address (SuppliedEmail) formula{"fn":"dtkSha256","transforms":["trim", "toLowerCase"],"format":".{64}@redacted.com"}
This formula applies the lower case to the input email address value, then applies the deterministic tokenization function to the email address, and finally trims the token to 64 characters and appends@redacted.comto it.

-
-
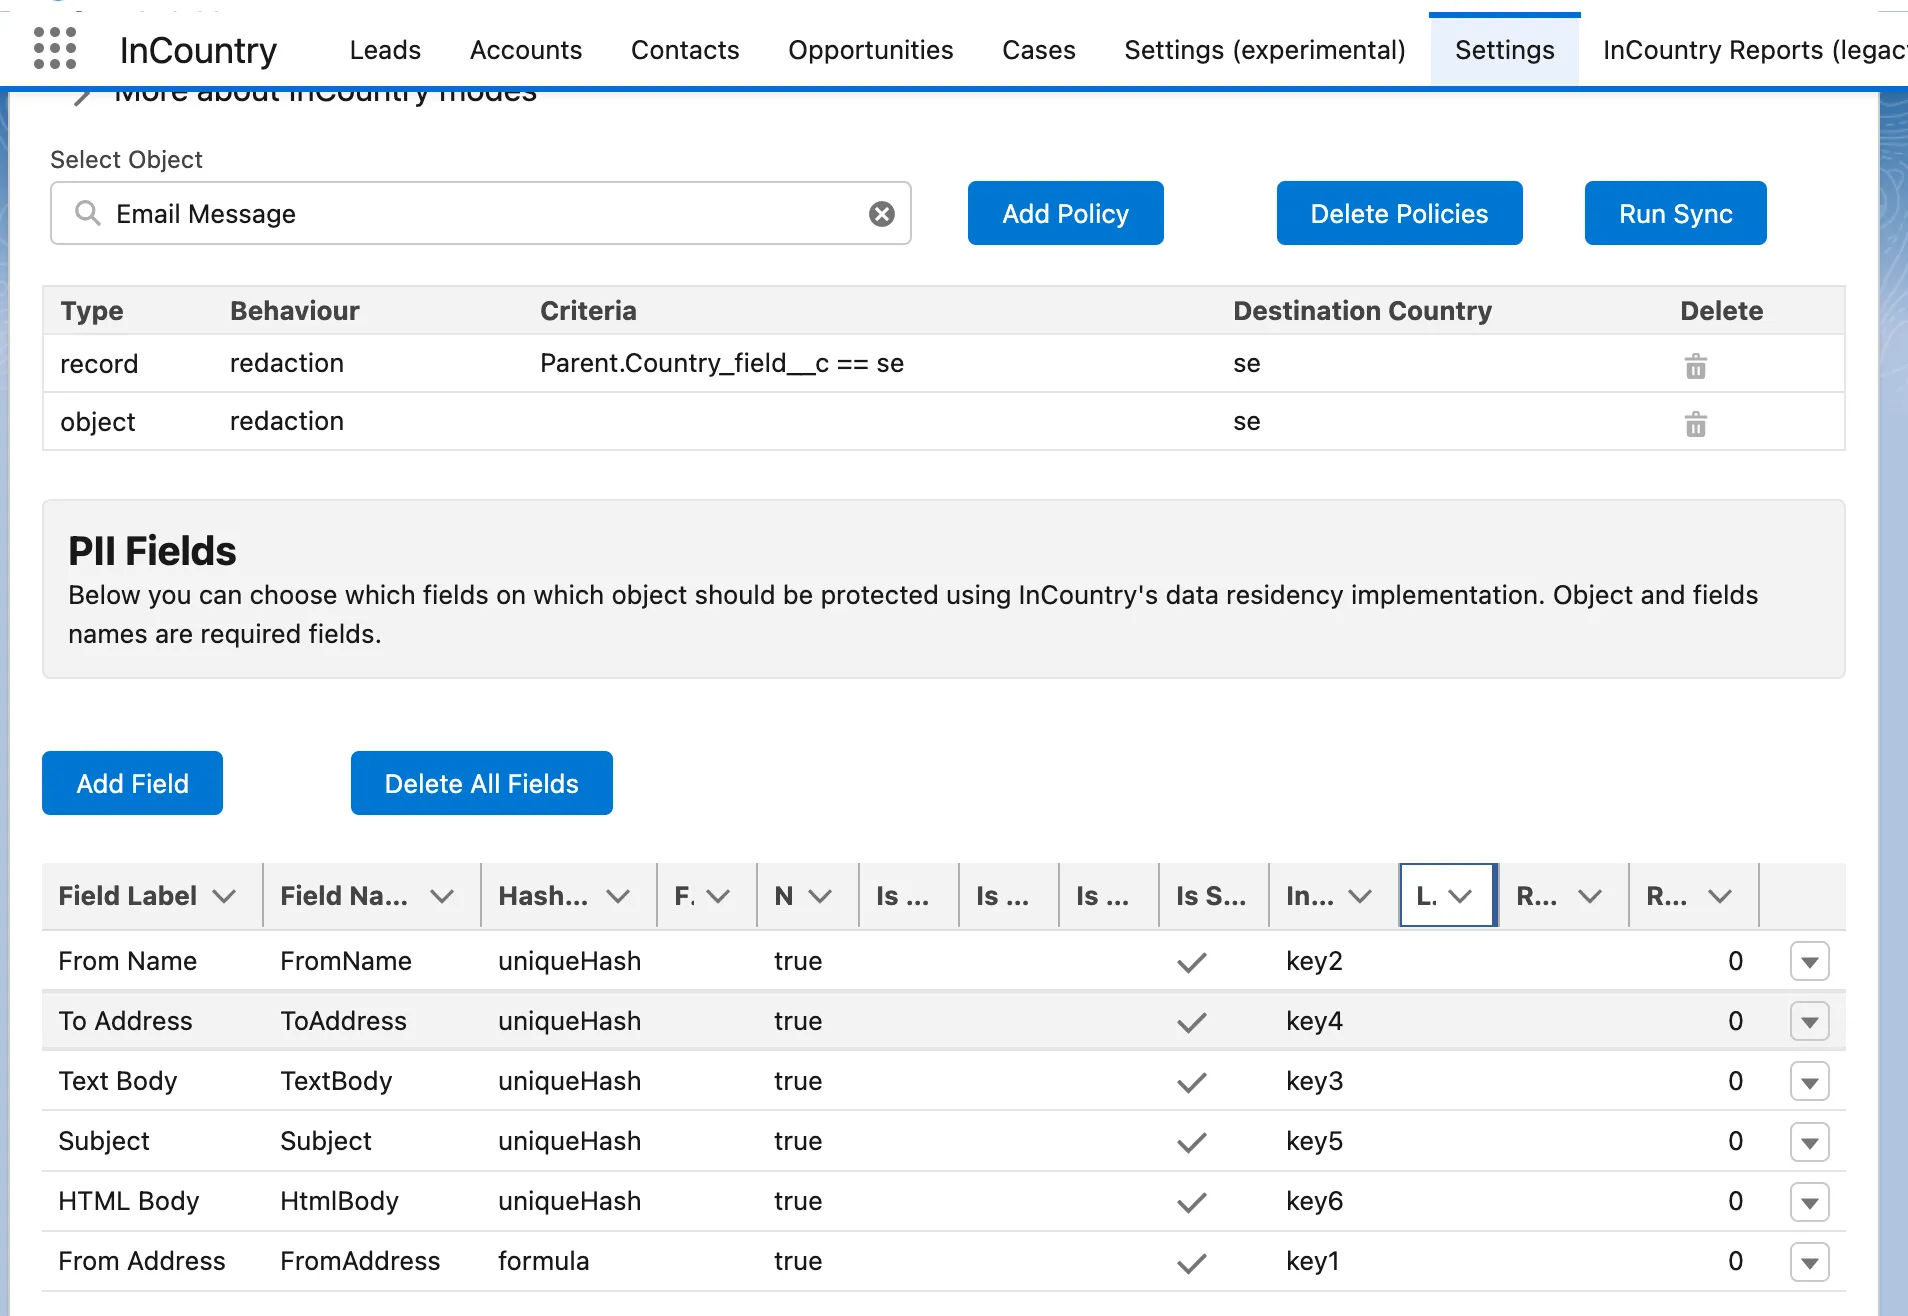
Create protected fields for the Email Message object.
-
On the menu, select Settings.
-
Select the email message object.
-
Add the following fields:
Field Hash function Searchable Html Body (HtmlBody) uniqueHash
Subject uniqueHash
From Address (FromAddress) formula{"fn":"dtkSha256","transforms":["trim", "toLowerCase"],"format":".{64}@redacted.com"}
This formula applies the lower case to the input email address value, then applies the deterministic tokenization function to the email address, and finally trims the token to 64 characters and appends@redacted.comto it.
From Name uniqueHash
To Address (ToAddress) uniqueHash
Text Body (TextBody) uniqueHash

-
-
Create protected fields for the Contact object.
-
On the menu, select Settings.
-
Select the Contact object.
-
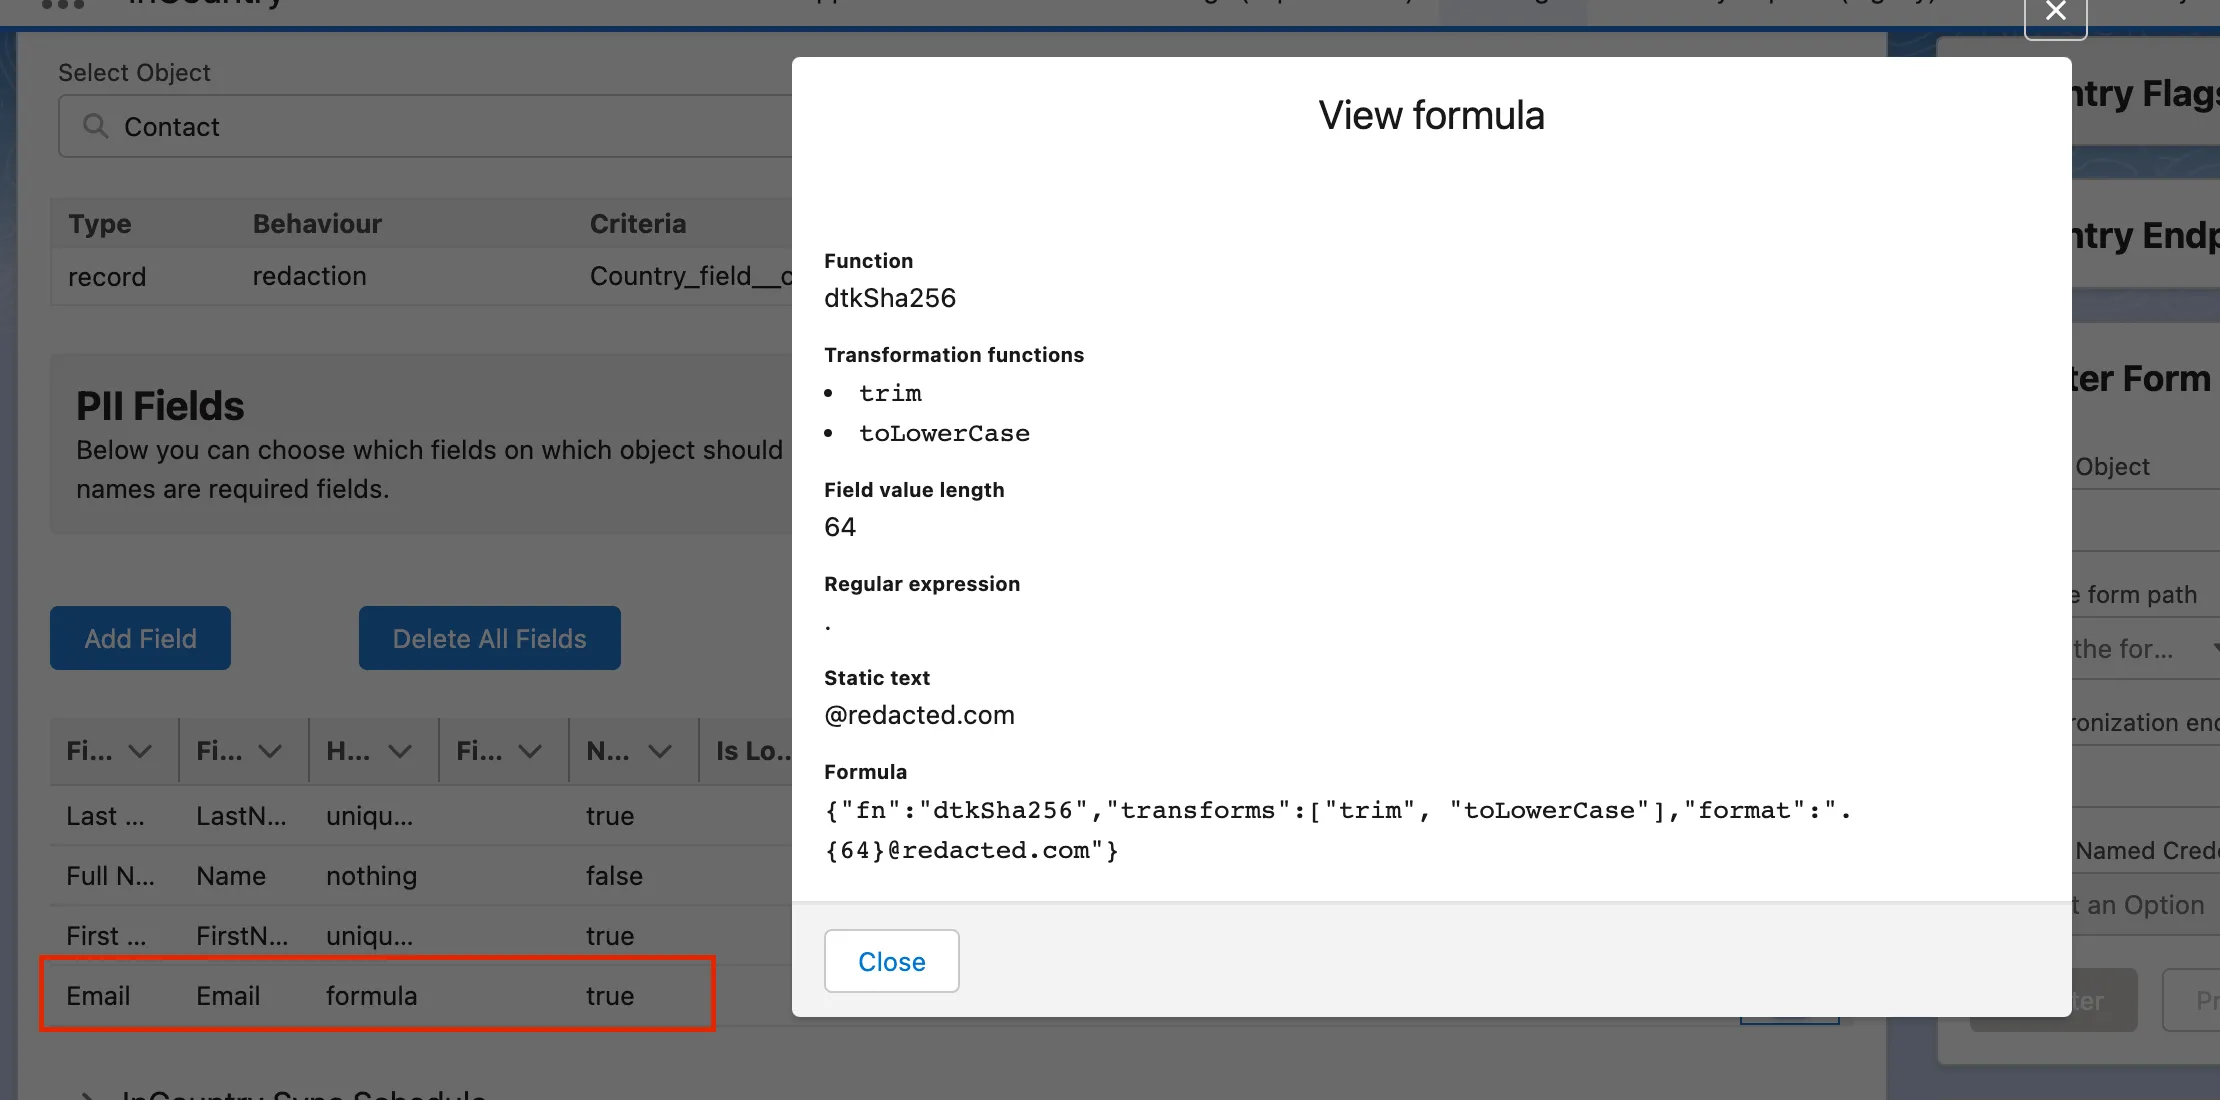
Add the Email field, specifying the following parameters:
Field Hash function Searchable Email formula{"fn":"dtkSha256","transforms":["trim", "toLowerCase"],"format":".{64}@redacted.com"}
This formula applies the lower case to the input email address value, then applies the deterministic tokenization function to the email address, and finally trims the token to 64 characters and appends@redacted.comto it.
 note
noteFor the details on linking contacts with a case, please check Salesforce documentation.
-
-
Configure the InCountry Chatter web component.
noteFor the details, please check our documentation.
-
-
To link the case record and email messages with the InCountry platform, deploy the following code to your Salesforce organization: Download Email-to-Case metadata.
-
Once the Salesforce part is completed, proceed to the Portal part.
Using the Email-to-Case feature
Once you have completed the above settings in Salesforce and InCountry Portal, you can use the Inbound (Email-to-Case) feature in Salesforce. All emails sent to your support address (for example: support@corp.com) will be available in Salesforce as case records.
