Managing the Package
About
The InCountry Data Residency for Salesforce package is installed as a common package by following the standard procedure.
Package Installation Guide
Install the package
You have two ways to obtain the package:
- Install the package directly from the AppExchange.
- Request an installation link from the InCountry Team by reaching out to our support team at support@incountry.com.
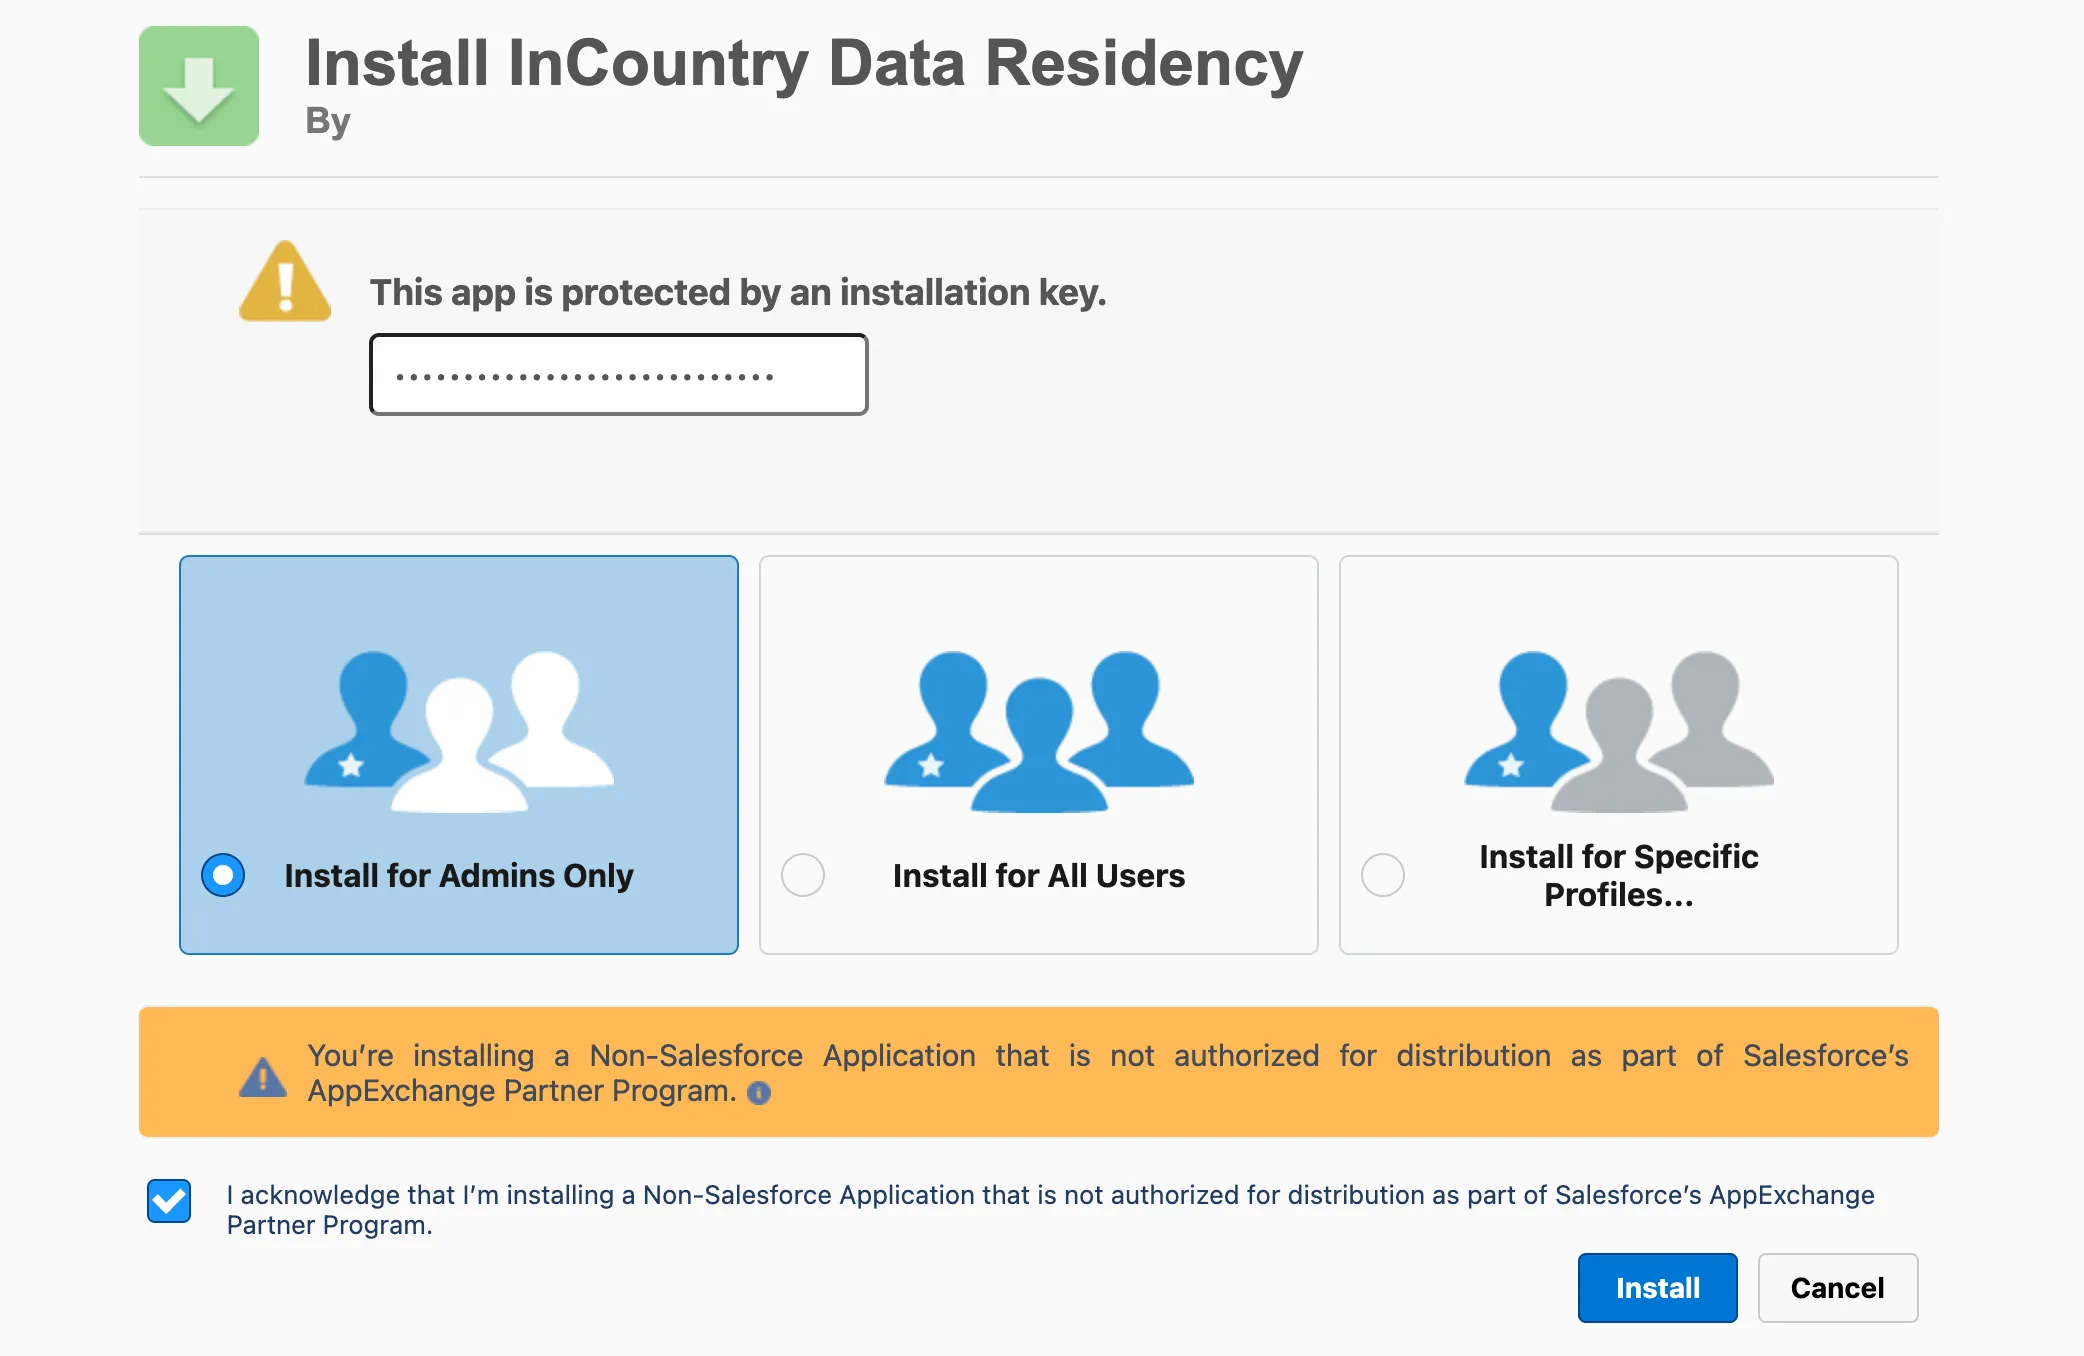
It is strongly advised to install the package for administrators only by selecting the Admins Only option. This approach allows you to later use permission sets to control and grant access to the InCountry Data Residency package for specific Salesforce users as needed.
Avoid selecting the Install for All Users option, as it grants all Salesforce users access to the InCountry Data Residency package, preventing regulation of individual user access.
Granting access to the Salesforce API
Packages older than version 1.262 of the InCountry Data Residency package require the following steps to grant access. This ensures the package can create metadata and retrieve data via APIs.
Create Authentication Components
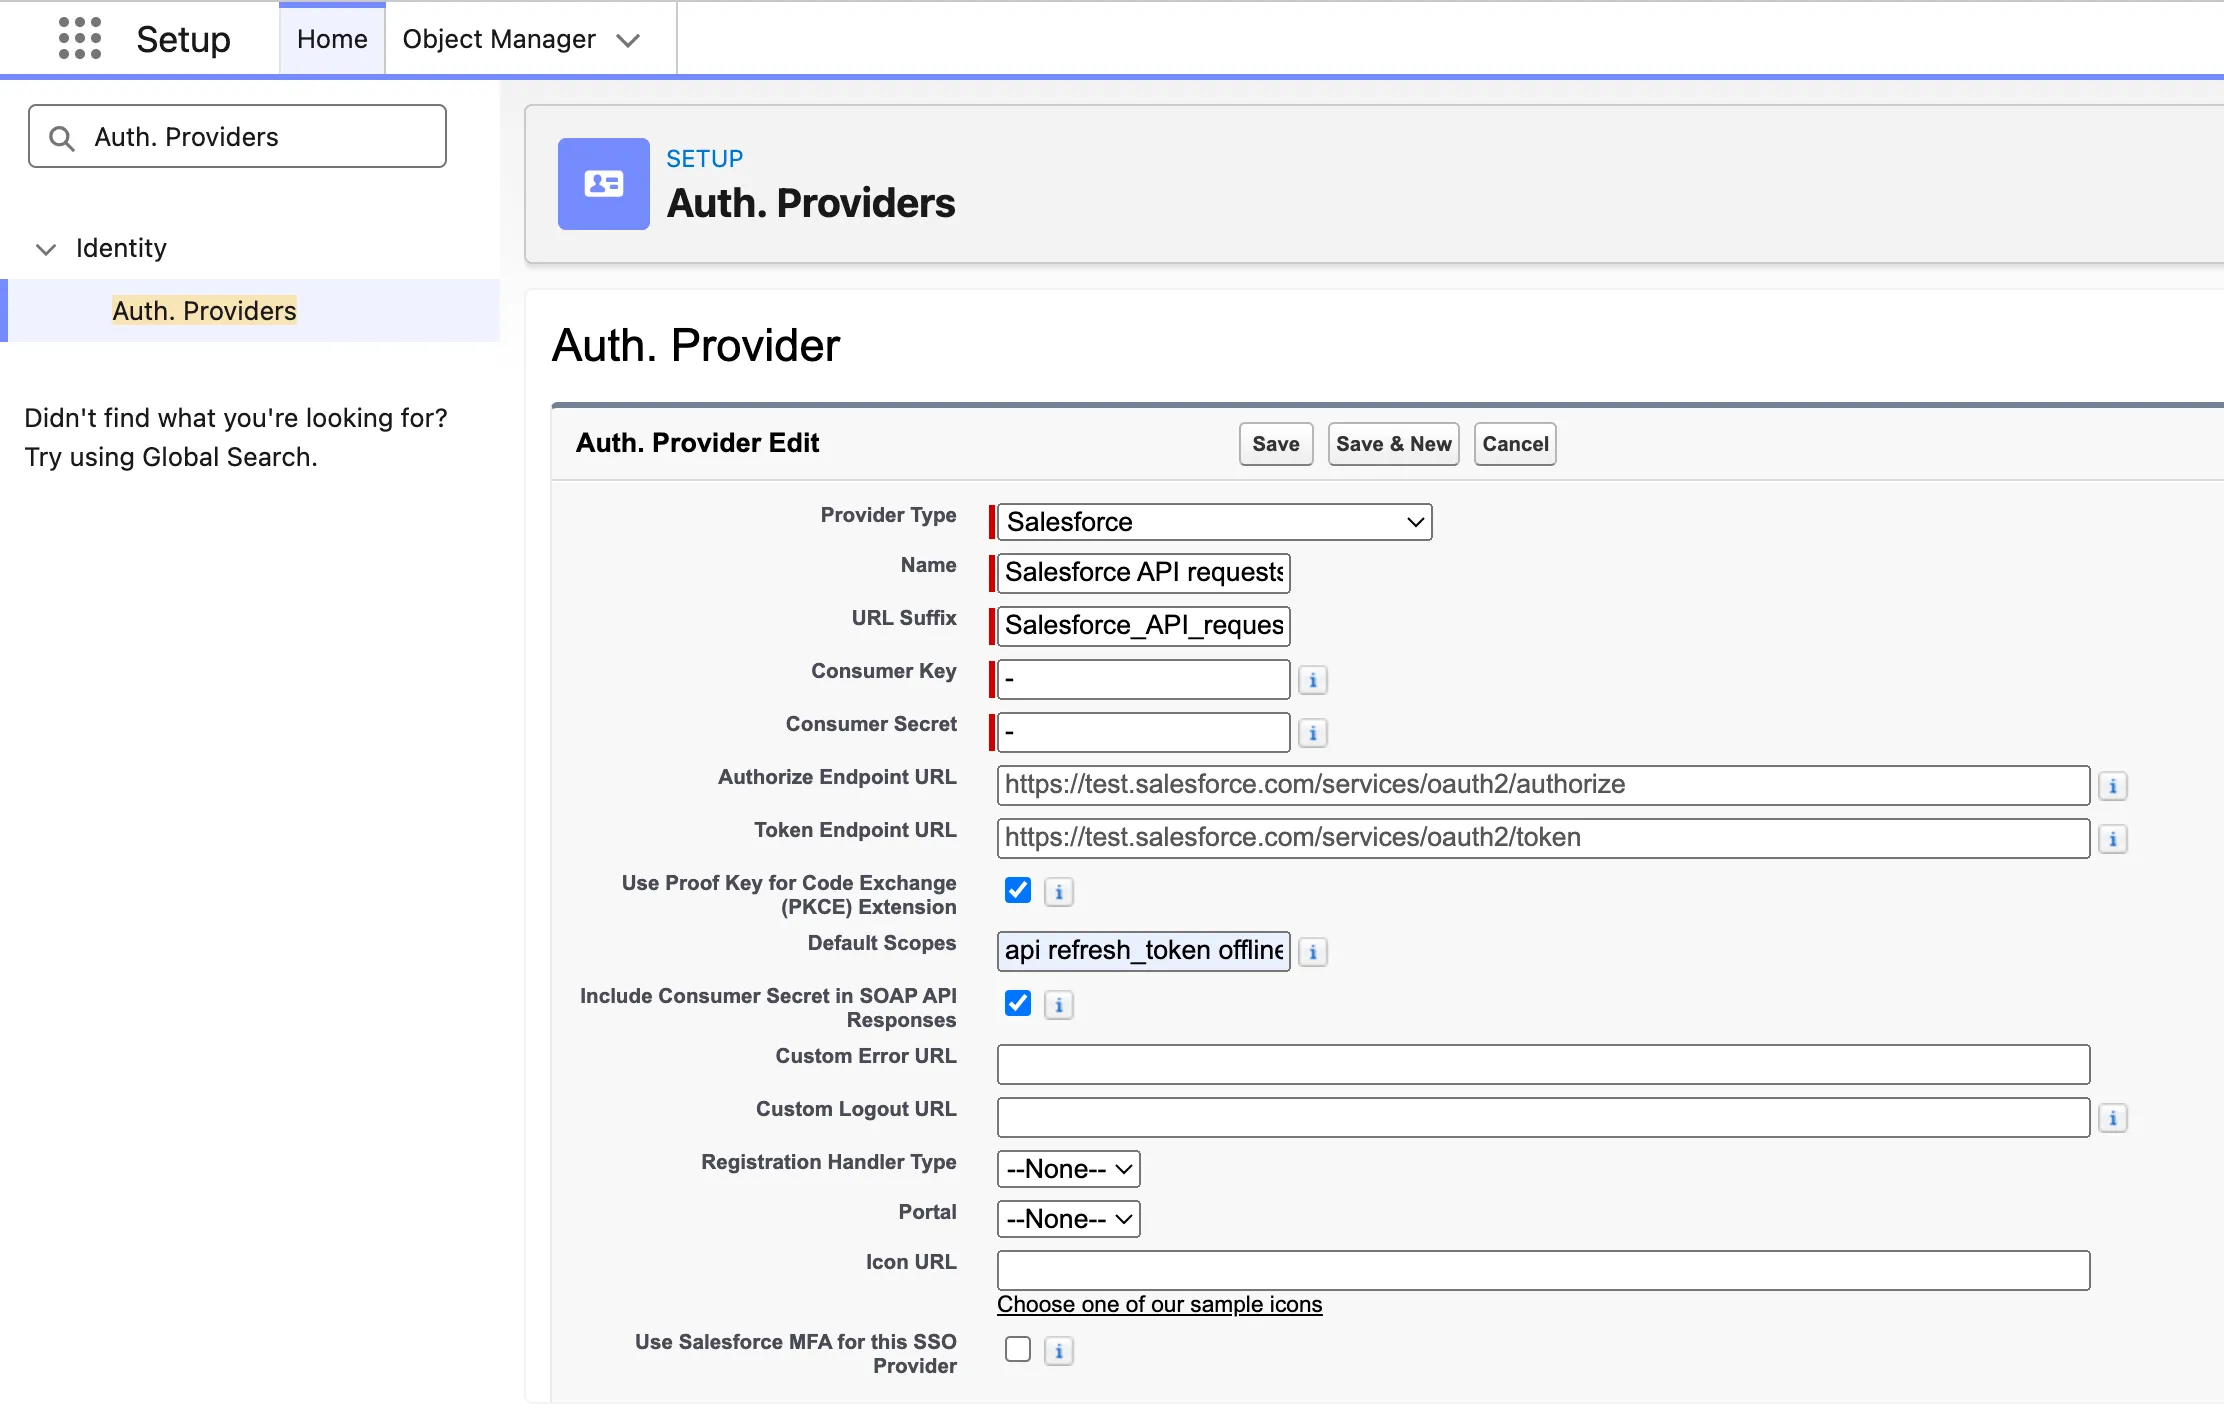
Create an Auth. Provider
Go to Setup → Quick Find Auth. Providers → Click New
- Set the following parameters:

- Provider Type:
Salesforce - Name:
Salesforce API requests(you can change this descriptive label). - URL Suffix:
Salesforce_API_requests(this is automatically generated based on the Name, it should be unique). - Consumer Key:
-(use this placeholder since the field cannot be blank, it will be updated later). - Consumer Secret:
-(use this placeholder since the field cannot be blank, it will be updated later). - Default Scopes:
api refresh_token offline_access
- Provider Type:
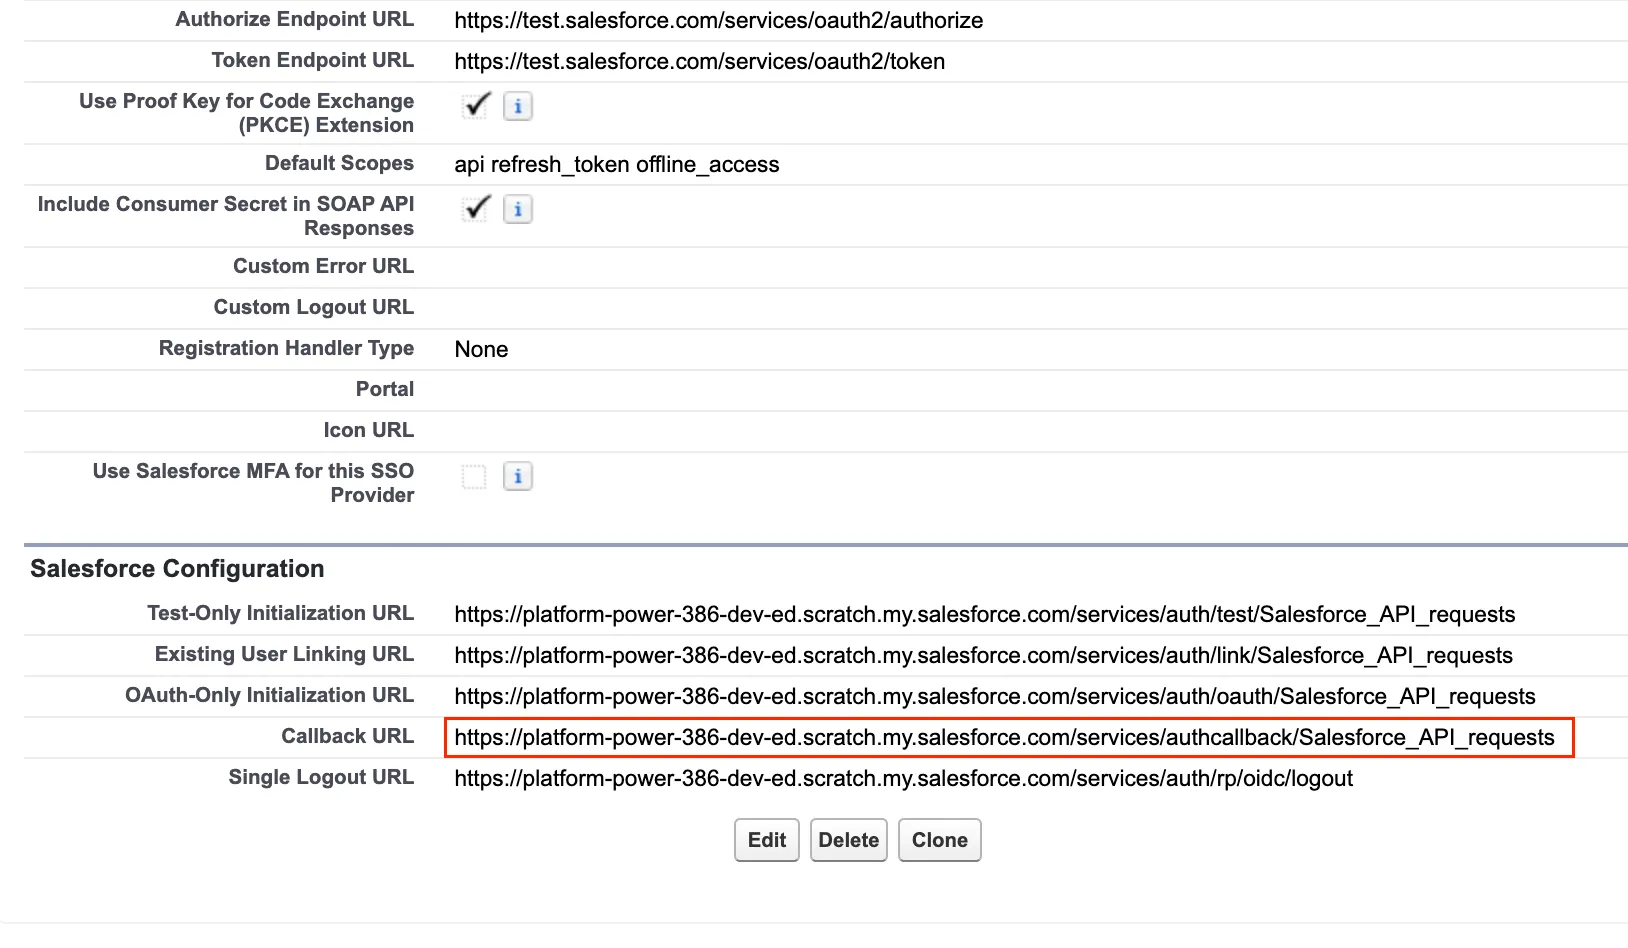
- Click Save.
- Once the Auth. Provider is created, a set of new parameters will appear. Copy the Callback URL; you will need to use it in the External Client App setup.
Create an External Client App
Go to Setup → Quick Find External Client App → External Client App Manager → Click New External Client App

- Set the following parameters:
- External Client App Name:
Salesforce API requests(you can change this descriptive label). - API Name:
Salesforce_API_requests(this is automatically generated based on the Name, it should be unique). - Contact Email:
Enter the admin email address - Distribution State: Local
- External Client App Name:
- Enable OAuth in API (Enable OAuth Settings) section.
- Set the following OAuth parameters:
- Callback URL: (Paste the Callback URL value from the Auth. Provider).
- Selected OAuth Scopes:
- Manage user data via APIs (api)
- Perform requests at any time (refresh_token, offline_access)
- Configure the remaining parameters (such as session timeout) to align with your company's security policies and requirements.
- Click Save.
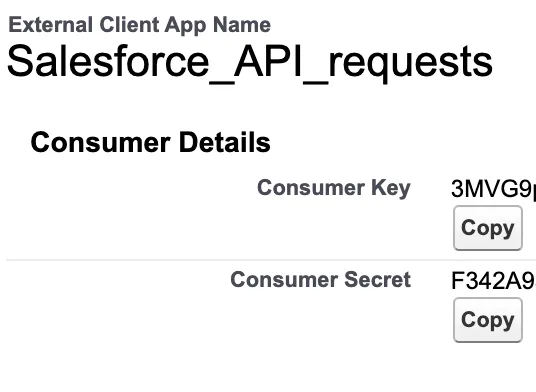
- Once the External Client App is created, go to Settings → OAuth Settings → App Settings → Consumer Key and Secret.
- Copy Consumer Key and Consumer Secret, you will need to use it in the Auth. Provider setup.

Update the Auth. Provider
Go to Setup → Quick Find Auth. Providers → Click Edit on Salesforce API requests
- Set the following parameters:
- Consumer Key: (paste the Consumer Key value from the External Client App).
- Consumer Secret: (paste the Consumer Secret value from the External Client App).
- Click Save.
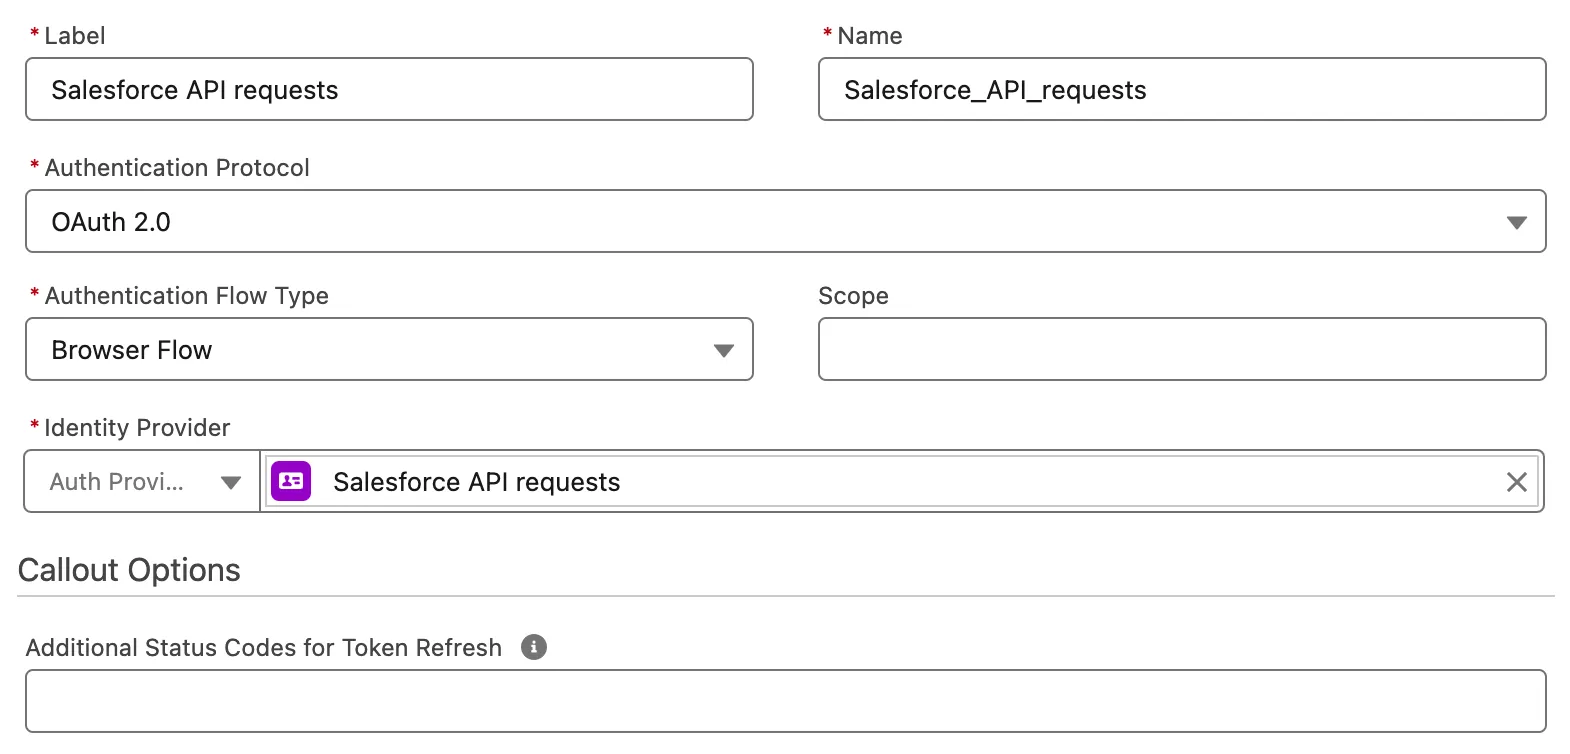
Create an External Credential
Go to Setup → Quick Find Named Credentials → Click External Credentials tab→ Click New

- Set the following parameters:
- Label:
Salesforce API requests - Name:
Salesforce_API_requests - Authentication Protocol:
OAuth 2.0 - Authentication Flow Type:
Browser Flow - Identity Provider:
Auth Provider-Salesforce API requests
- Label:
- Click Save.
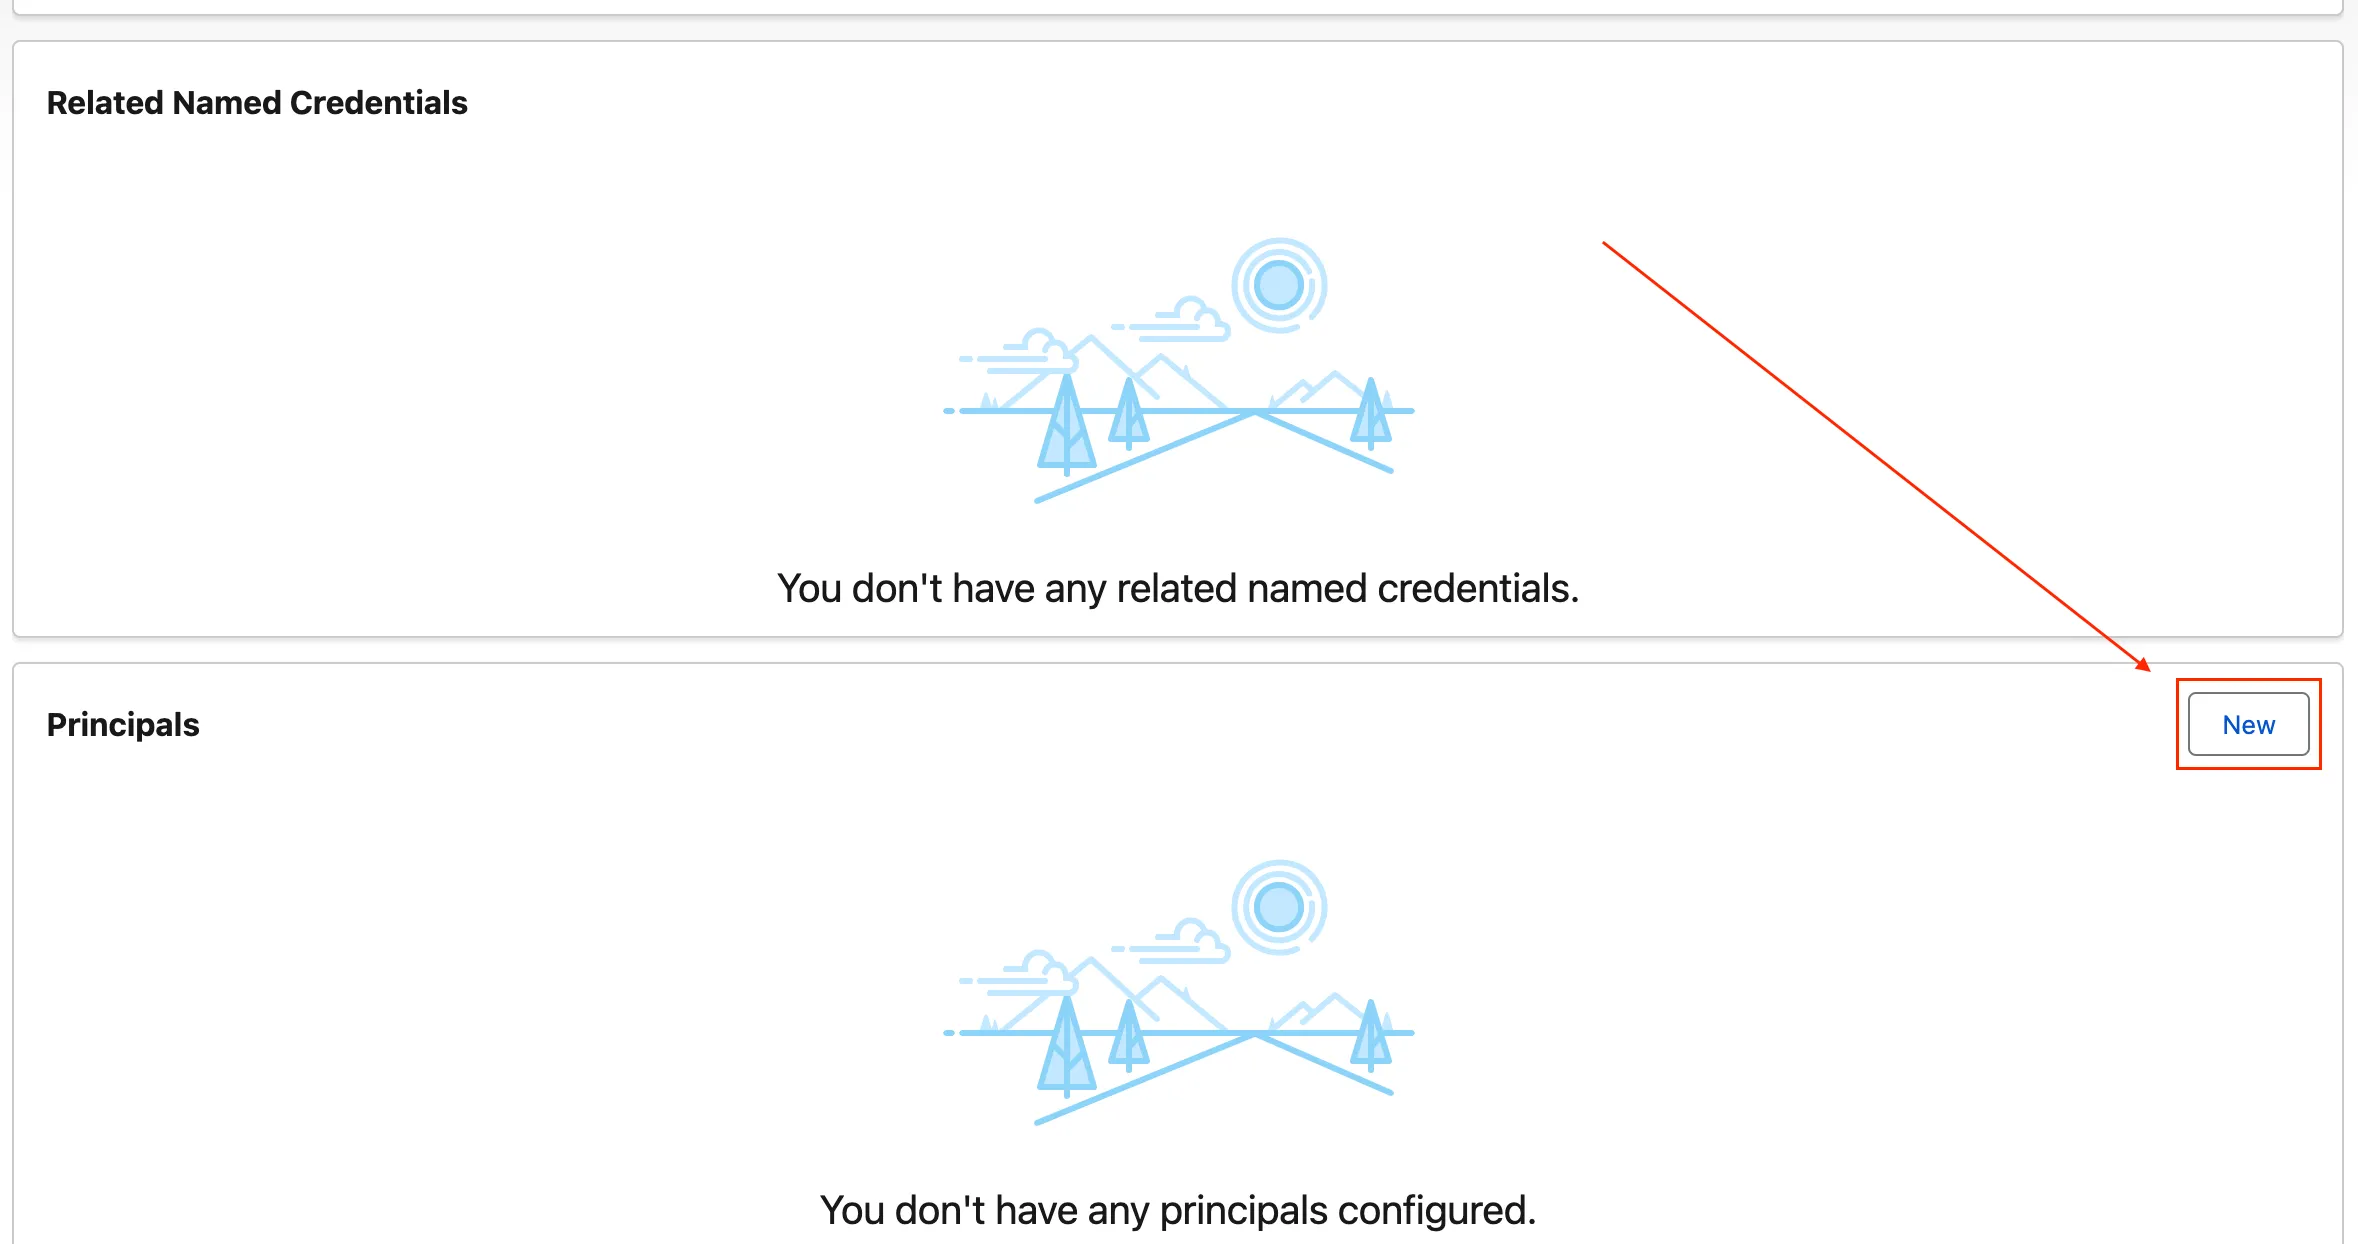
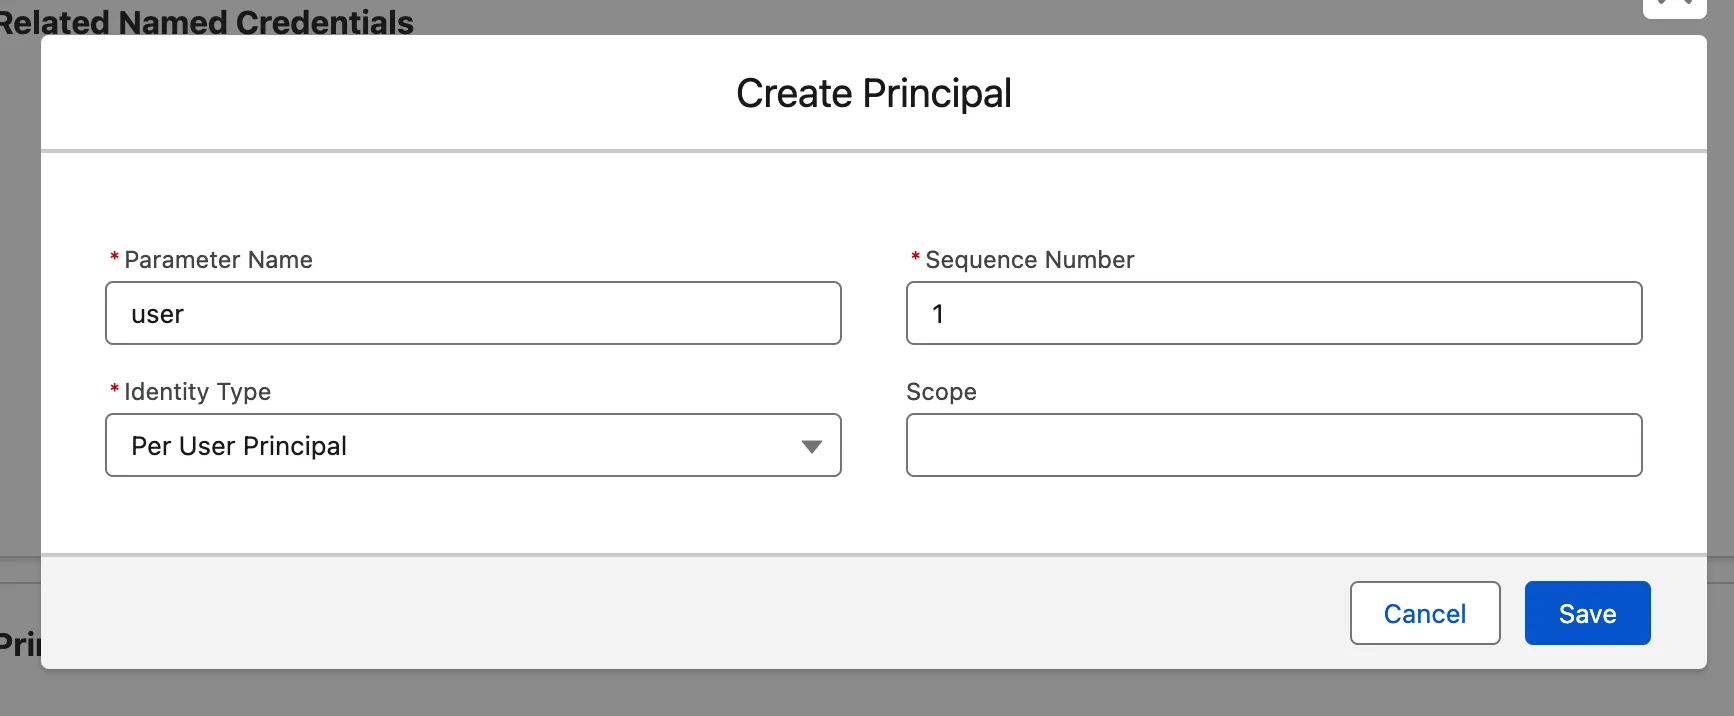
- Once the External Credential is created, navigate into it and set up a new Principal with these parameters:
- Parameter Name:
user(you can change this descriptive label). - Sequence Number:
1 - Identity Type:
Per User Principal
- Parameter Name:
- Click Save.
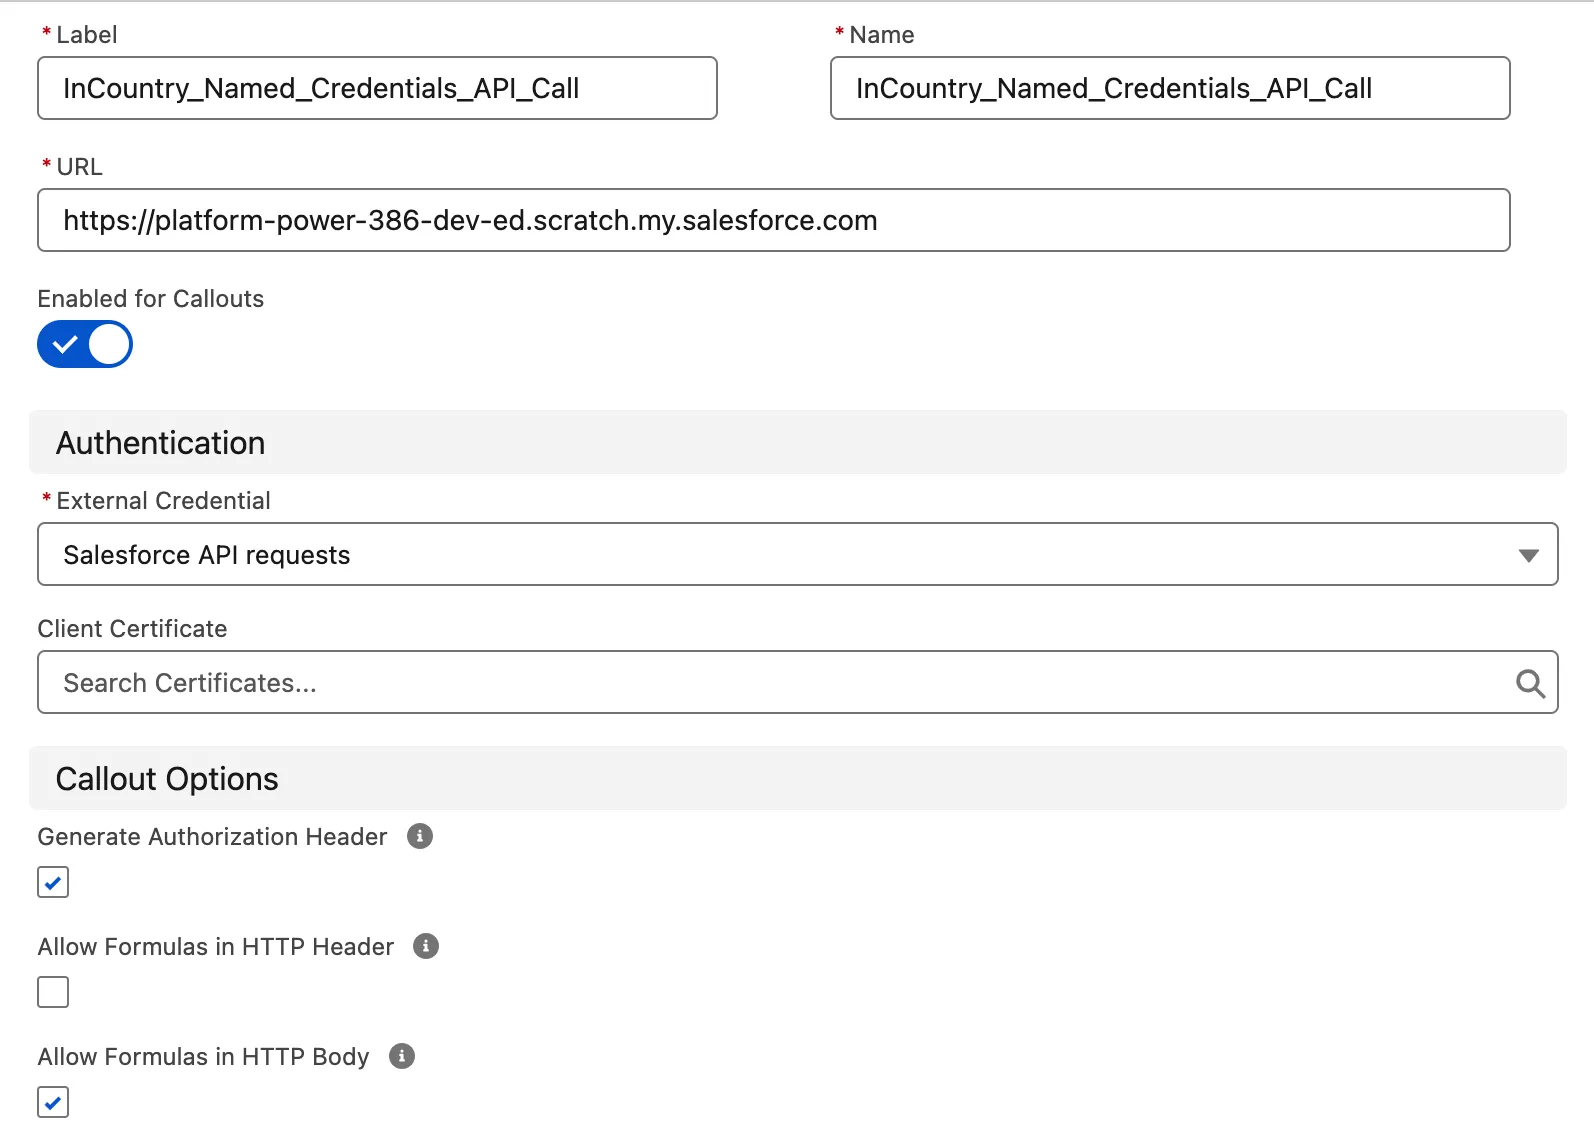
Create a Named Credential
Go to Setup → Quick Find Named Credentials → Click Named Credentials tab→ Click New
- Set the following parameters:
- Label:
InCountry_Named_Credentials_API_Call - Name:
InCountry_Named_Credentials_API_Call(do not change this name, the package relies on this exact name to execute its callouts to Salesforce.) - URL:
Enter your Salesforce org domain(you can find it in Setup → My Domain) - Authentication -> External Credential:
Salesforce API requests - Callout Options:
- Enable
Generate Authorization Header - Enable
Allow Formulas in HTTP Body
- Enable
- Managed Package Access → Allowed Namespaces for Callouts:
testIncountry1
- Label:
- Click Save.
Configure Permissions and Access
Create a Permission Set
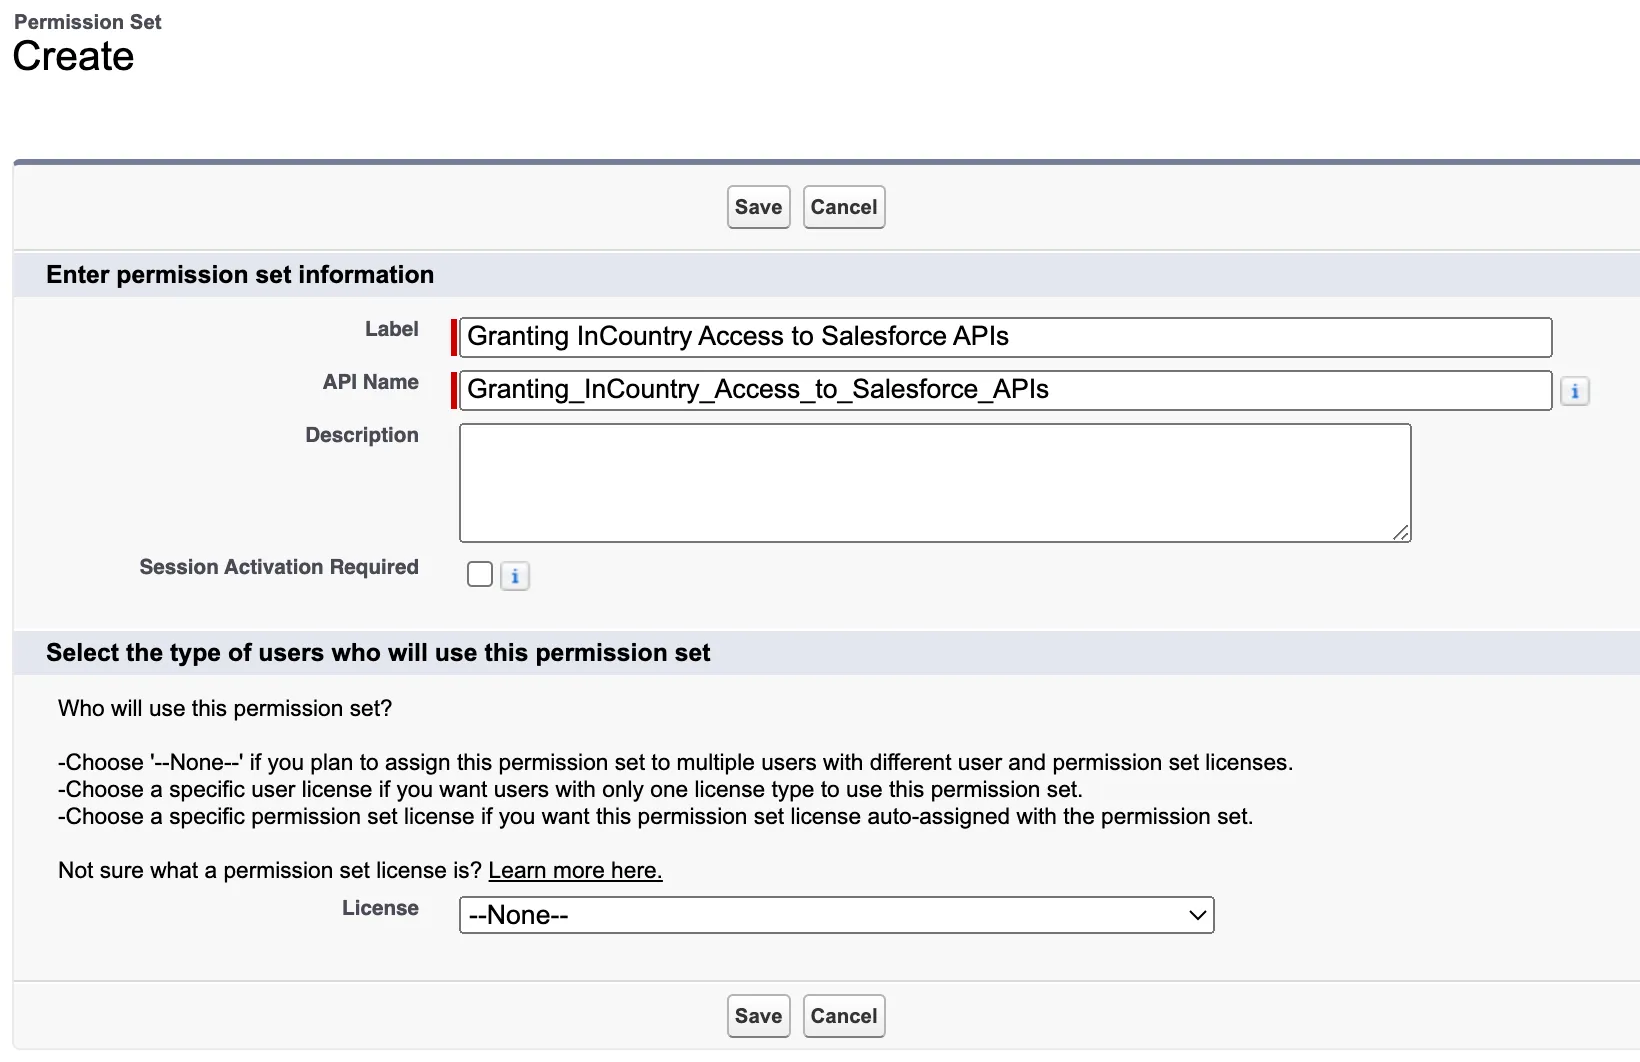
Go to Setup → Quick Find Permission Sets → Click New
- Set the following parameters:
- Label:
Granting InCountry Access to Salesforce APIs - API Name:
Granting_InCountry_Access_to_Salesforce_APIs
- Label:
- Click Save.
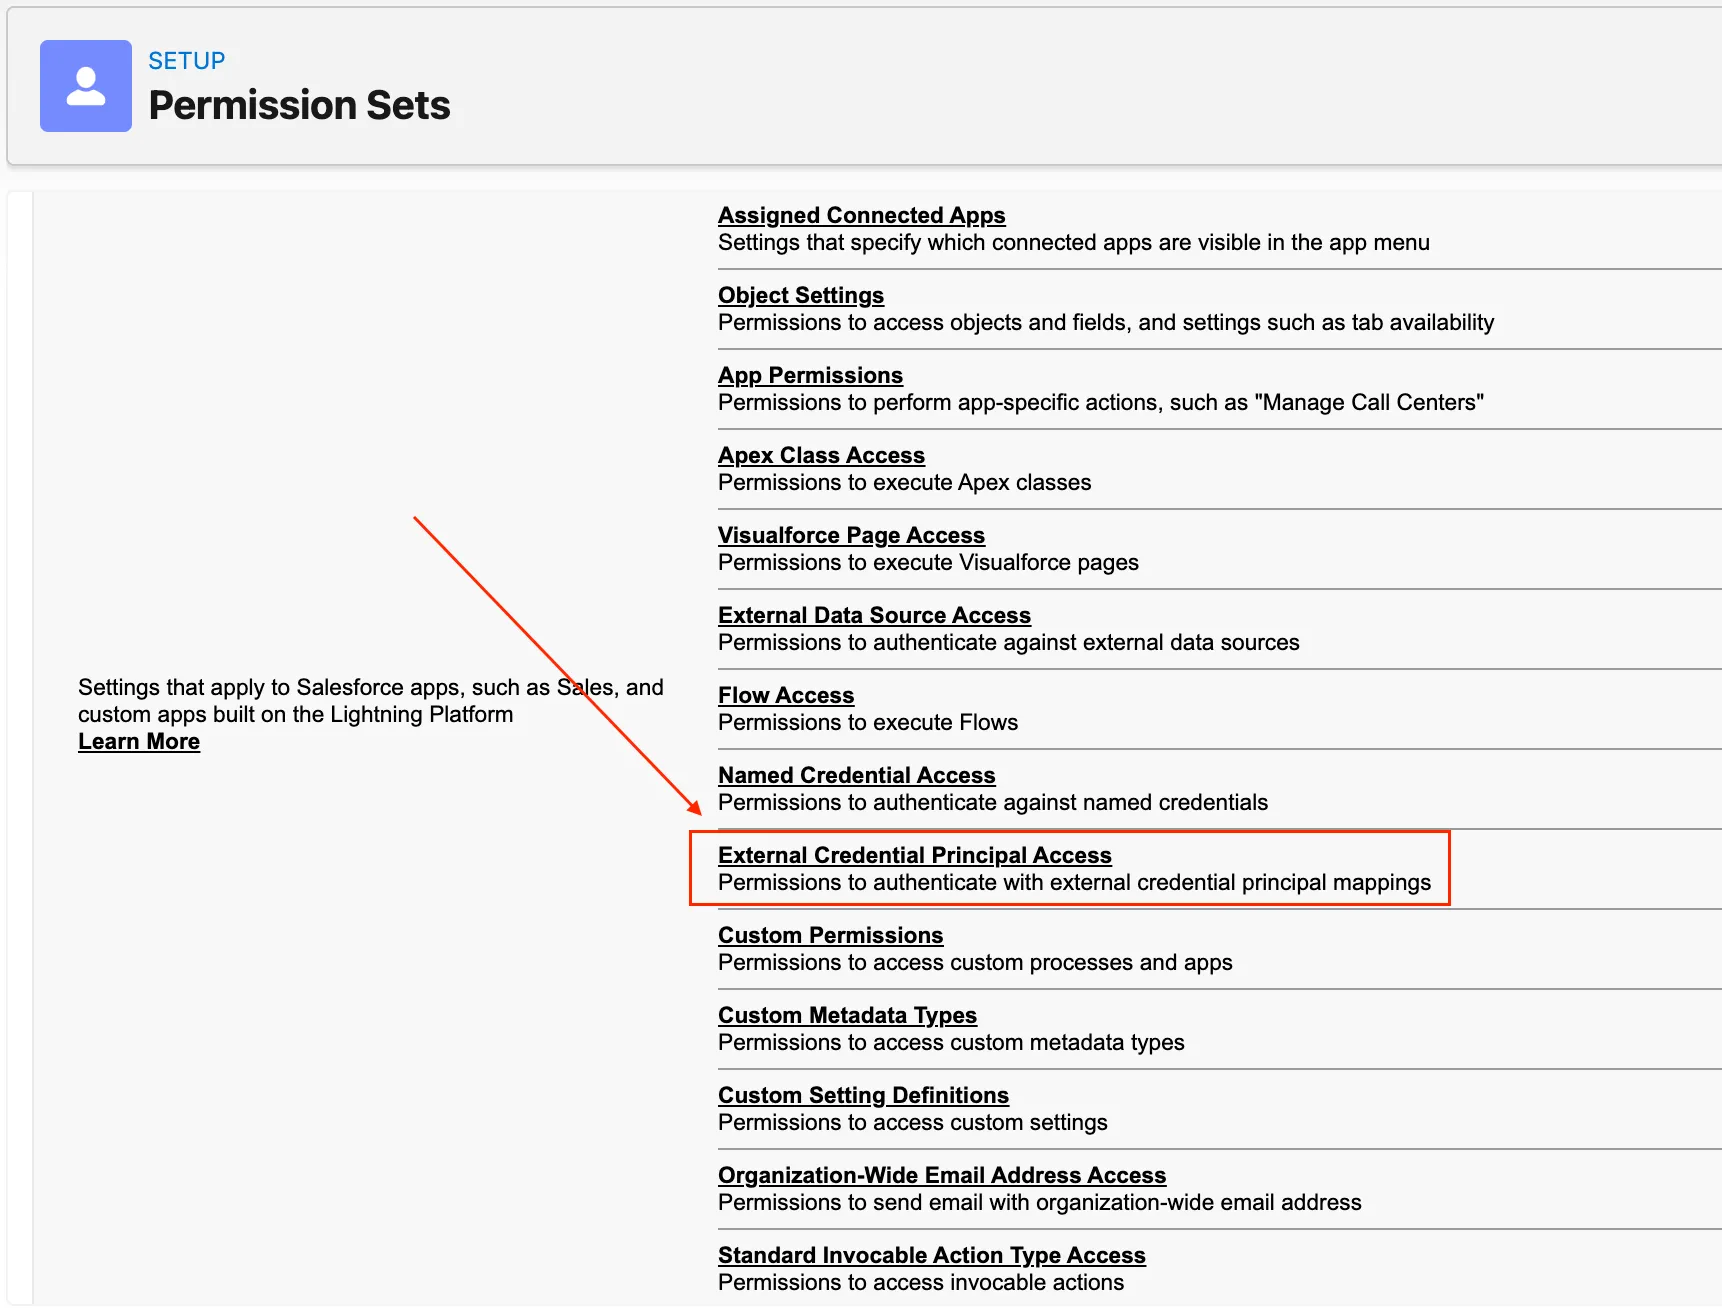
- You will be redirected to the Permission Set details page. From there, click External Credential Principal Access.
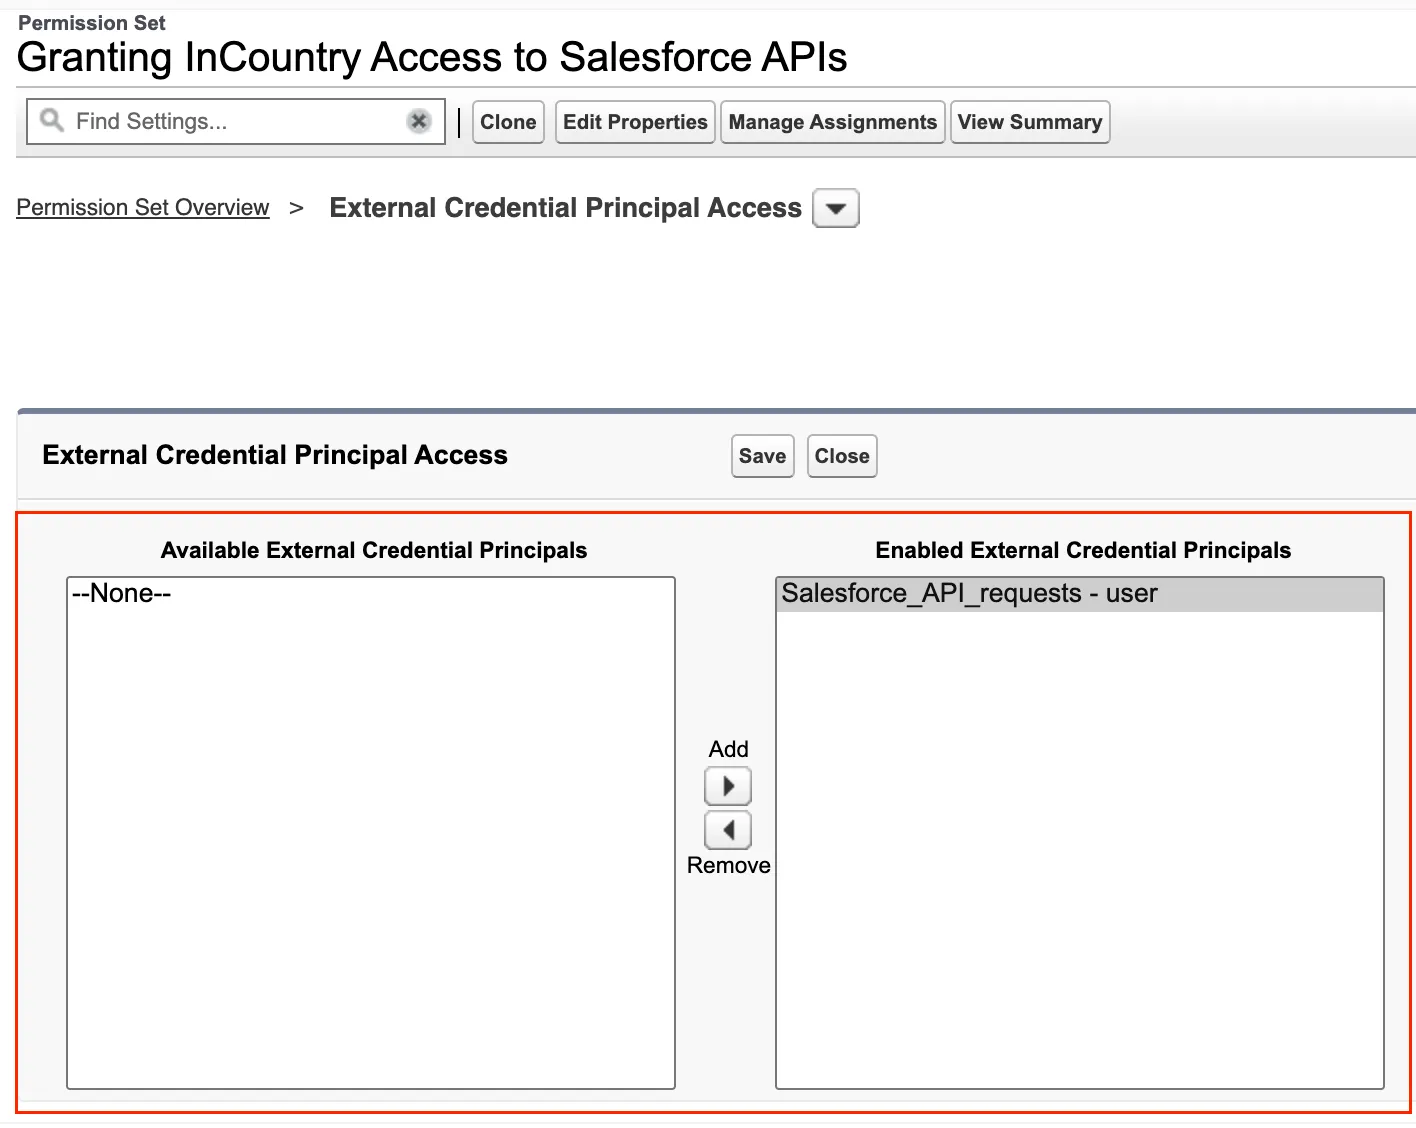
- Click Edit.
- Add
Salesforce_API_requests - userto Enabled External Credential Principals - Click Save.
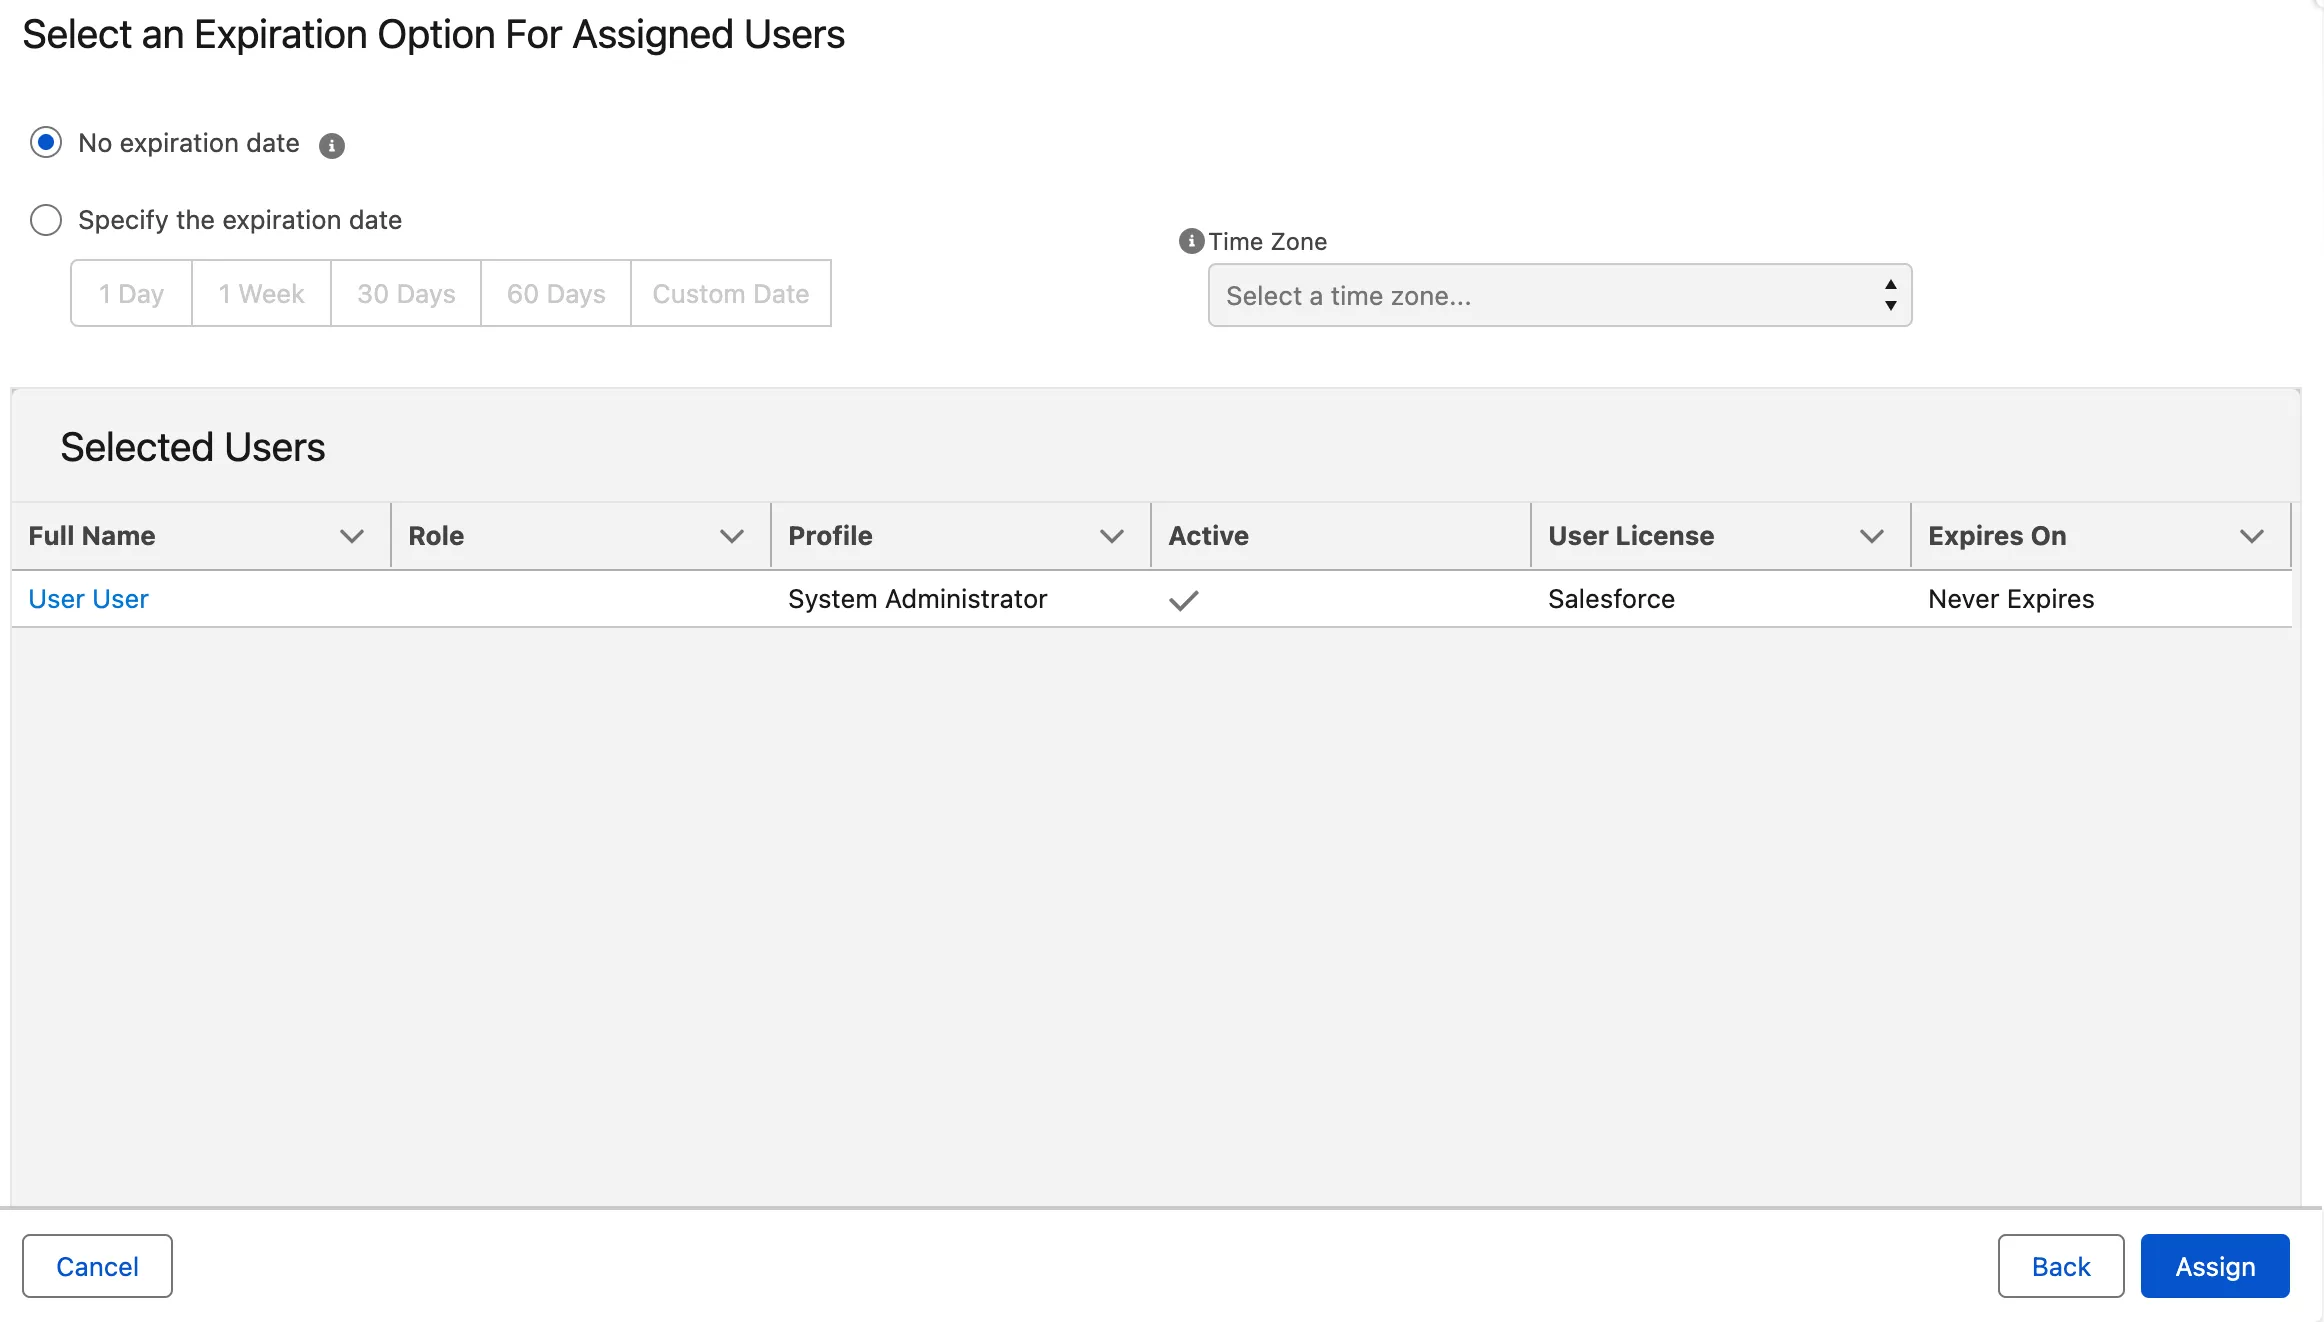
Assign the Permission Set to the necessary users
Go to Setup → Quick Find Permission Sets → Open Granting InCountry Access to Salesforce APIs
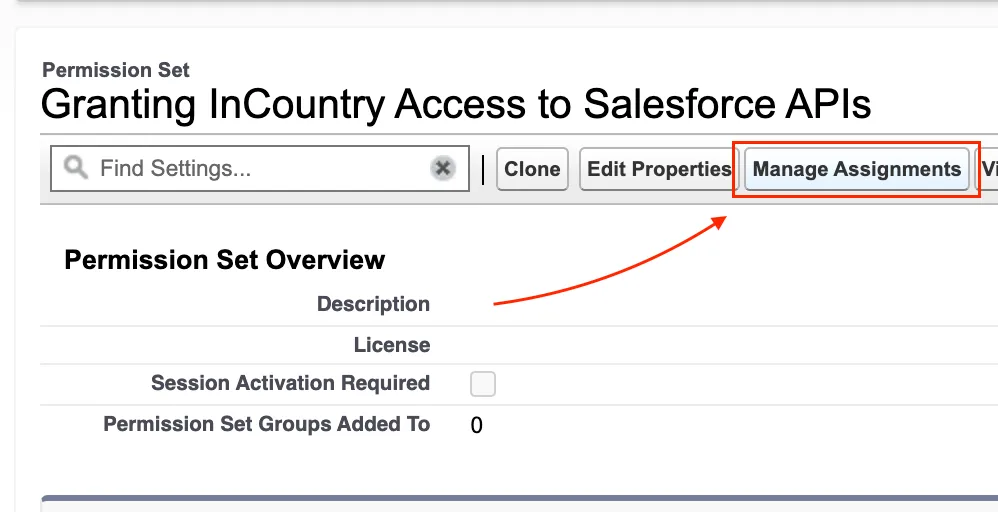
- Click Manage Assignments.
- Click Add Assignment.
- Select the users who need access to the InCountry package.
- Click Next.
- Set the expiration settings to align with your company's security policies.
- Click Assign.

Grant Access to the External Credential
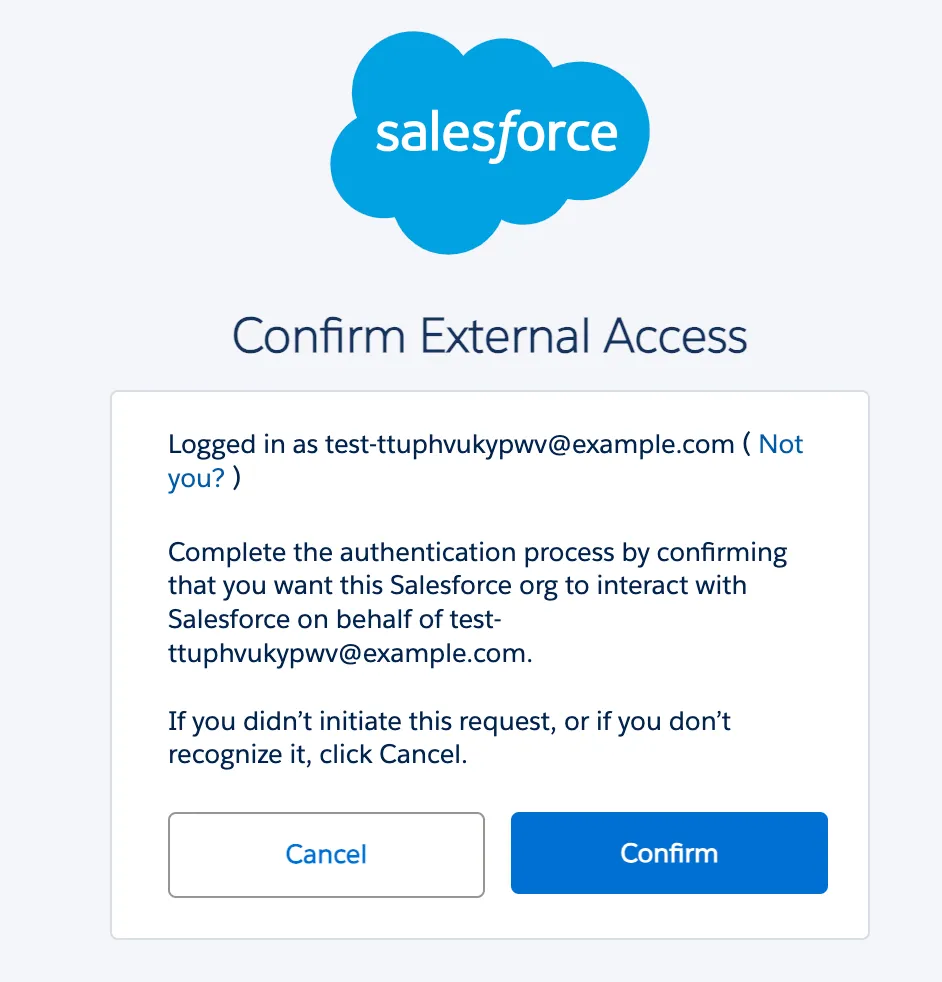
After assigning the Permission Set, the user must complete the authorization flow. This step grants the necessary permission for the External Credential to make API calls and is required for every user who needs access to the InCountry package.
-
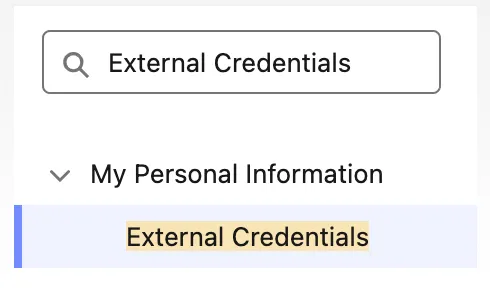
Go to the user settings.
-
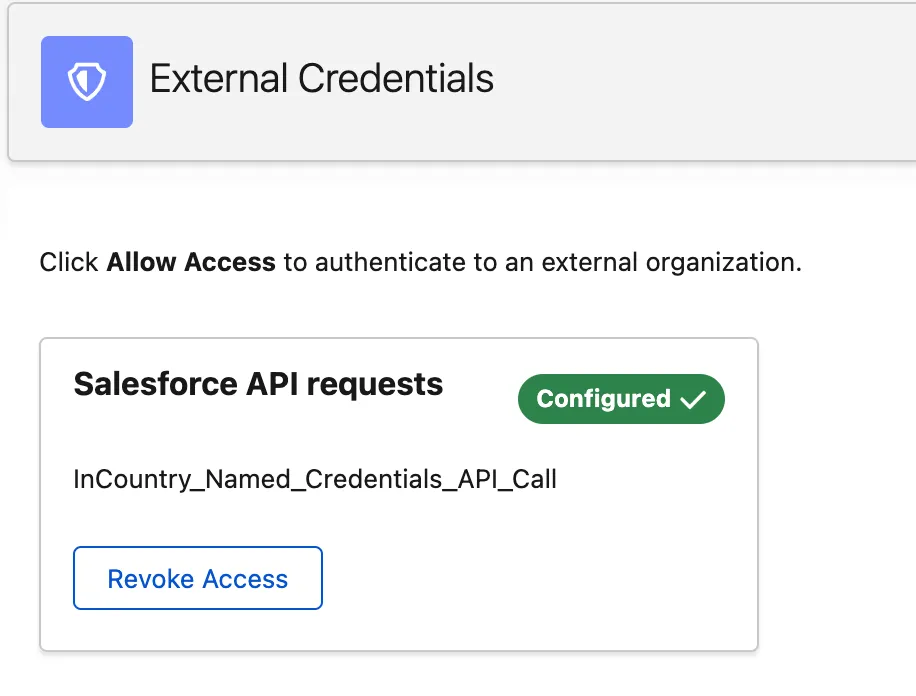
Open
External Credentials. -
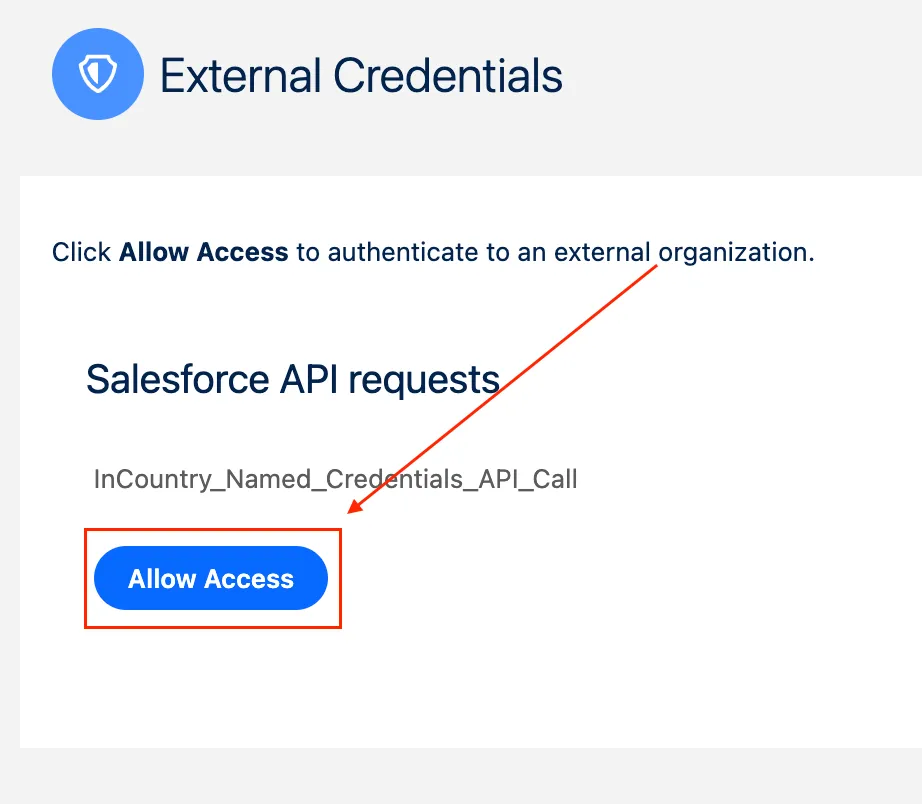
Click Allow Access for Salesforce API requests.
-
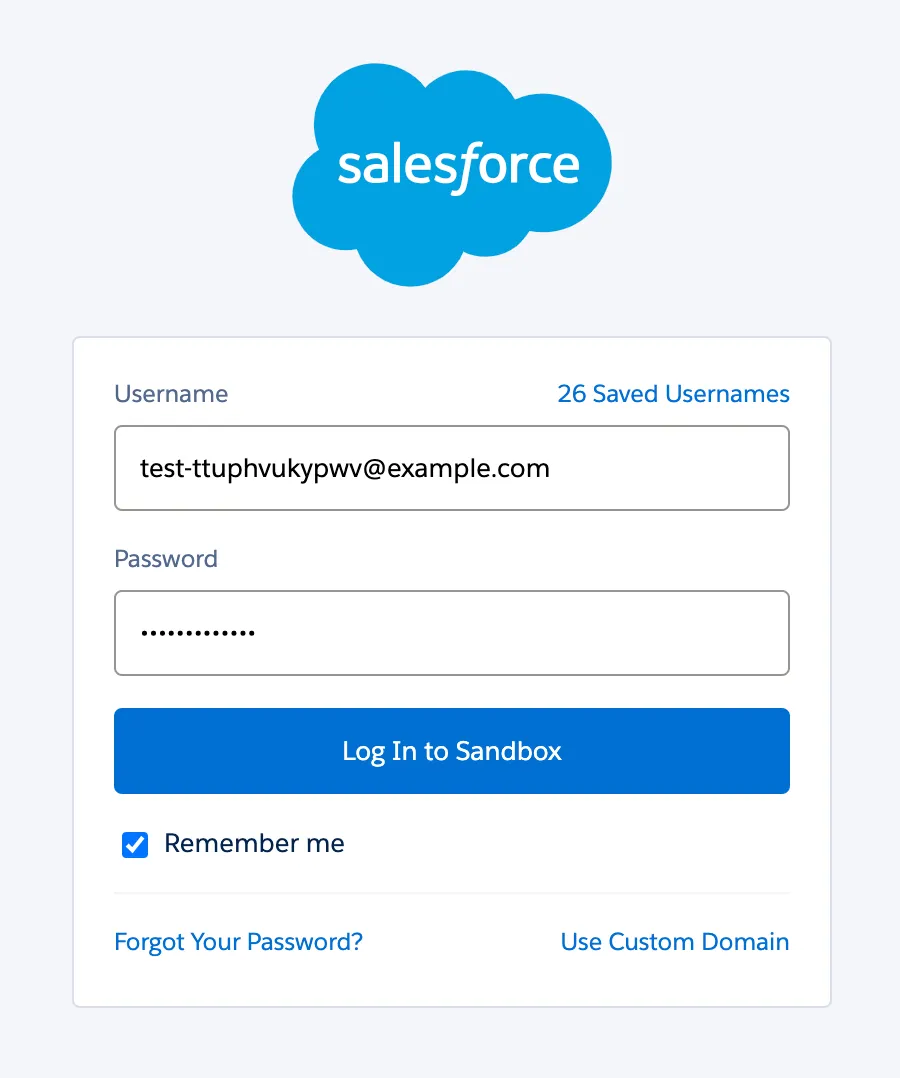
Log In to the Salesforce org.
-
Click Confirm.
-
Once the flow is complete, look for the Configured tag displayed above the External Credential.

Configure Resident Function Access for the Salesforce API
Customers can create their own Resident Functions to execute custom calculations or complex logic. These functions are triggered by package events (such as save, update, or lead conversion) and can send data back to Salesforce.
To enable this communication, we use an External Client App and the Client Credentials Flow. Therefore, all changes pushed from the Resident Function back to Salesforce will be recorded as being made by the single "Run As" user assigned in the External Client App.
Create an External Client App
Go to Setup → Quick Find External Client App → External Client App Manager → Click New External Client App
-
Set the following parameters:
- External Client App Name:
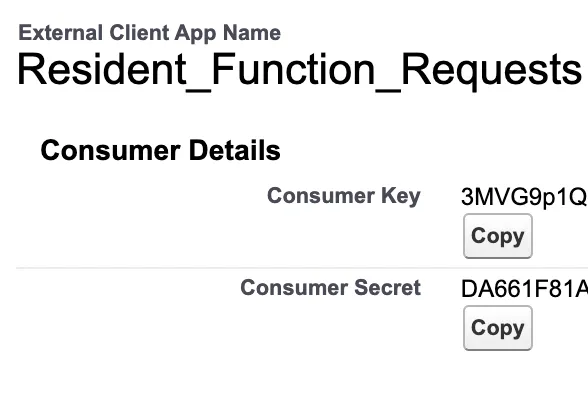
Resident Function Requests(you can change this descriptive label). - API Name:
Resident_Function_Requests(this is automatically generated based on the Name, it should be unique). - Contact Email:
Enter the admin email address - Distribution State: Local
- External Client App Name:
-
Enable OAuth in API (Enable OAuth Settings) section.
-
Set the following OAuth parameters:
- Callback URL: (enter any value here; for example
{your org}/services/oauth2/success) - Selected OAuth Scopes:
- Manage user data via APIs (api)
- Callback URL: (enter any value here; for example
-
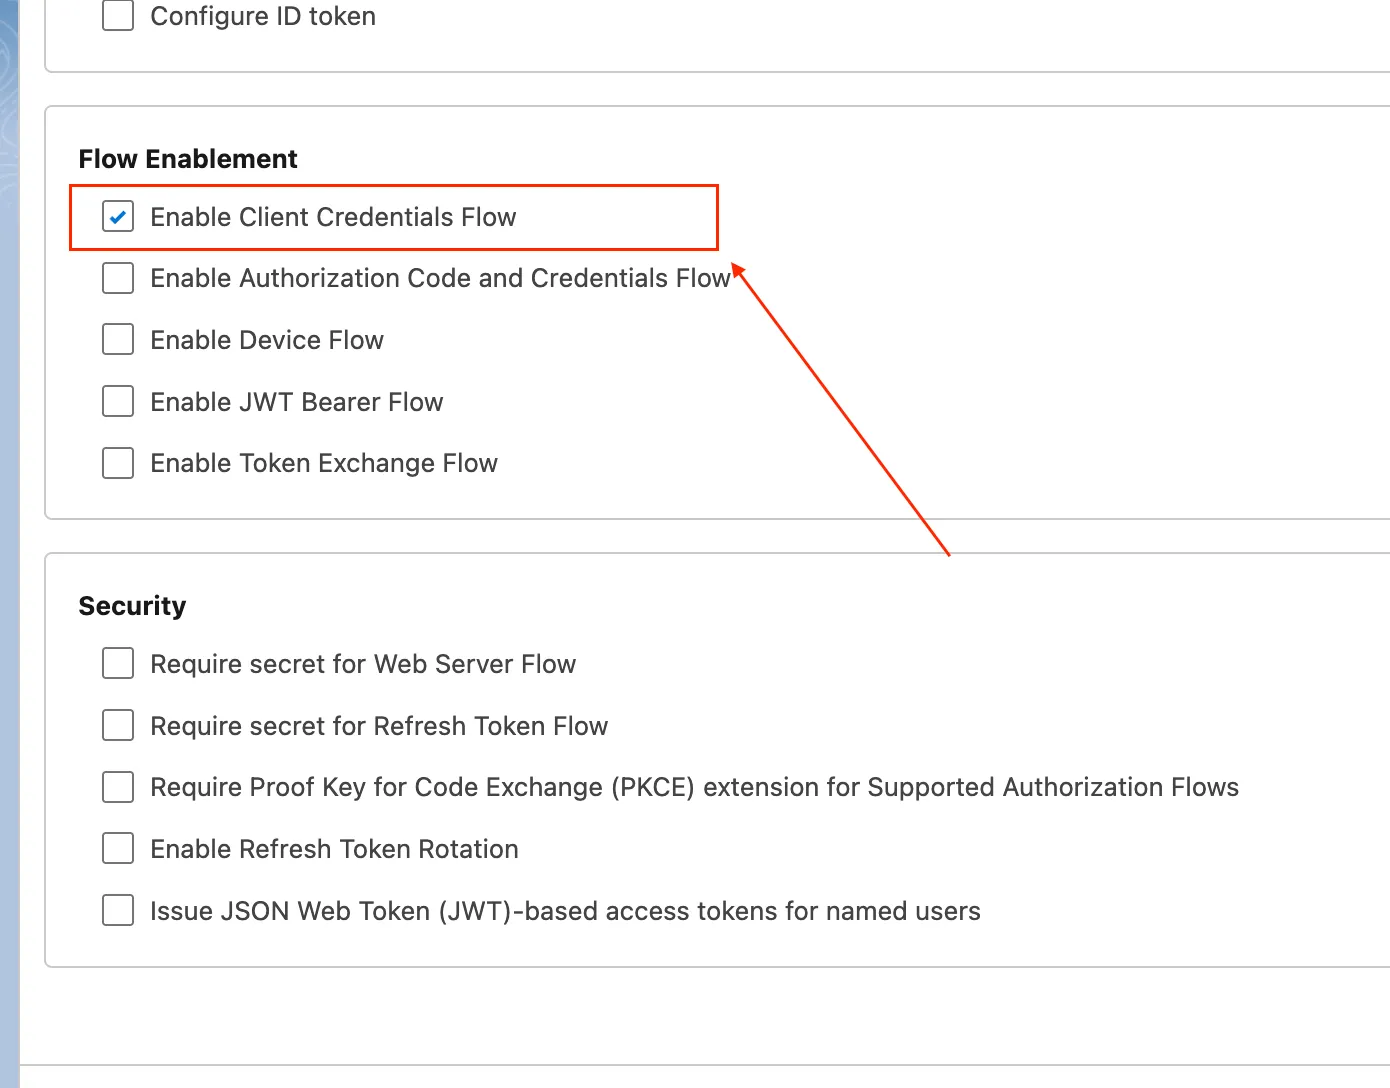
Enable Client Credentials Flow.
-
Configure the remaining parameters (such as session timeout) to align with your company's security policies and requirements.
-
Click Save.
-
Once the External Client App is created, go to Settings → OAuth Settings → App Settings → Consumer Key and Secret.
-
Copy Consumer Key and Consumer Secret, you will need to use it in the Auth. Provider setup.
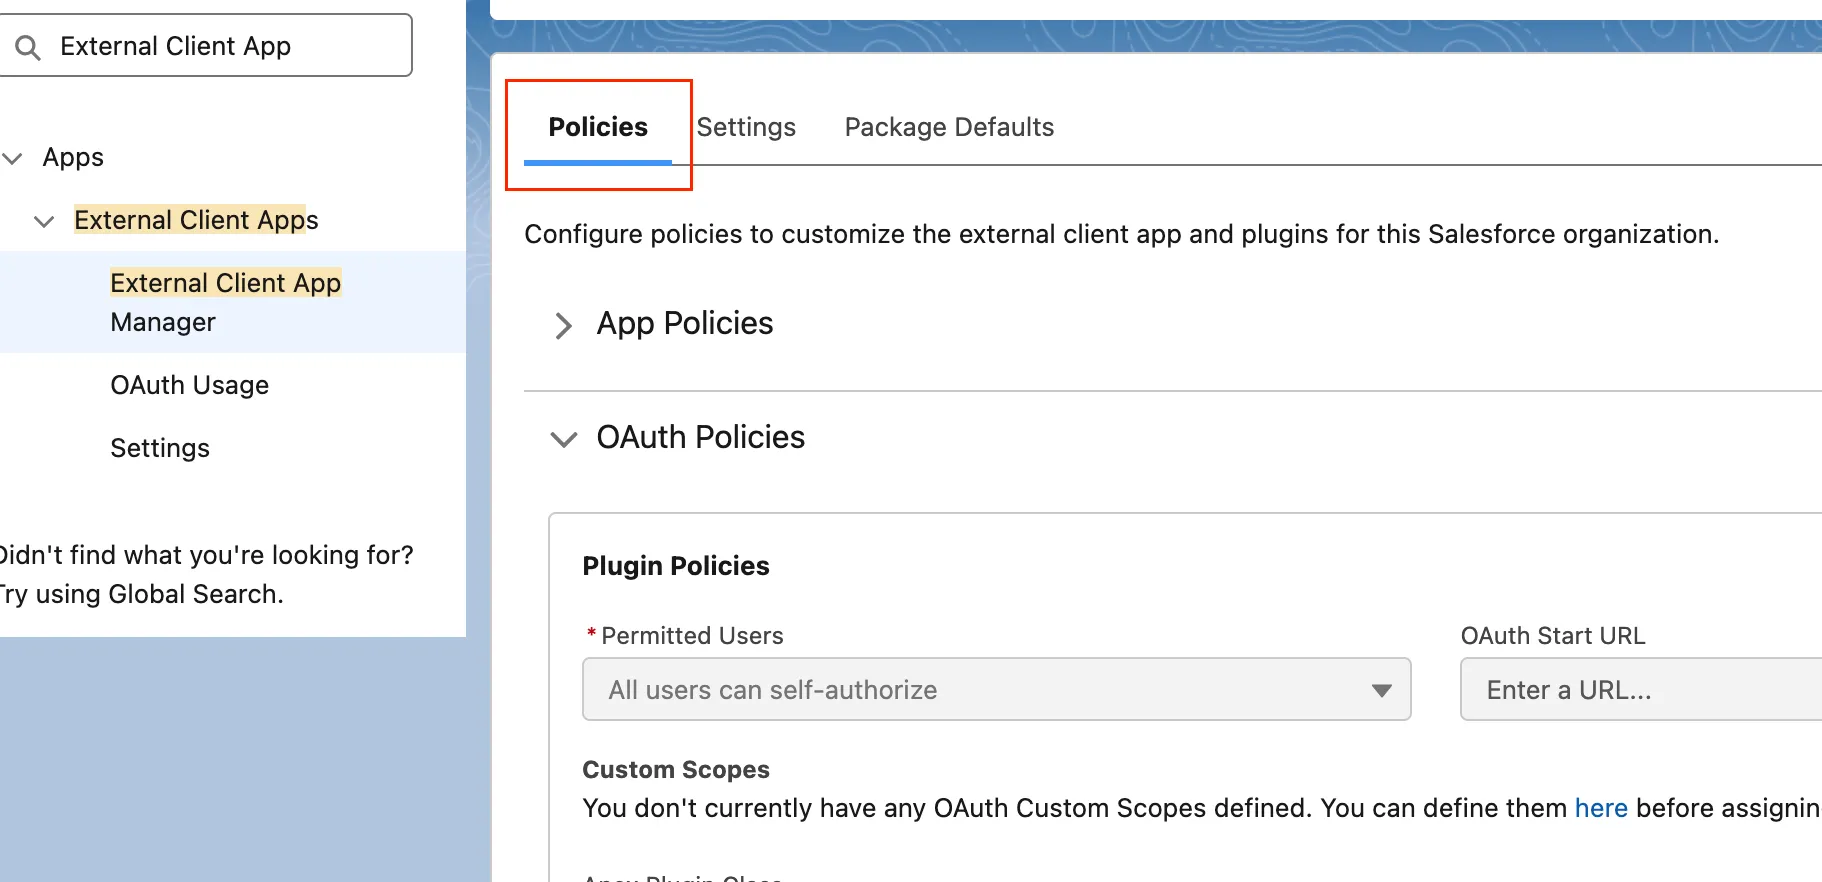
-
Click Policies.
-
Click Edit.
-
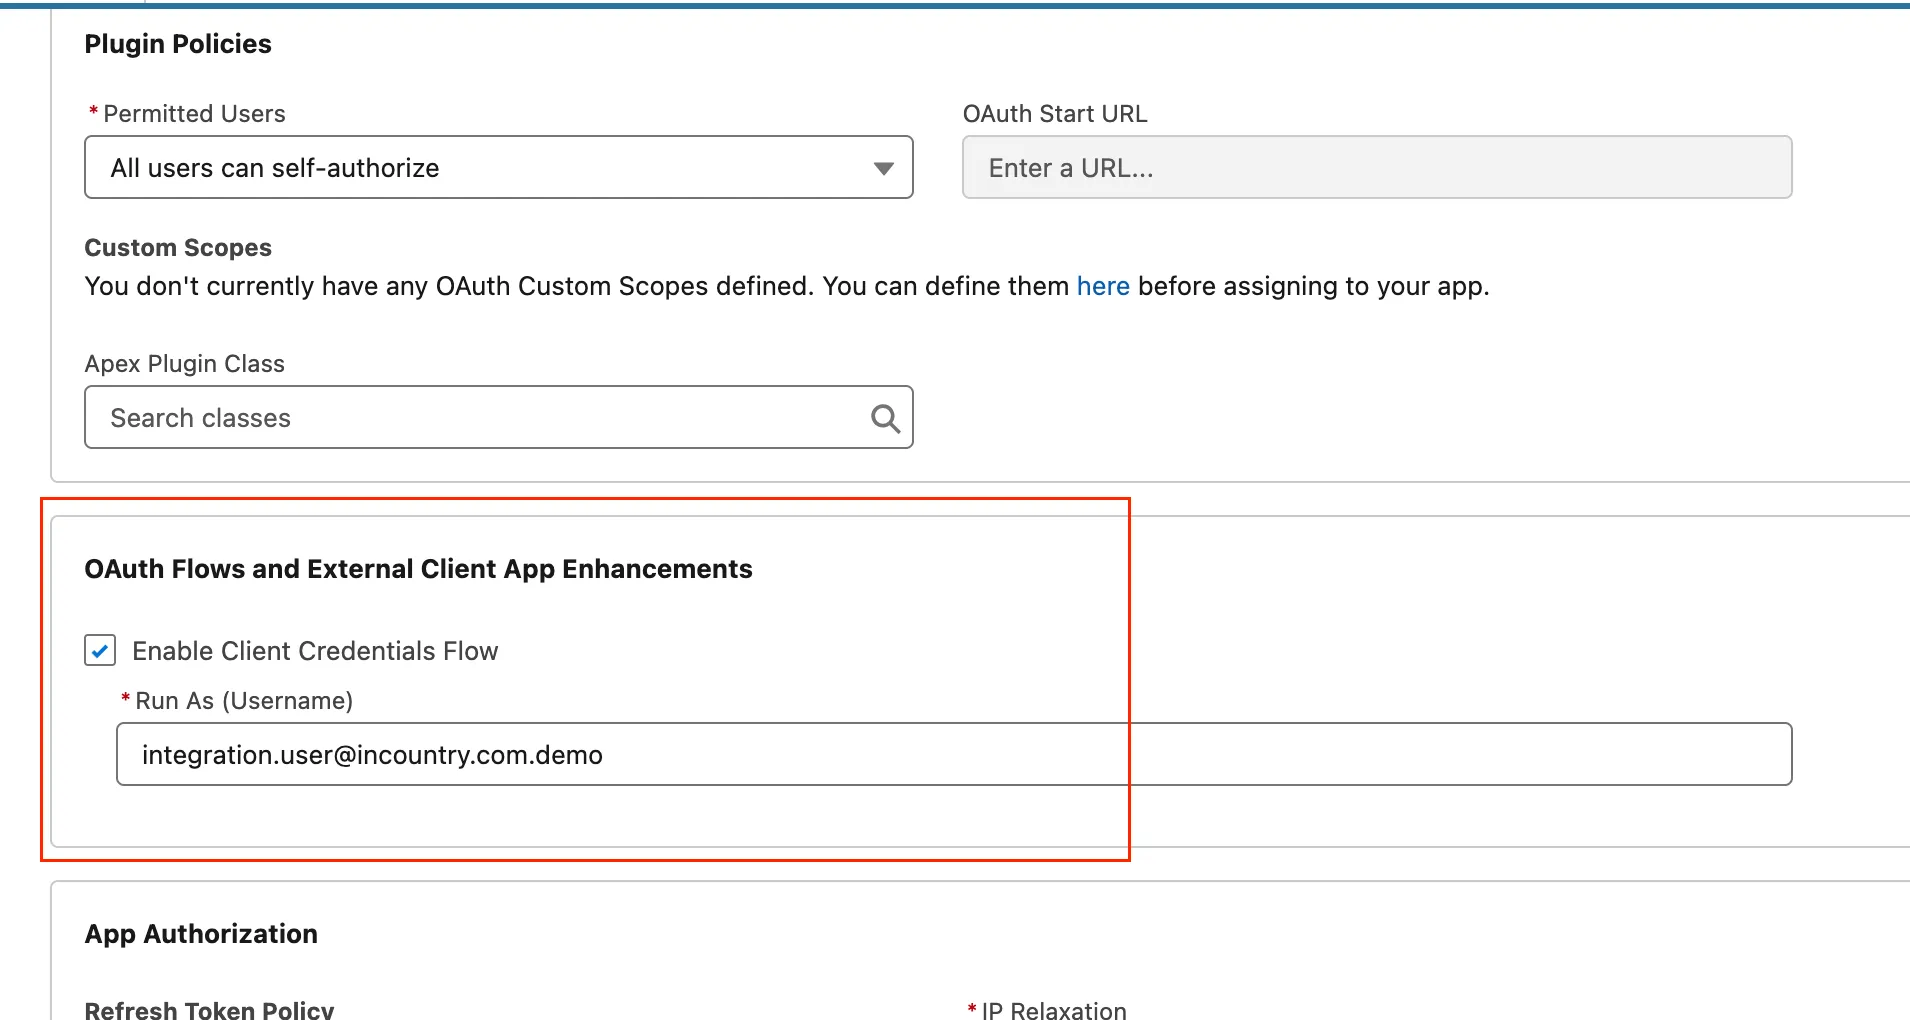
Scroll to the OAuth Flows and External Client App Enhancements section.
- Activate Enable Client Credentials Flow,
- Find Run As, and assign a user who has the API Enabled permission.
-
Click Save.
Create the Resident Function
Customers can still use this documentation to create their custom Resident Functions. However, if a function needs to send a request back to Salesforce, it must first obtain an access token via a separate API request.
Example: Resident Function to Obtain an Access Token and Send an Update Request to Salesforce
module.exports.handler = async (storage, country, params, modules) => {
    const result = {
        data: '',
        error: false,
        errorMsg: null
    };
    const getSalesforceAccessToken = async () => {
        // --- IMPORTANT: Replace these placeholder values with your actual credentials ---
        const clientId = 'XXXXX'; // Your External Client App's Consumer Key
        const clientSecret = 'XXXXXX'; // Your External Client App's Consumer Secret
        // ---
        const tokenUrl = `${params.sfdcBaseUrl}/services/oauth2/token`;
        const requestData = {
            grant_type: 'client_credentials',
            client_id: clientId,
            client_secret: clientSecret,
        };
        const requestHeaders = {
            'Content-Type': 'application/x-www-form-urlencoded',
        };
        try {
            const postData = Object.entries(requestData)
                .map(([key, value]) => `${encodeURIComponent(key)}=${encodeURIComponent(value)}`)
                .join('&');
            const response = await modules.axios.post(
                tokenUrl,
                postData, {
                    headers: requestHeaders,
                },
            );
            return response.data;
        } catch (error) {
            result.error = true;
            result.errorMsg = `Error getting Salesforce access token: ${error.message}`;
            return null;
        }
    }
    const authData = await getSalesforceAccessToken();
    if (authData) {
        const endpoint = `${authData?.instance_url}/services/data/v64.0/sobjects/Lead/${params.id}`;
        const body = {
            Phone: '222-22-22'
        };
        const headers = {
            headers: {
                "Authorization": "Bearer " + authData?.access_token,
                "Content-Type": "application/json",
            }
        };
        await modules.axios.patch(
            endpoint,
            body,
            headers,
        );
        result.data = 'Record successful updated'
    }
    return result;
}
Package Upgrade Guide
Upgrade the package using the same method as installation. To upgrade the InCountry Data Residency for Salesforce package to beta releases, contact the InCountry team beforehand.
If upgrading from version 1.262 or earlier, you must take the following steps to retain your current InCountry credentials. This is required because we revised the credentials usage and storage flow, removing direct user access.
If you have not yet provided access to the required Salesforce APIs, please review the instructions in this installation guide.
Before upgrade
Go to App Launcher → InCountry Setup → Settings page → open Endpoints tab.
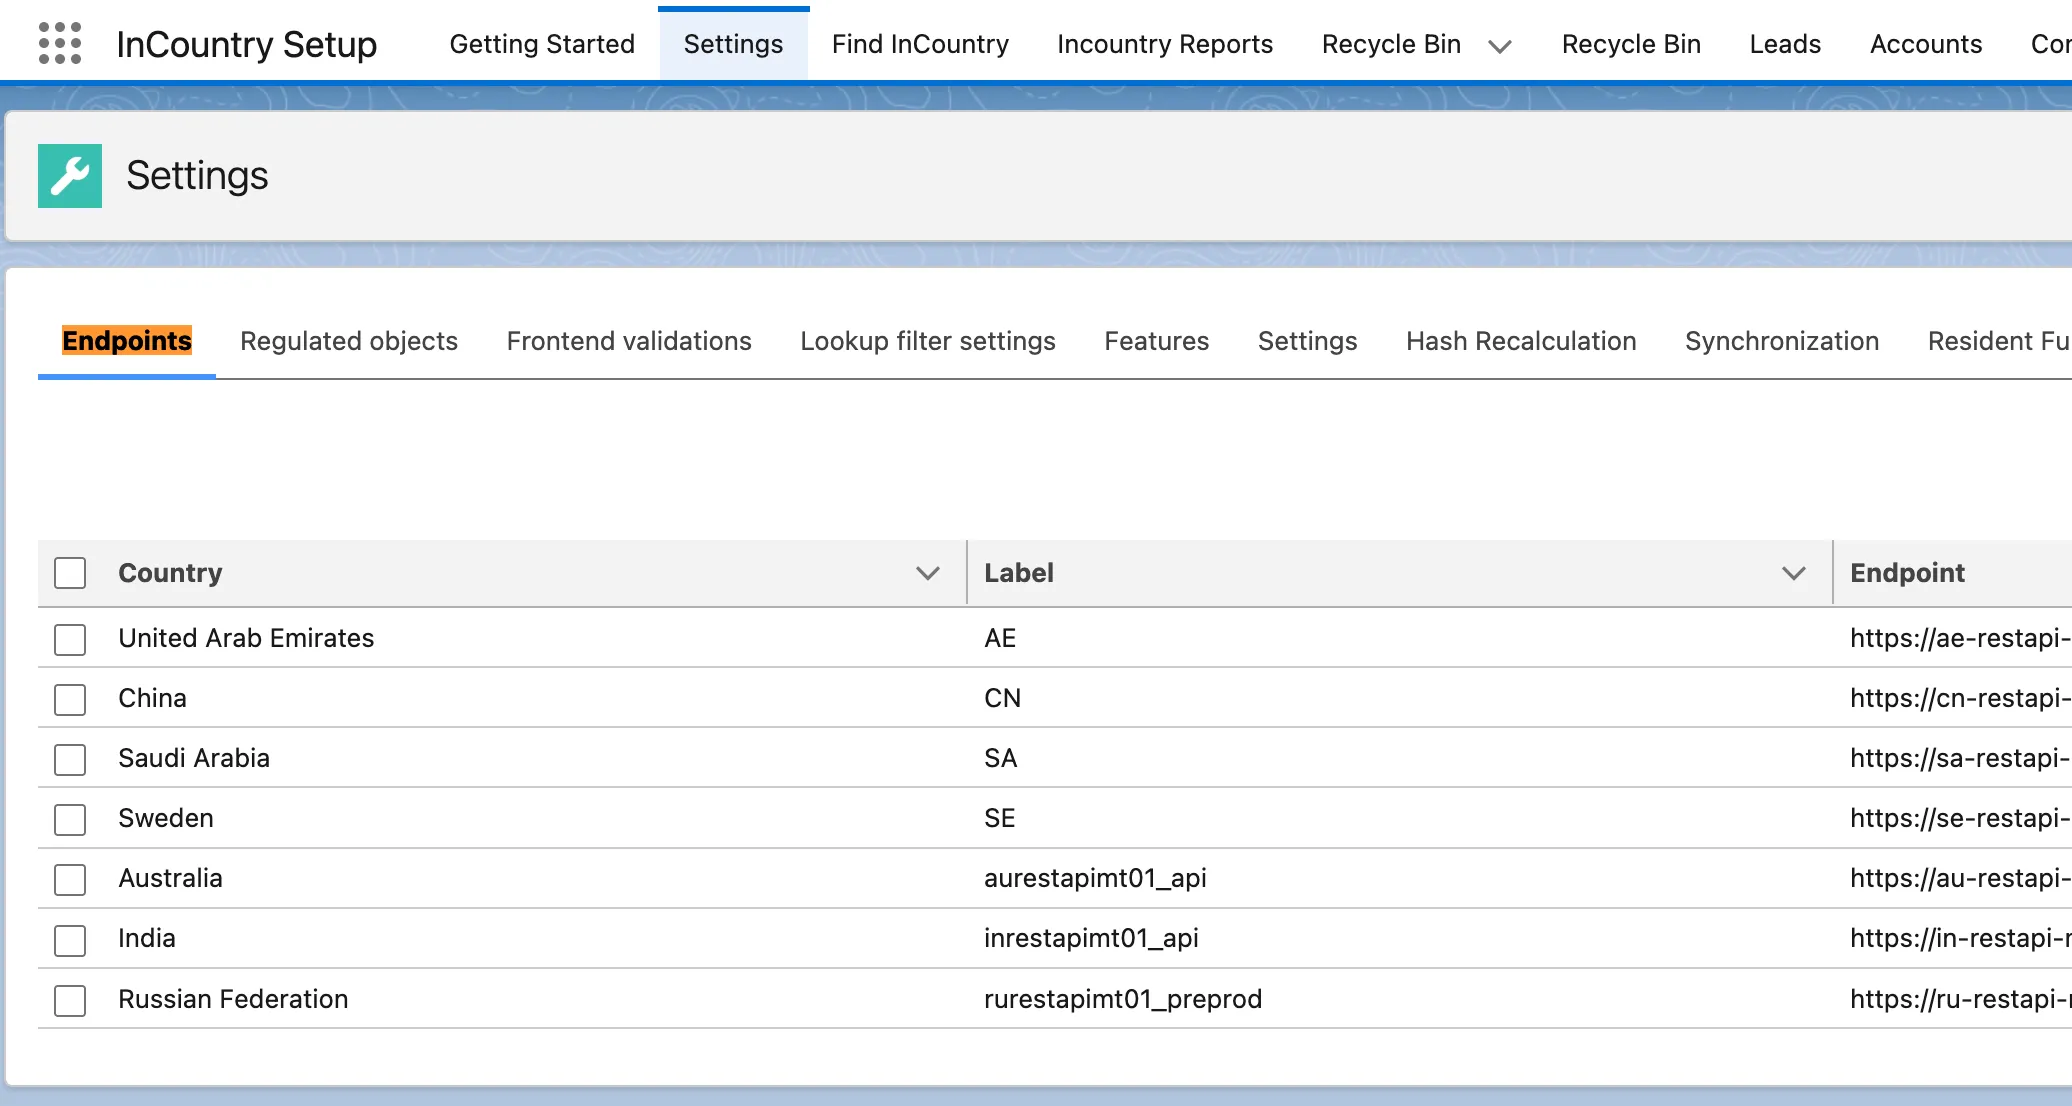
For each previously configured country endpoint:
-
Find the endpoint row and click Edit in the row actions.
-
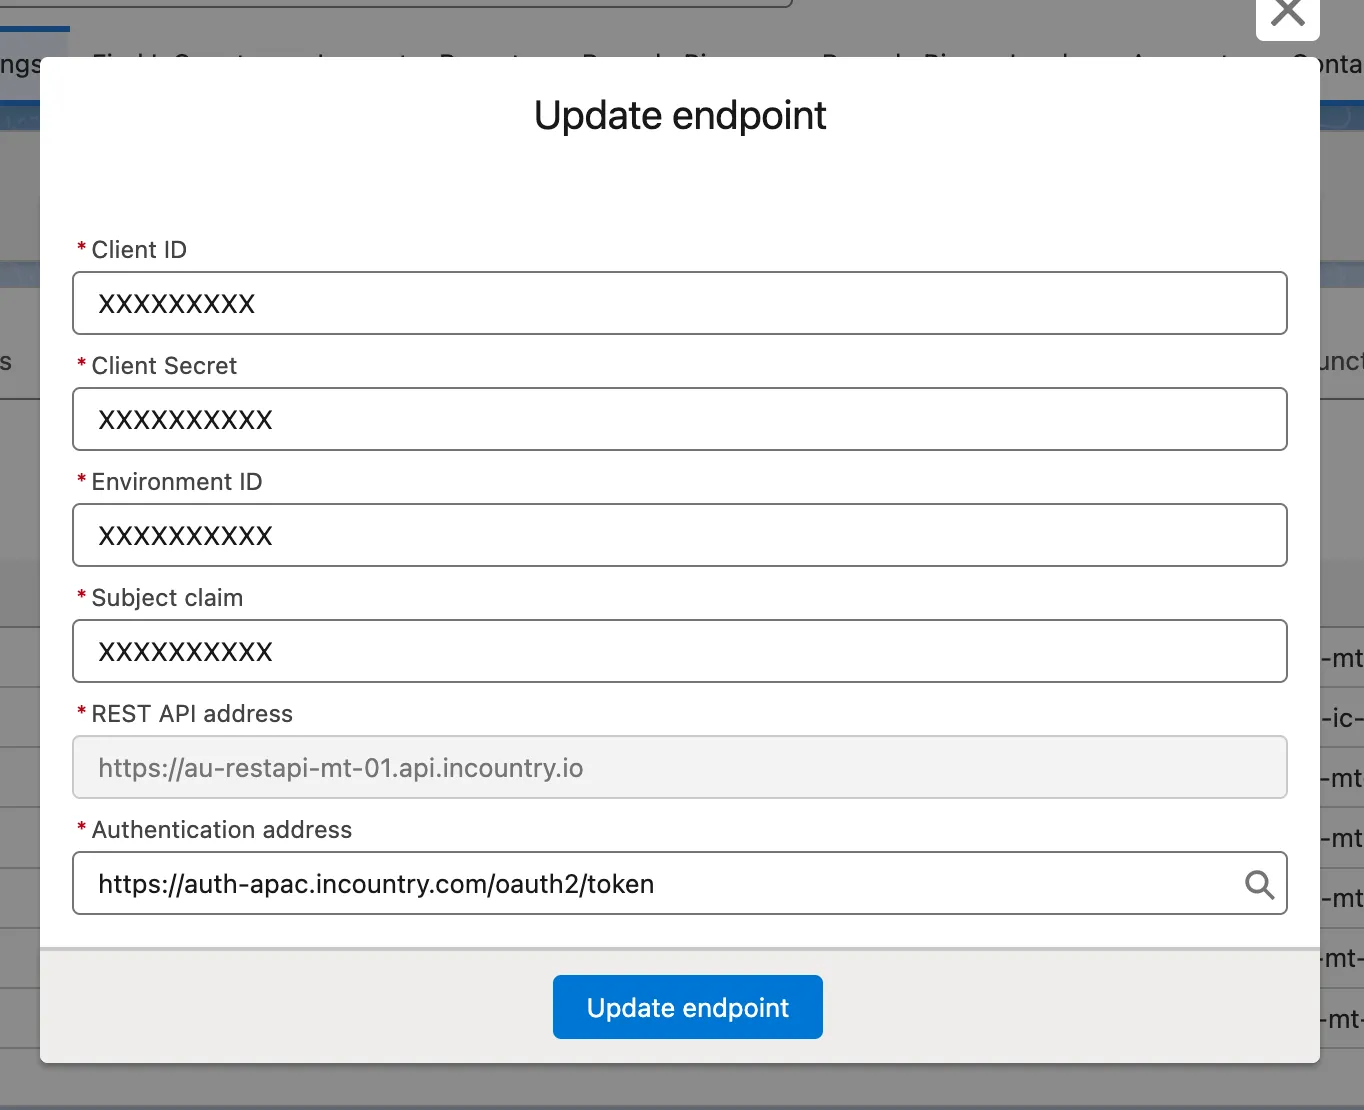
The resulting modal will display your InCountry credentials for that country.
WarningCopy and securely save these parameters according to your company's security policies. You will need them after the package upgrade.
-
Close this modal.
Upgrade
Use the provided link or upgrade the package directly from the AppExchange.
We recommend you upgrade the package for admins only, then use a permission set to grant access to other users later.
After Upgrade
When you upgrade the package, you will need to update the configuration:
Go to App Launcher → InCountry Setup → Settings page → open Endpoints tab.
For each previously configured country endpoint:
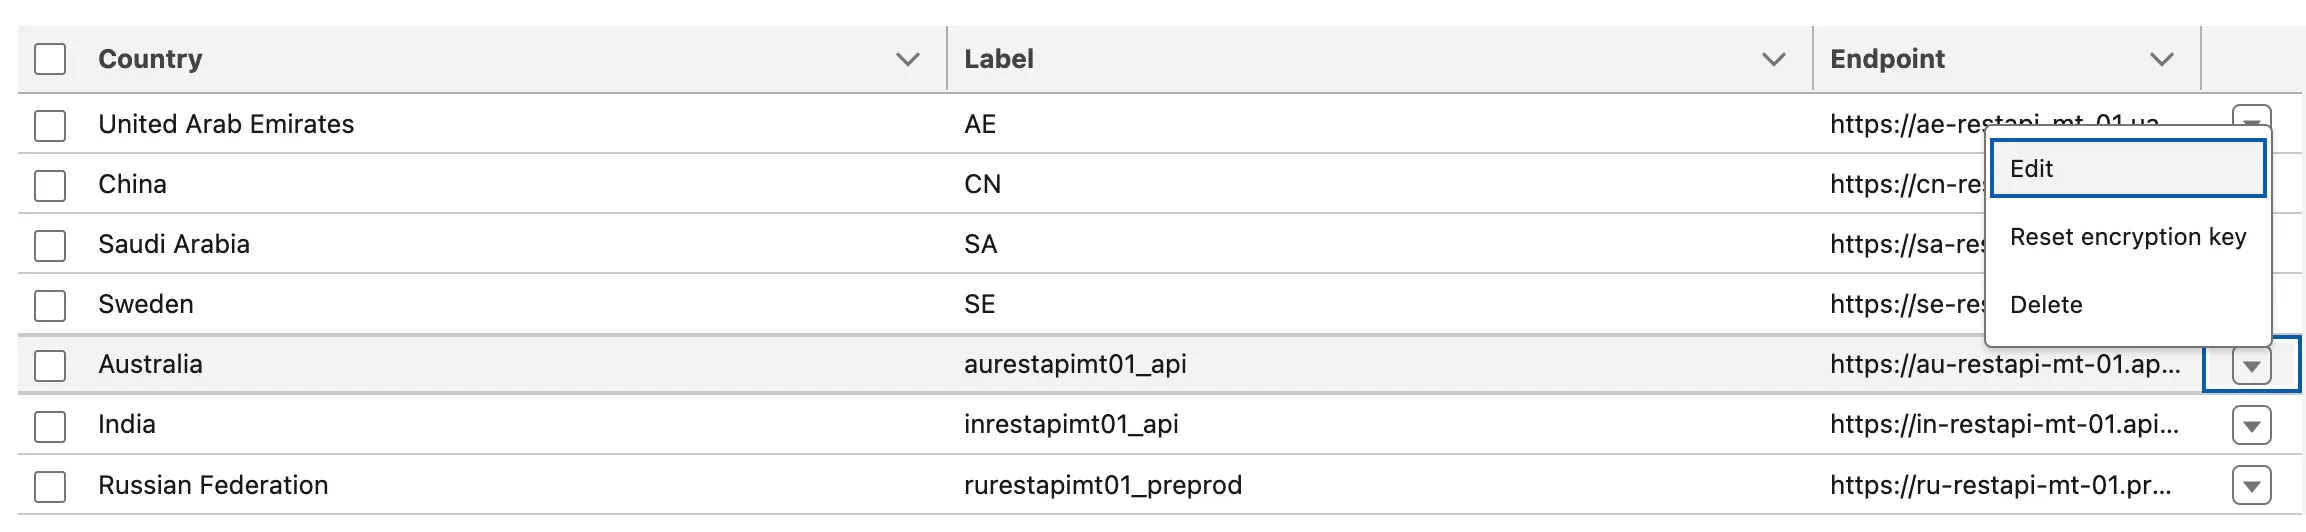
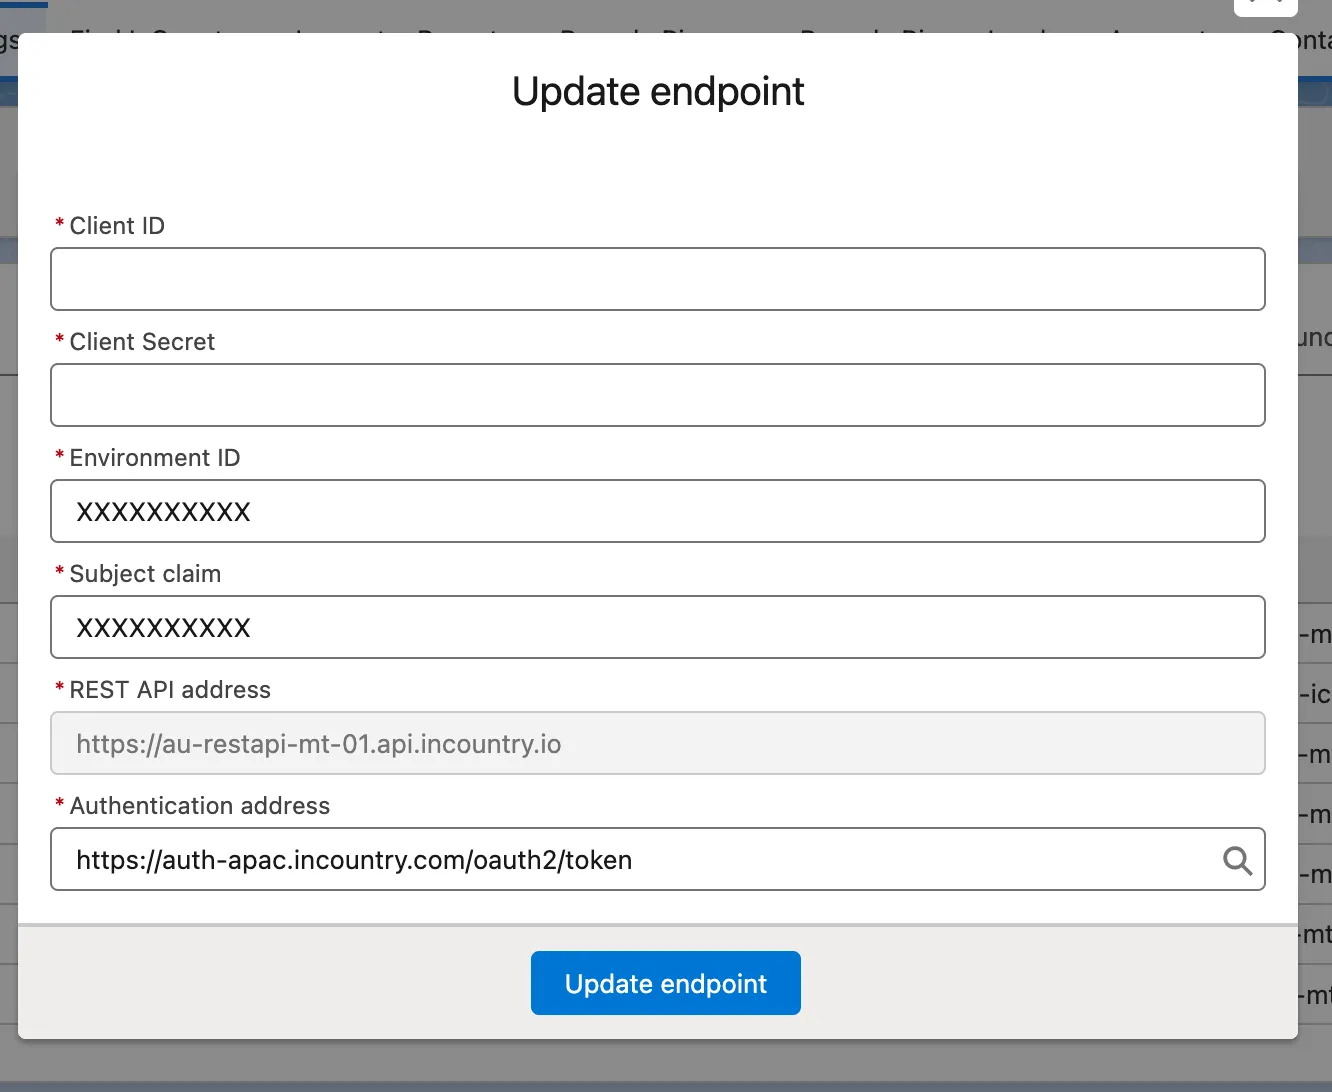
- Find the endpoint row and click Edit in the row actions.
- The resulting modal will display your InCountry credentials for that country, here you will see the difference in the credentilas that was before, client id and client secret will be blank, so each time you will need to update this credential, you will need to enter them from scratch.
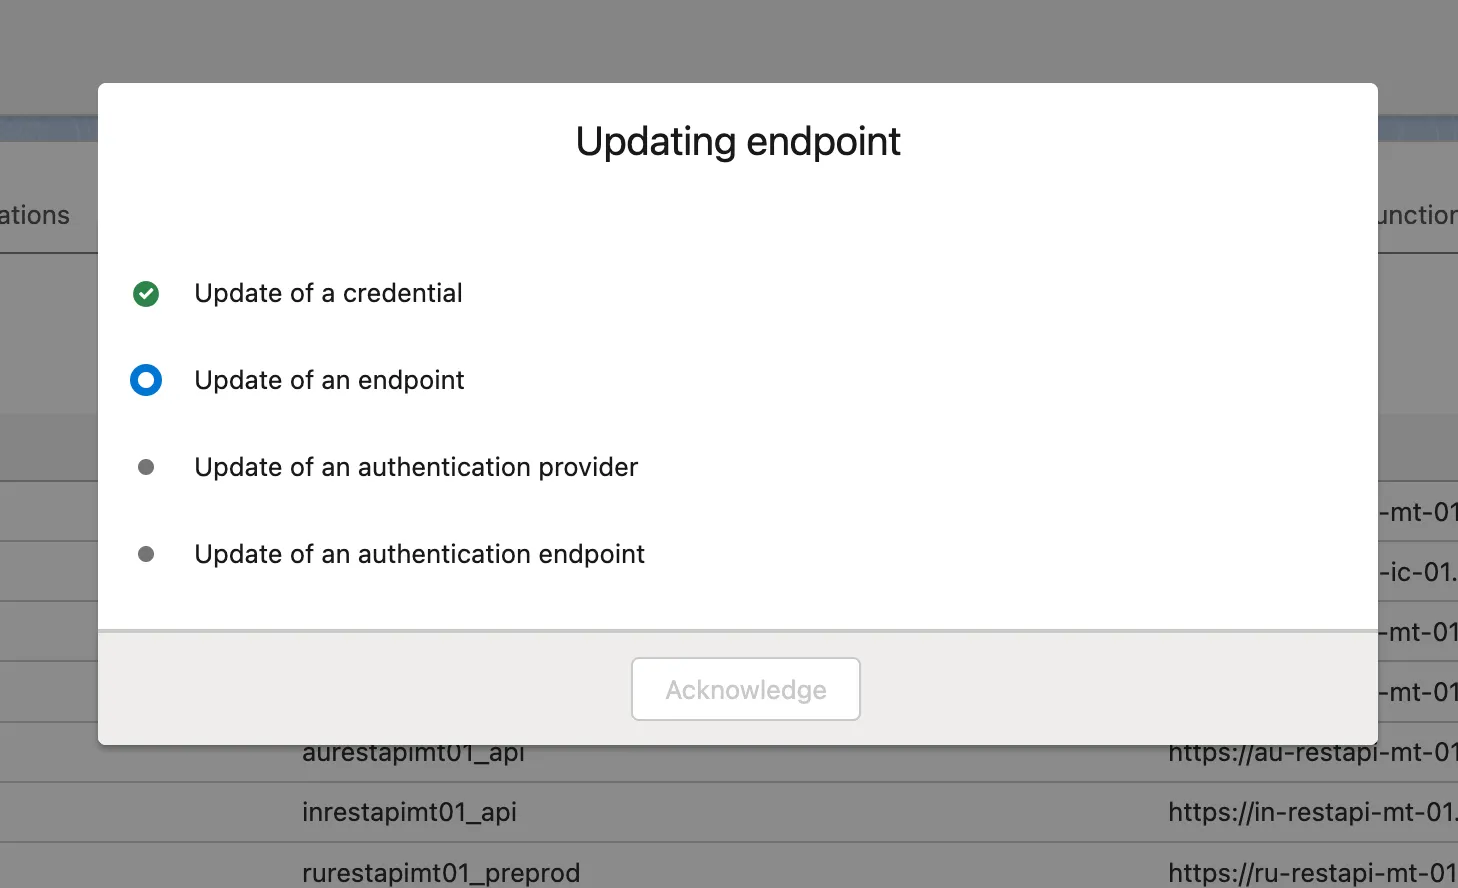
- Click Update endpoint.
- Wait.
- Click Acknowledge.
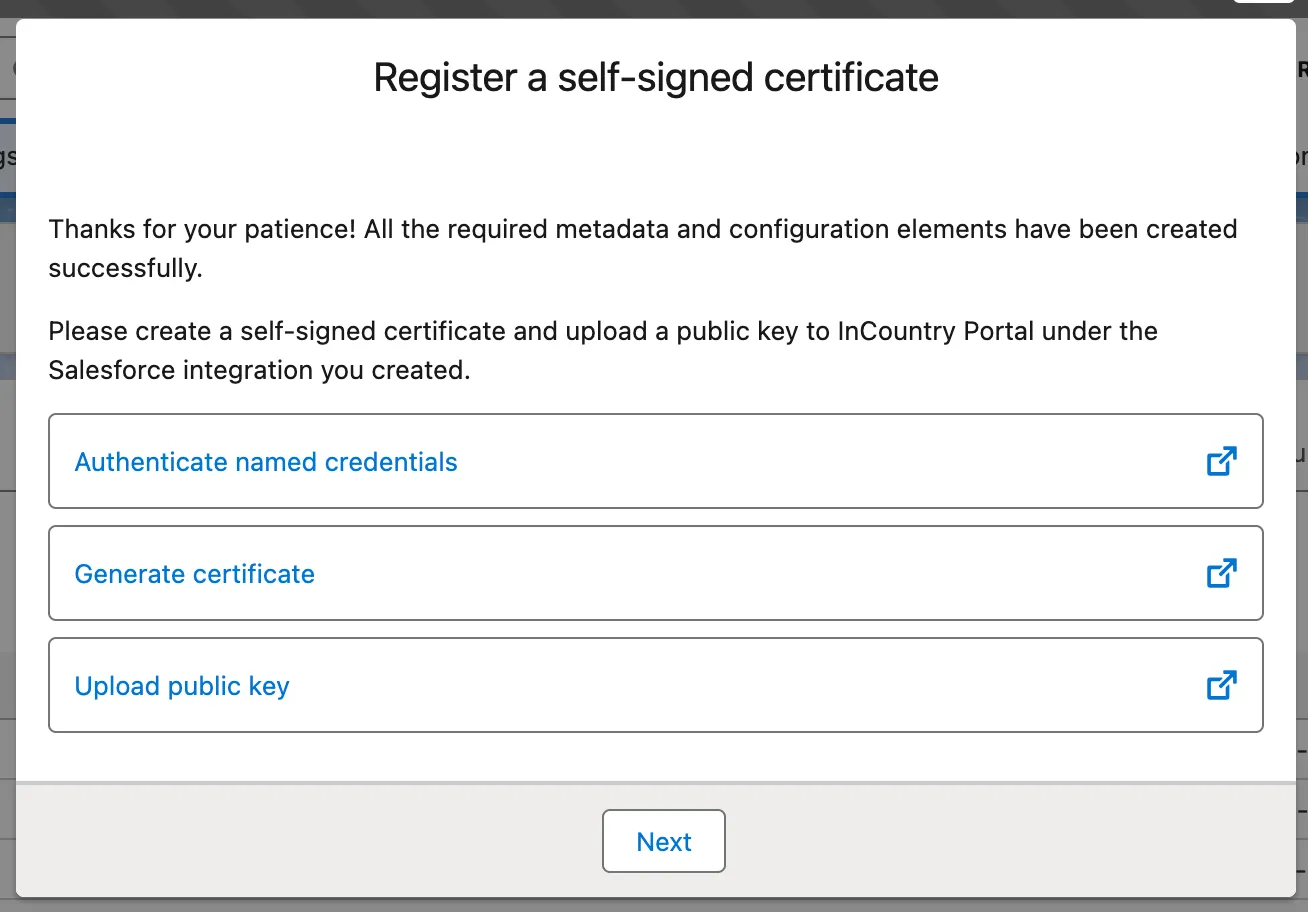
- Complete all steps:
- Authenticate named credentials.
- (Optional) Generate certificate.
- (Optional) Upload public key.
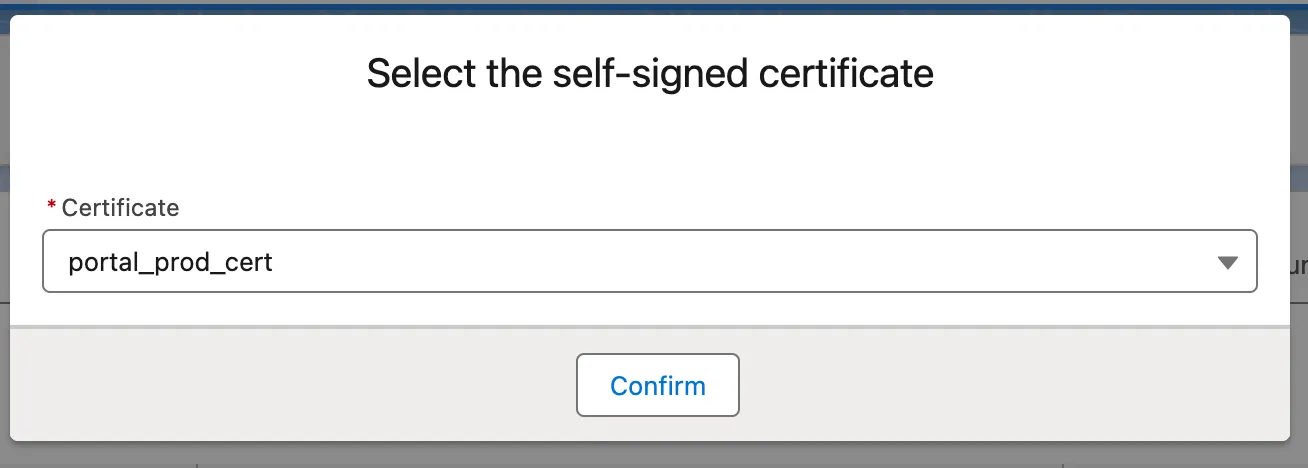
- Click Next.
- Select the self-signed certificate you uploaded to the portal.
- Click Confirm.
- Click Reset encryption key in the row actions.


If the uploaded certificate is incorrect, you will see an error message.

Post-Upgrade Validation
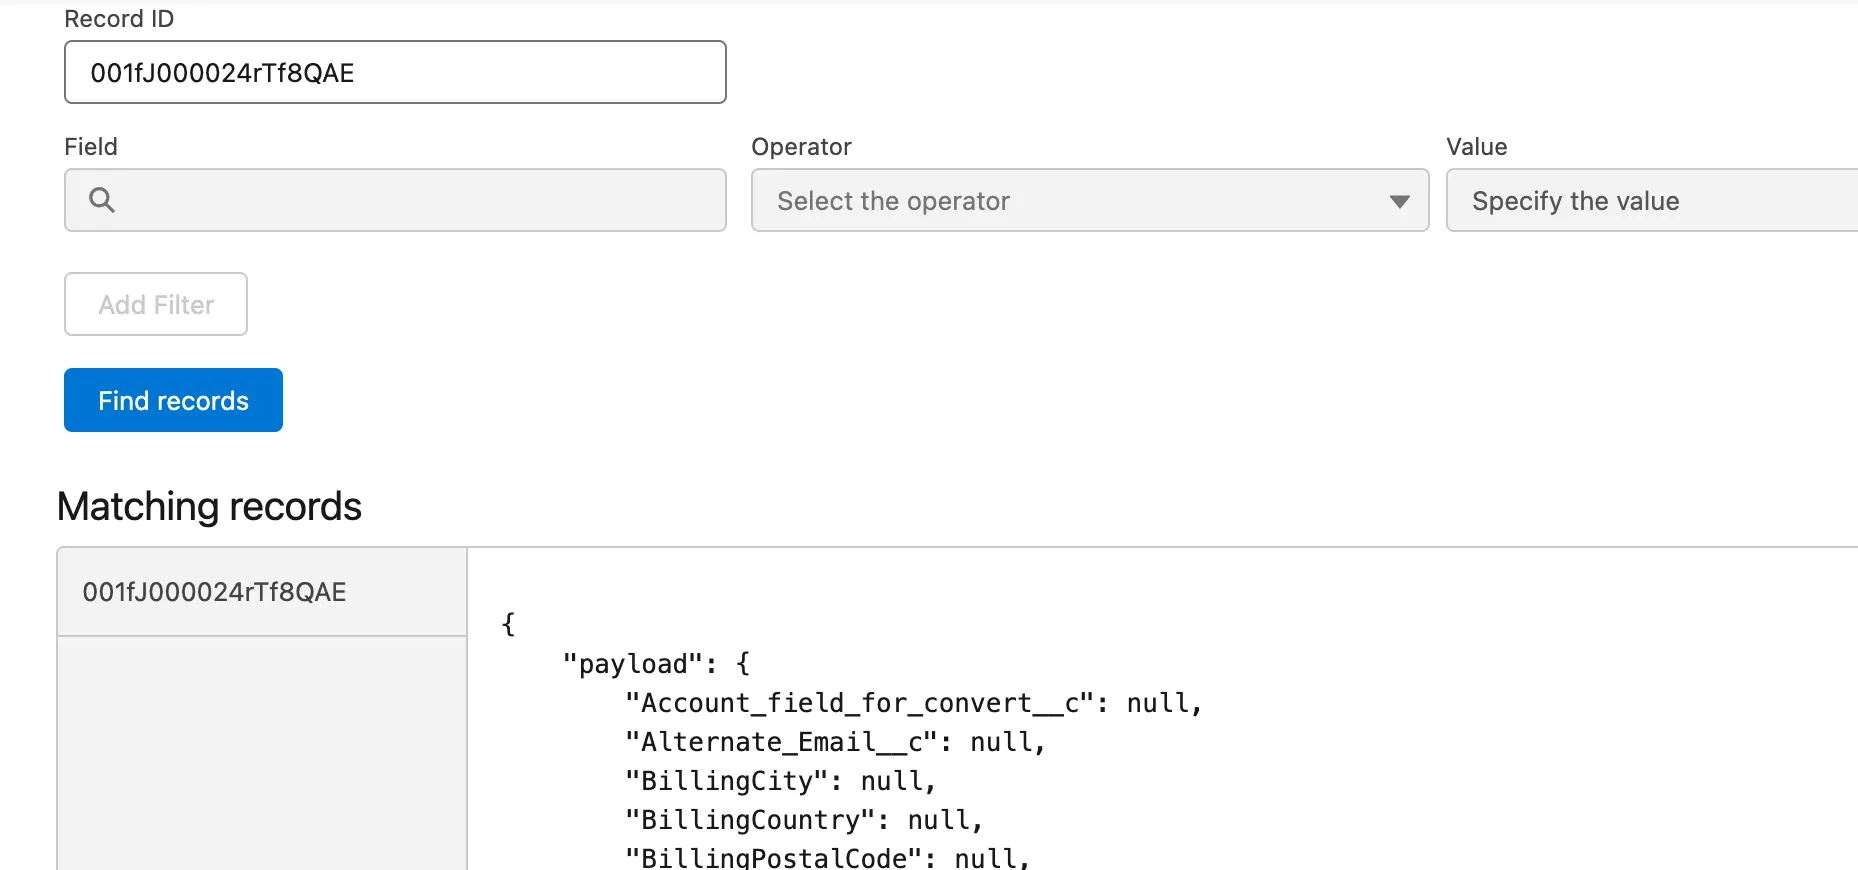
Select any record that you regulate (in this example account record 001fJ000024rTf8QAE)
Go to App Launcher → InCountry Setup → Find InCountry page.
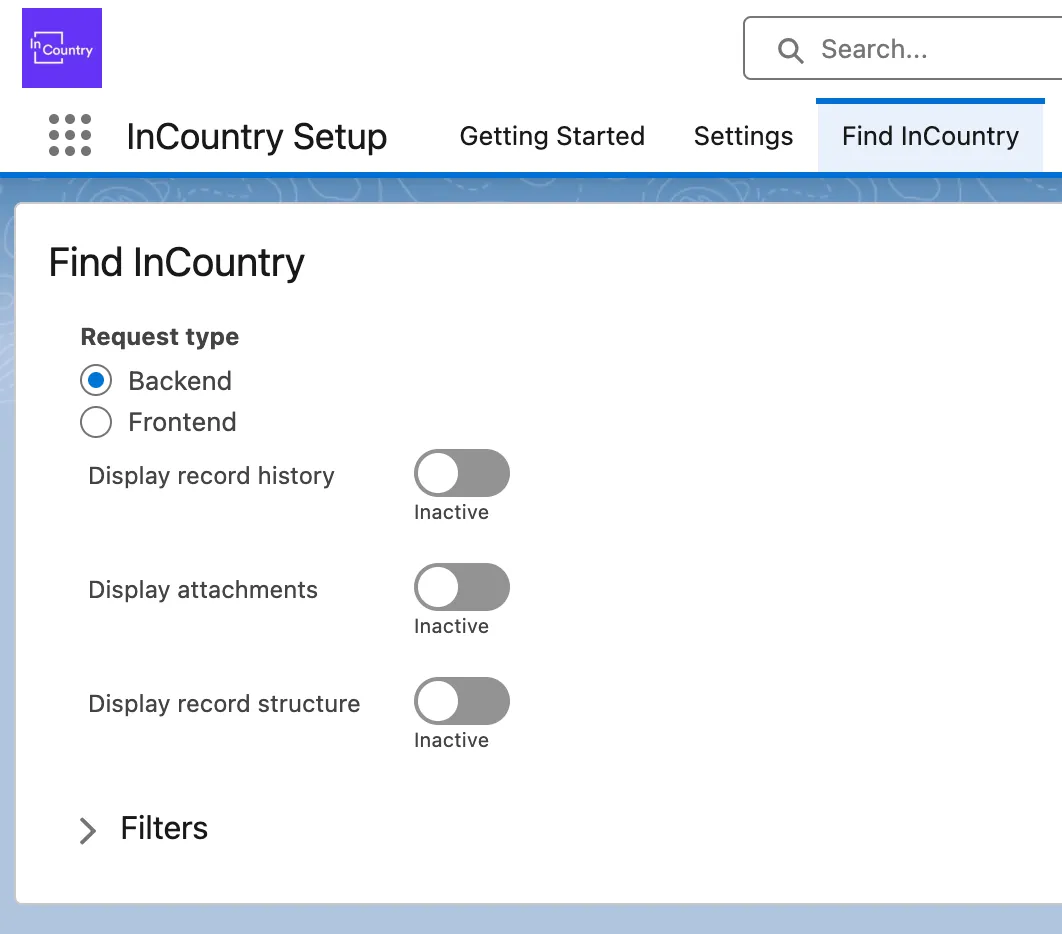
Backend (Named Credential)
Use the following steps to verify that the backend Named Credential is configured correctly and can retrieve data:
- Select the Request Type:
Backend. - Enable the Display record structure toggle.
- Expand the Filters section.
- Select the desired Country.
- Paste the Record ID of a test record into the corresponding field.
- Click Find Records.
Verification
-
Success: If the credential is correct, the record data will display under the Matching Records section. Click on the Record ID in the displayed list to view the full record data and confirm successful retrieval.
-
Failure: If the credential is incorrect or invalid, the component will not display record data, or you will see an error message indicating a connection failure or unauthorized access.

Frontend (JWT)
Use the following steps to verify that the JWT-based frontend authorization is working and can correctly retrieve protected InCountry record data:
- Select the Request Type:
Frontend. - Enable the Display record structure toggle.
- Expand the Filters section.
- Select the desired Country.
- Paste the Record ID of a test record into the corresponding field.
- Click Find Records.
Verification
- Success: If the certificate is correct, the record data will display under the Matching Records section. Click on the Record ID in the displayed list to view the full record data and confirm successful retrieval.
- Failure: If the certificate is incorrect or invalid, the component will not display record data, or you will see an error message indicating a connection failure or unauthorized access.
Package Uninstallation
The package uninstallation is comprised of two steps:
Removing User Assignments
- Log in to Salesforce as a system administrator.
- From Setup, click User Permissions, and then select Permission Sets.
- On the list, locate the InCountry User and InCountry Admin sets and click them to open.
- Select all users and click Remove Assignment.
Uninstalling the InCountry Data Residency for Salesforce package
- From Setup, click Apps, then Packaging, and select Installed Packages.
- On the Installed Packages page, locate the InCountry Data Residency for Salesforce package.
- Click Uninstall.
- On the confirmation page, select Do not save a copy of this package's data after uninstall.
- Select the Yes, I want to uninstall this package and permanently delete all associated components box.
- Click Uninstall.
The package may not uninstall immediately if your organization has modifications after installation, such as:
- new layouts in App Builder
- new pages in App Builder
- references in Apex Classes
- references to LWC/Aura components or modules
If this occurs, a list of modified items appears. Remove these dependencies before uninstalling the package from your Salesforce instance.