Converting Leads
Conversion of leads is supported in the legacy package and in the three-model package for the redaction and restrictions models.
For the details on configuring the Lead Convert component, please check our documentation.
The Lead Convert component converts a lead into an account and contact, as well as an opportunity.
To convert a lead:
-
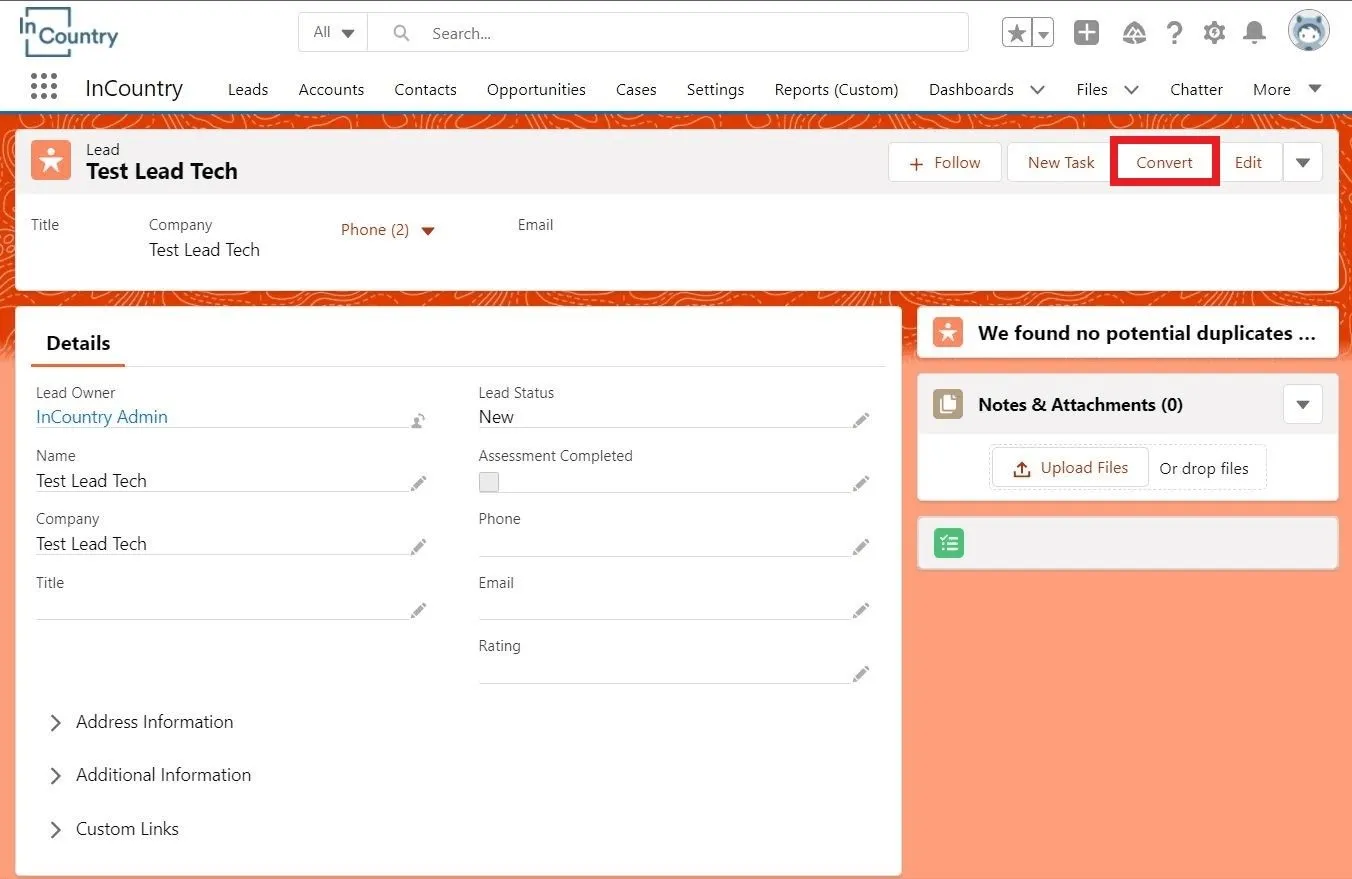
On the Leads tab, open the lead record.
-
At the top right part of the page, click Convert.

-
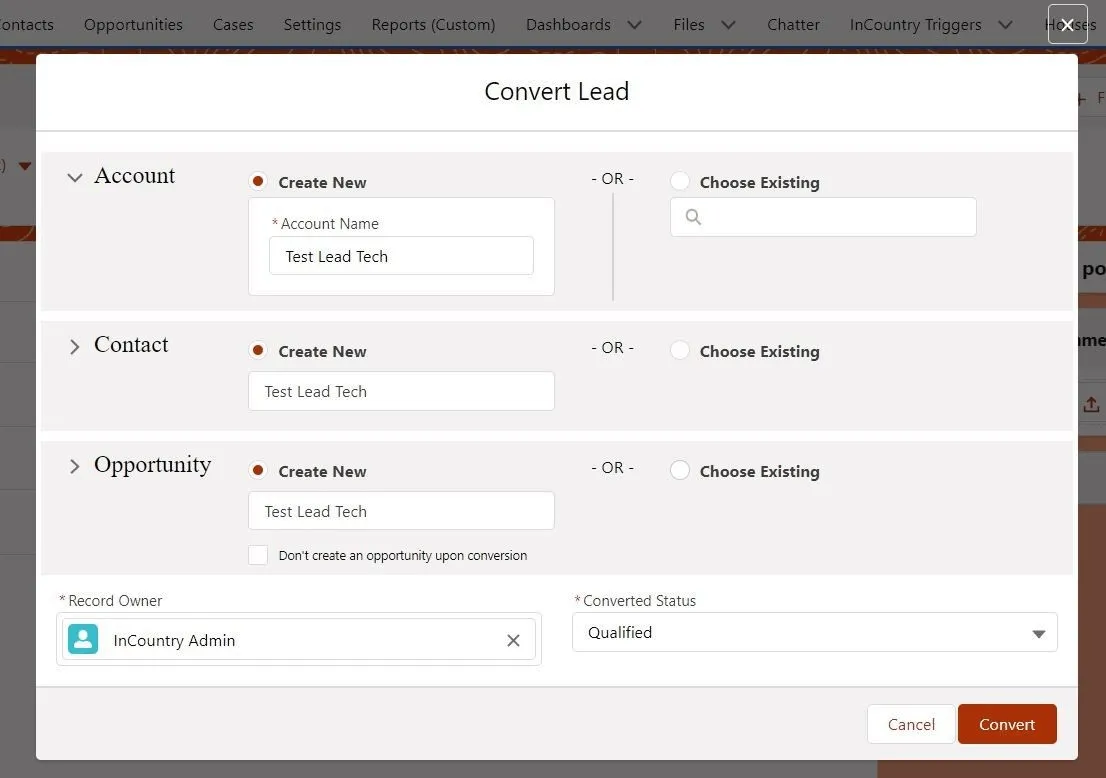
In the Convert Lead form, define the type of record you want to convert the current lead into.
-
In the Account section, select Create New and enter the account name if you want to convert your lead into an account, or select Choose Existing and pick the appropriate account for lead conversion.
-
In the Contact section, select Create New and enter the contact name if you want to convert your lead into a contact, or select Choose Existing and pick the appropriate contact for lead conversion.
-
In the Opportunity section, select Create New and enter the opportunity name if you want to convert your lead into an opportunity, or select Choose Existing and pick the appropriate opportunity for lead conversion. You can also choose the Don’t create an opportunity upon conversion option if you don't want to create an opportunity.
-
-
Verify the record owner and converted status in the corresponding fields.
-
Click Convert.
Please take into account the following points:
-
A lead can be converted to regulated and non-regulated objects.
-
The lead must always be a regulated object.
-
To convert a lead to other objects in other countries, you must have access to this country. (For example,
-
A user OUTSIDE OF the country treated under the redacted policy cannot convert a record to the lead pertaining to the country managed under the redacted policy.
-
A user FROM the country treated under the redacted policy can convert a lead to the record that can be attributed to the country treated under the redacted policy and to the record that can be treated under the restricted or replicated policy.
-
-
To convert a lead record according to the applied record policy, the lead record pending conversion must have a record-level policy applied.
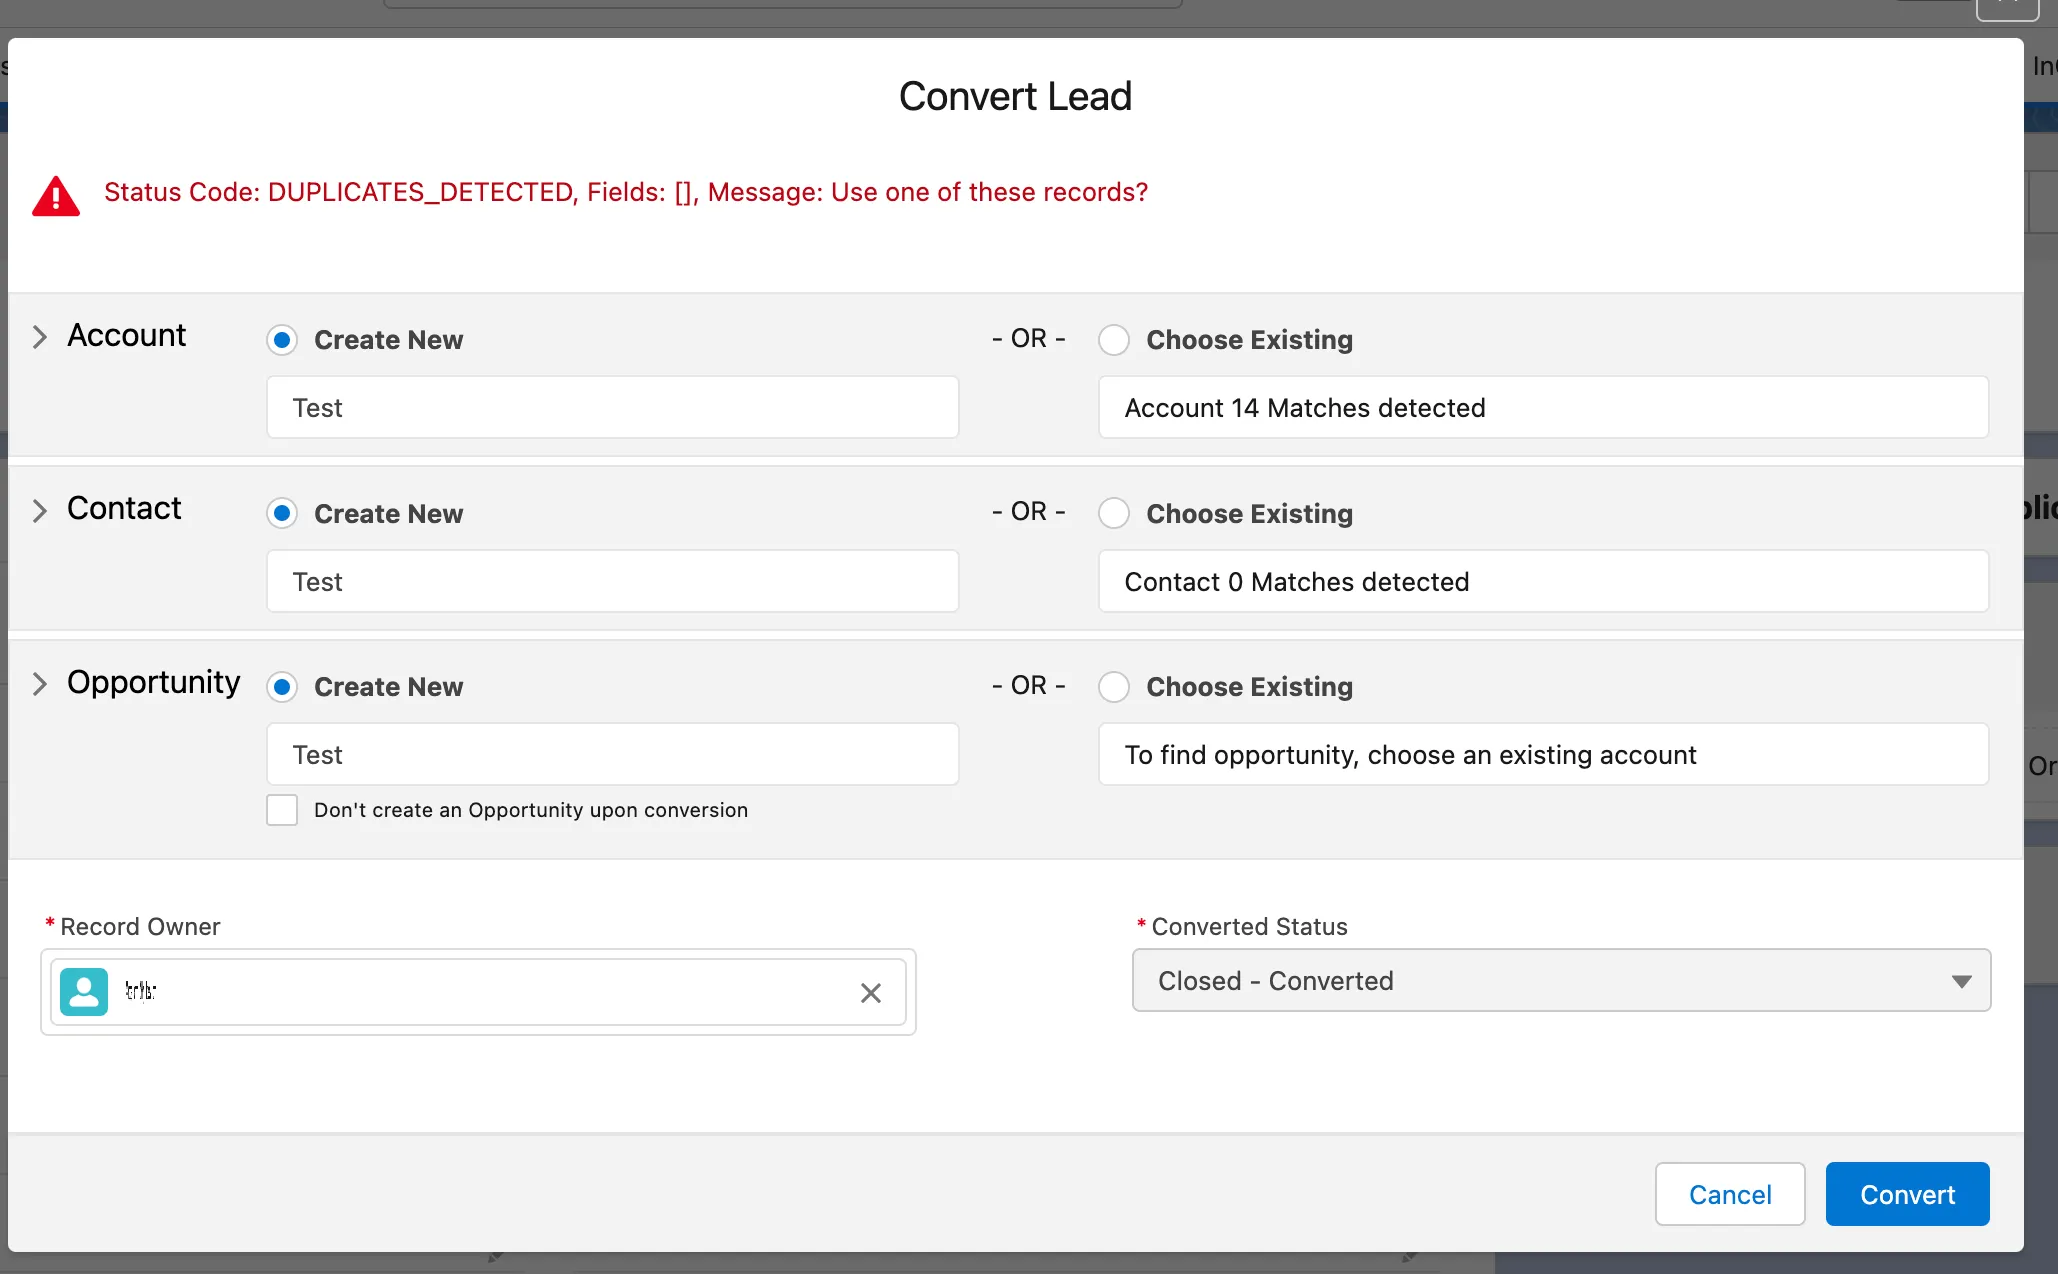
Checking the duplicates
Once you have configured the duplicate and matching rules in Salesforce, you can proceed with conversion of leads to other Salesforce objects. Upon identification of potential duplicates, the Convert Lead form will indicate such duplicated records.
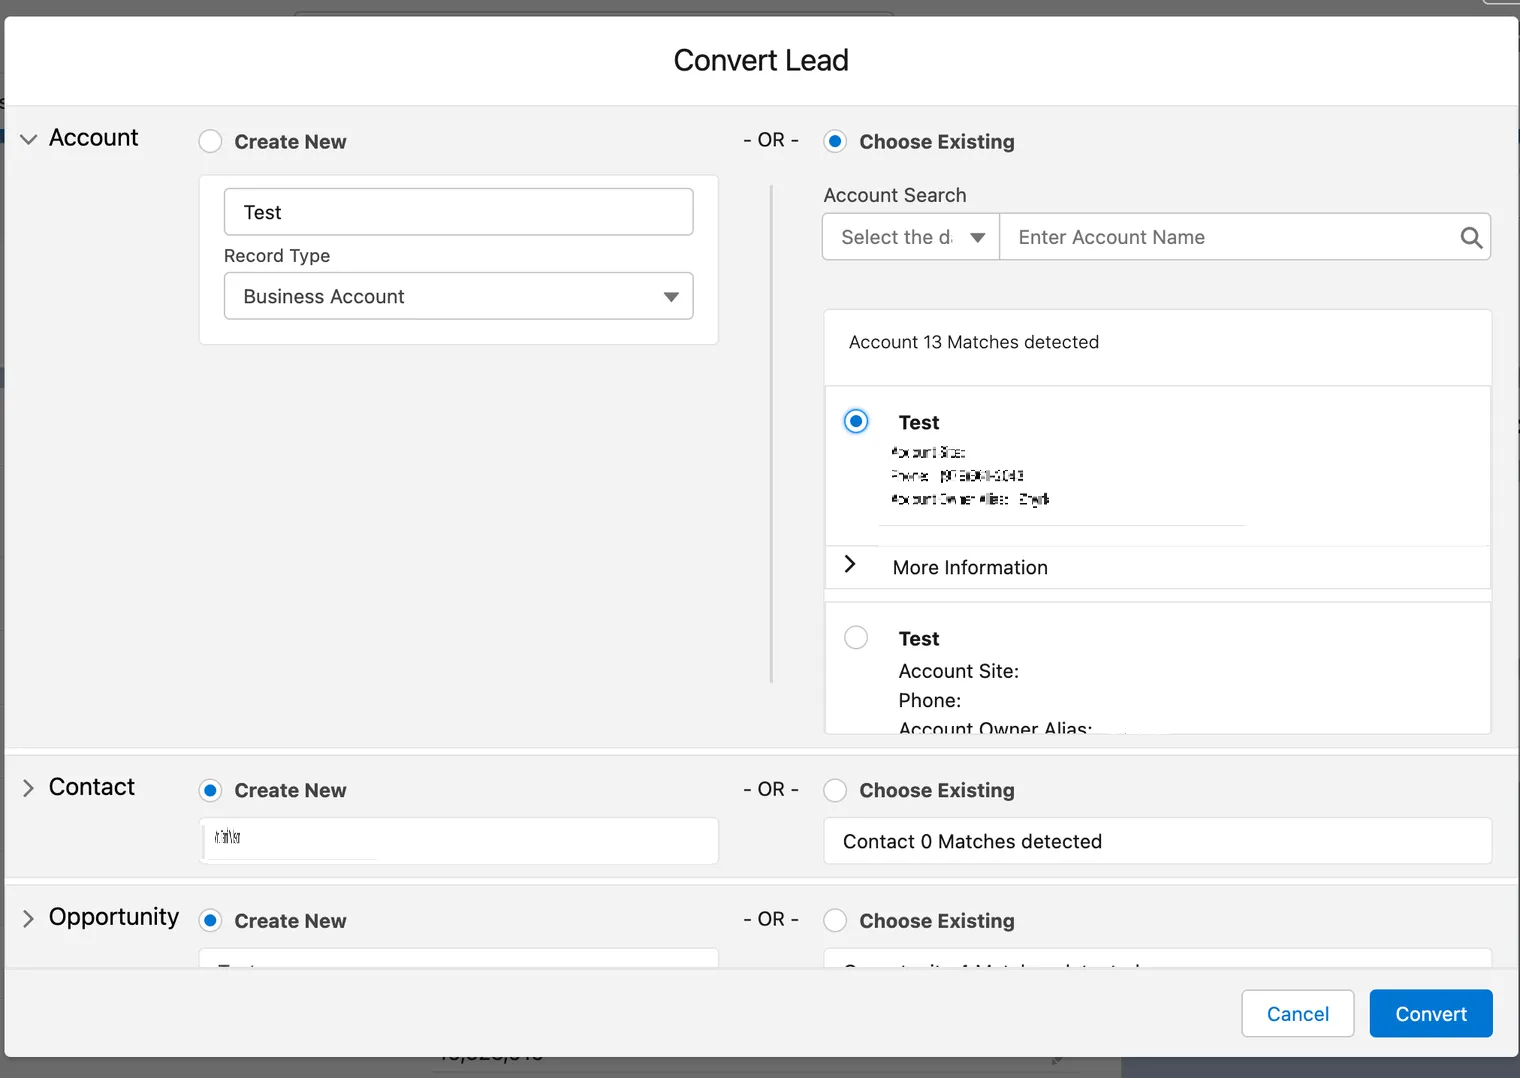
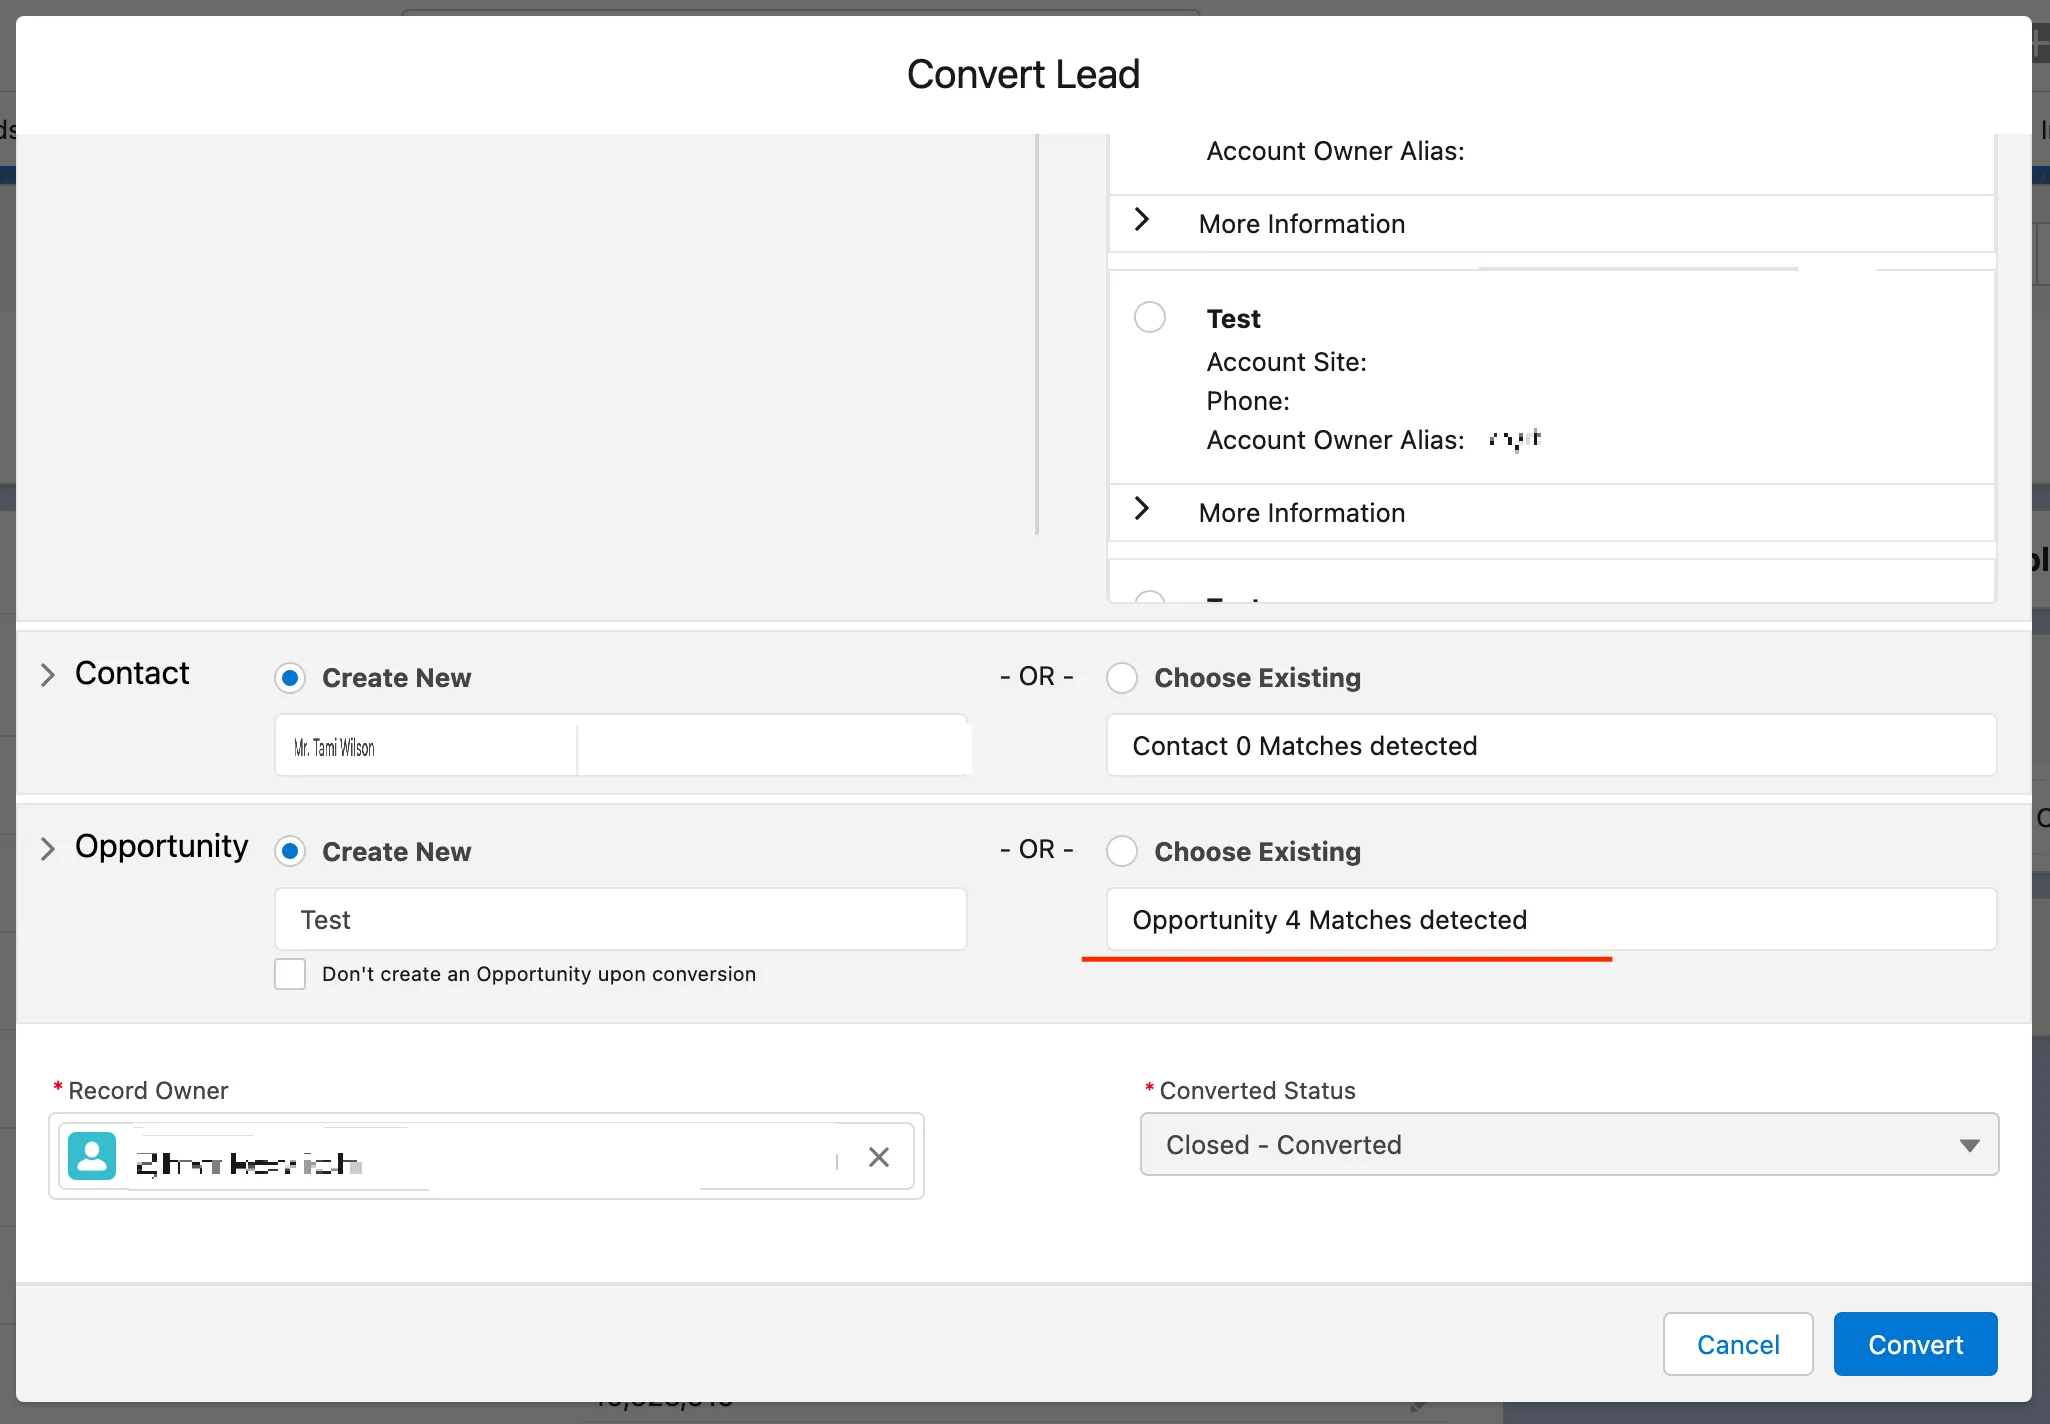
To see duplicates in the Opportunity section, you must select the Account record, then the Lead Convert component makes a request to find all opportunities associated with the selected account:
If you ignore the block action in the duplication rule, then you will see the following error:
Considerations
-
The duplicate record check is performed only when the Lead Convert form is displayed.
-
The duplicate detection mechanism uses the full-text match to identify duplicates. It pulls values of fields used for duplicate matching, hashes them, and checks them against values of the Account, Contact, Opportunity, and Person objects stored in Salesforce database. Upon matching identical hashes, the mechanism pulls duplicated records from Salesforce and shows them to you.
-
If the allow action is used in duplicate rules then you can convert leads without selecting anything, if the block action is used in duplicate rules then you must select one of the existing records.
-
The duplicate detection mechanism can handle up to 50 potential duplicates per object.
-
The search layouts of Salesforce objects are used to display fields of potential duplicates.
-
Hash functions that are applied to similar fields (for example, First Name and Last Name) should be identical across all Salesforce objects against which duplicate rules are checked. If hash functions differ, the duplicate mechanism may not find the proper matches. Additionally, after the lead conversion you may receive an error without a capability to roll back your changes.
-
When Salesforce Lead Fields Map is used for regulated fields, you must copy these rules to InCountry Lead Convert Mapping.