Payments
Overview
The InCountry Stripe Payments service is a part of the InCountry Data Residency-as-a-Service. This solution lets you secure payment card data within your application when performing outbound requests or handling incoming payment requests. It enables you to securely collect payment card data and store it on the InCountry platform with the InCountry JavaScript library (Payment Elements). It automates the provision of credit card data in the aliased (redacted) form to third-party payment providers, depending on your business requirements.
You can manage Stripe Payments services, as follows:
- create new Stripe Payments services
- delete the no longer needed Stripe Payments services
Solution
Payments solution consists of the following items:
-
Secure collection of payment card data in your application interface. InCountry Payment Elements (JavaScript library) allows you to securely collect payment card data of your customers without processing this data by your systems. Fields on the Payment Elements form operate like traditional input fields, while they secure access to the sensitive financial data.
-
Secure saving of payment card data to the InCountry platform and redaction of clear-text data into aliased equivalents. Aliased payment card data is useless for malefactors and hackers even if it is compromised, lost, or stolen. InCountry Payments securely processes and saves payment card data to the InCountry platform and generates aliases for it.
-
Secure provision of card data to payment providers on demand. InCountry Payments unredacts the aliased payment card data and provides it to a specific payment provider.
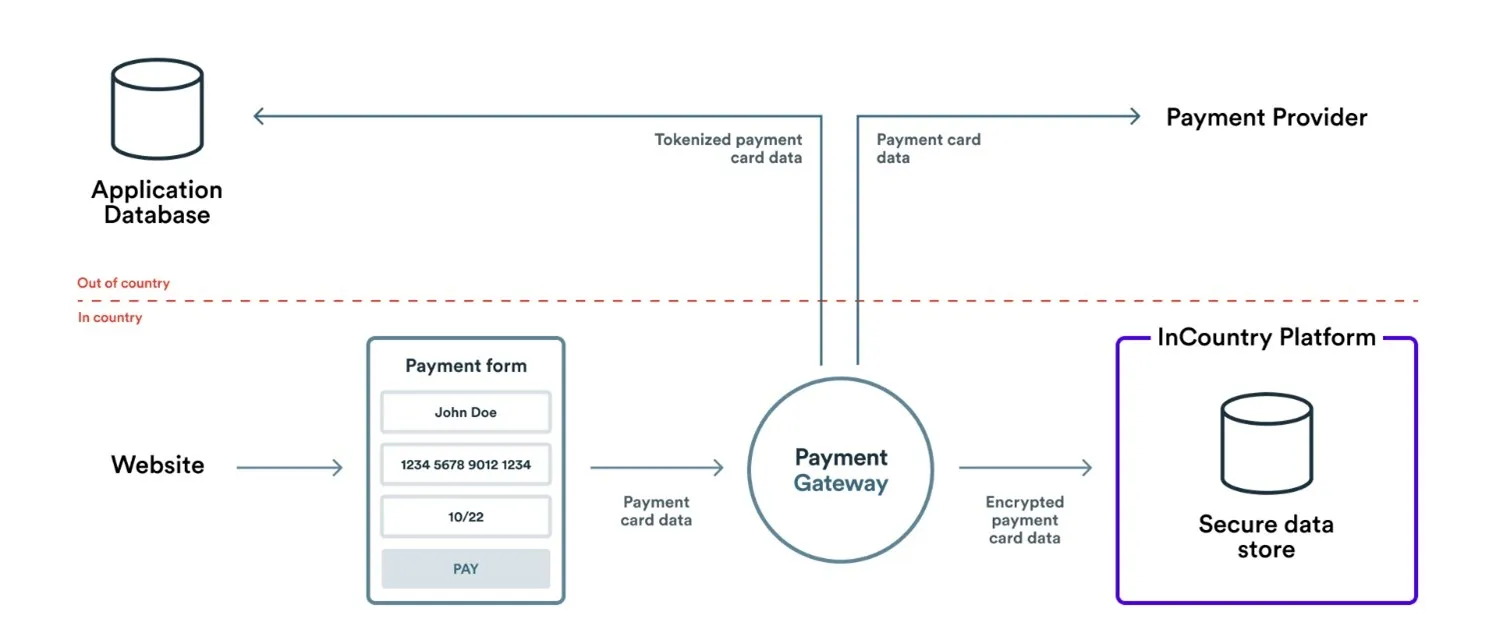
Secure Collection of Payment Card Data
You need to integrate the InCountry Payment Elements library into your application frontend. This component adds an IFrame element that renders a payment form loaded from the InCountry domain, so your application has no access to payment card data, which is required by PCI DSS.
Secure Saving of Payment Card Data
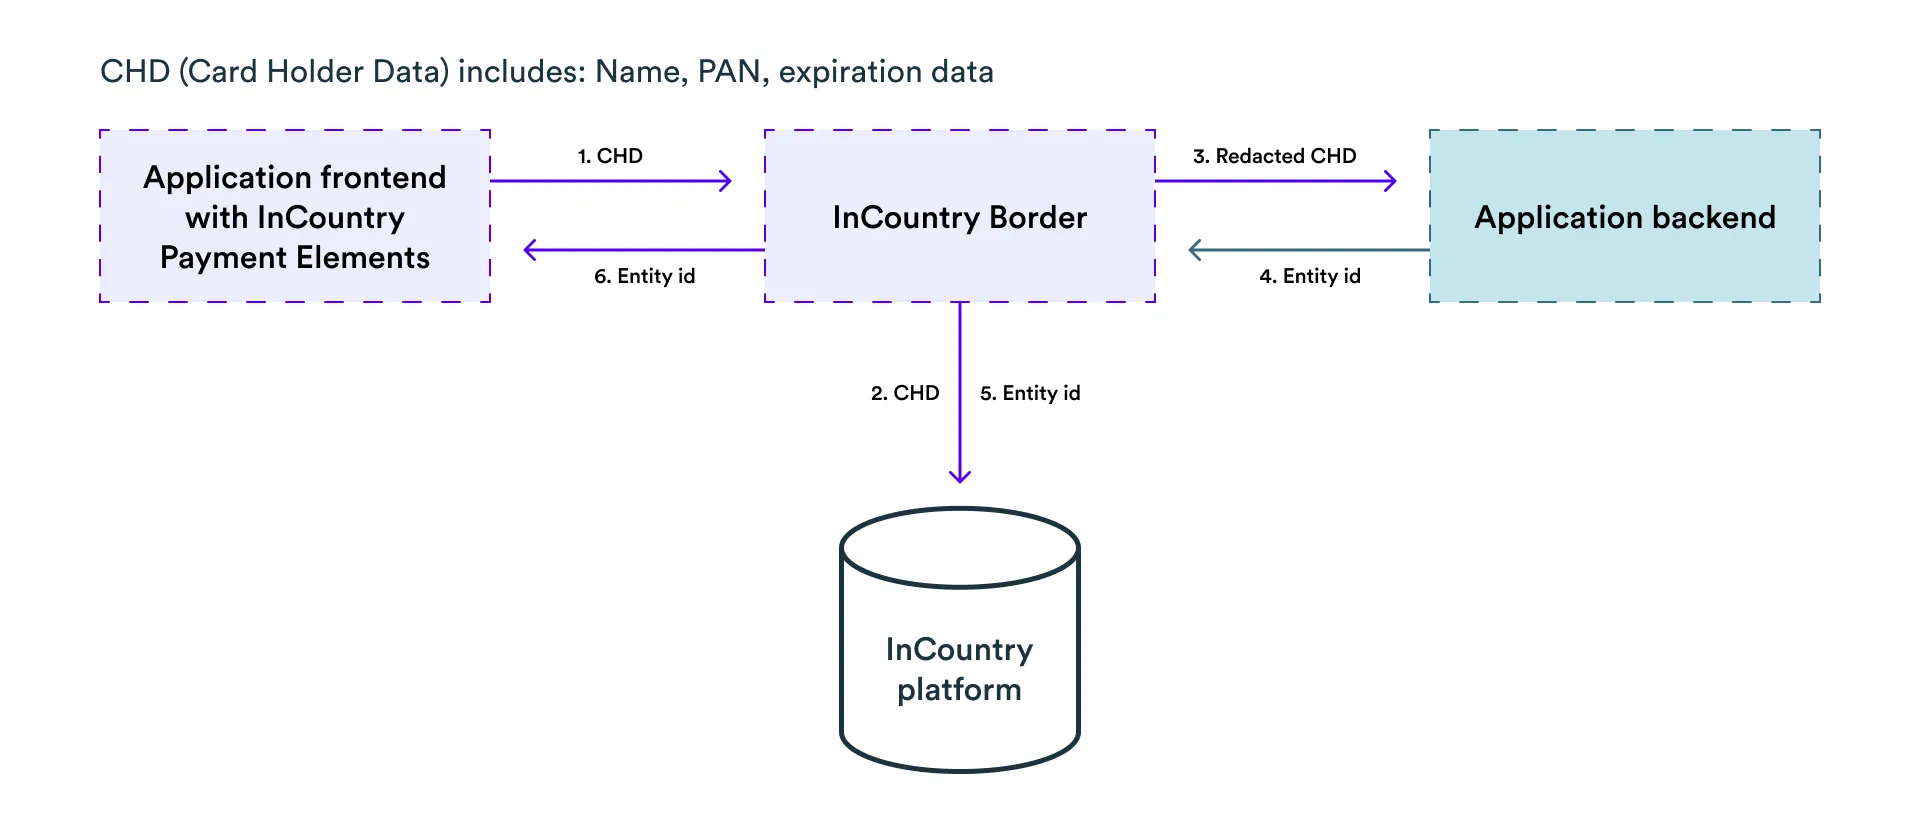
-
The payment form is rendered in the browser with the JavaScript library (Payment Elements) that passes the payment card data to InCountry.
-
InCountry Payments securely saves the payment card data to the InCountry platform.
-
InCountry Payments redacts this data with provider-agnostic alphanumeric tokens. This data by itself cannot be used even if it is lost, compromised, or stolen. Then InCountry Payments passes redacted data to your application backend to a specifically defined endpoint in your application. Neither InCountry Payments nor your application backend stores a CVC code in any form (plain, encrypted, or redacted).
-
Your application backend generates an identification token (entity id) and saves it to your application database for this card data record and returns an entity id in the response within the
x-inc-entity-idfield. For example, your response from your application could be:{"x-inc-entity-id": "ZFEwRCJN1"} -
InCountry Payments updates the record on the InCountry platform with the generated entity id.
-
InCountry Payments returns the created entity id to the browser.
Secure Provision of Card Data to Payment Providers
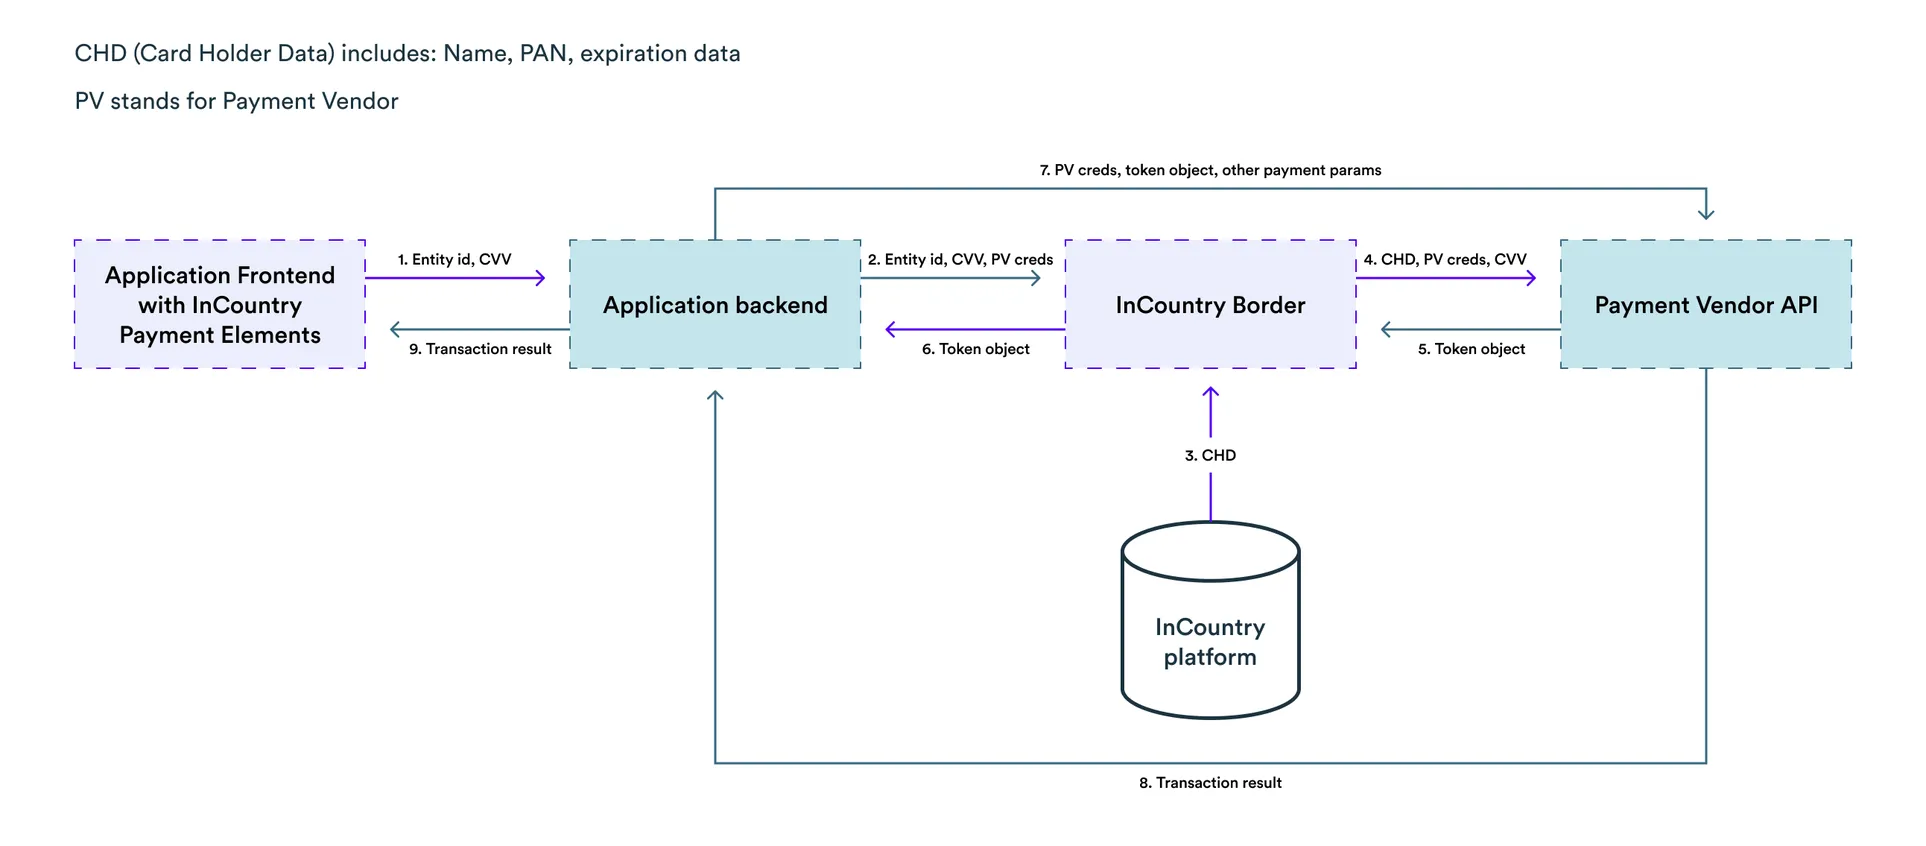
-
Your application in the browser sends an entity id and CVV/CVC to its backend.
-
Your application backend sends a request containing an entity id, CVV/CVC, and authorization credentials through InCountry to the payment provider to get a token object that represents the payment card data.
-
InCountry Payments fetches the payment card data by its entity id from the InCountry platform.
-
InCountry Payments fills out the payload with original payment card data in the pre-defined request format that is required by a payment provider and passes this request to the payment provider.
-
The payment provider returns a token object that represents provided payment data on the payment provider side. With this token, you can make payment transactions via payment provider.
-
InCountry Payments passes this token object to your application backend.
-
Having the payment provider credentials, token object, and other payment parameters, your application backend creates a payment transaction for the payment provider.
-
The payment provider returns the result for a created transaction.
-
Your application backend returns the transaction result to the application frontend.
Processing CVV/CVC Codes
The InCountry platform does not store CVV/CVC codes. InCountry Payments passes a CVV/CVC code as plain text over a secure HTTPS connection. This code may go through your application backend through the GET request, but must not be stored on your side to stay PCI DSS compliant, as the CVV/CVC code must be just passed and must not be stored.
How to Integrate InCountry Payments
- Create the Stripe Payments service on the InCountry Portal.
- Integrate the Payment Elements library into your payment workflow.
- Configure your payment logic with the desired payment provider (Stripe or Braintree) on your application.
All integrations with the InCountry DRaaS platform require a TLS handshake with the SNI (Server Name Indication) extension enabled. Please make sure that your TLS client is configured accordingly!
The Payment Elements library includes the two parts:
-
JavaScript code that is integrated into your application page to interact with the Payment Elements library.
-
JavaScript code that is loaded within an IFrame element (XSS protection) to manage the form elements data, styles, validation, and so on.
Integrating the Payment Elements library with Application Frontend
The generic workflow includes the following steps:
-
Include the Payment Elements script on each page of a website. It should always be loaded directly from the InCountry endpoint, rather than included within an application bundle or hosted on your premises.
-
Add a placeholder for the payment form.
-
Initialize the library.
-
Create a payment form.
-
Submit the payment card data.
-
Get the card’s entity id and CVV.
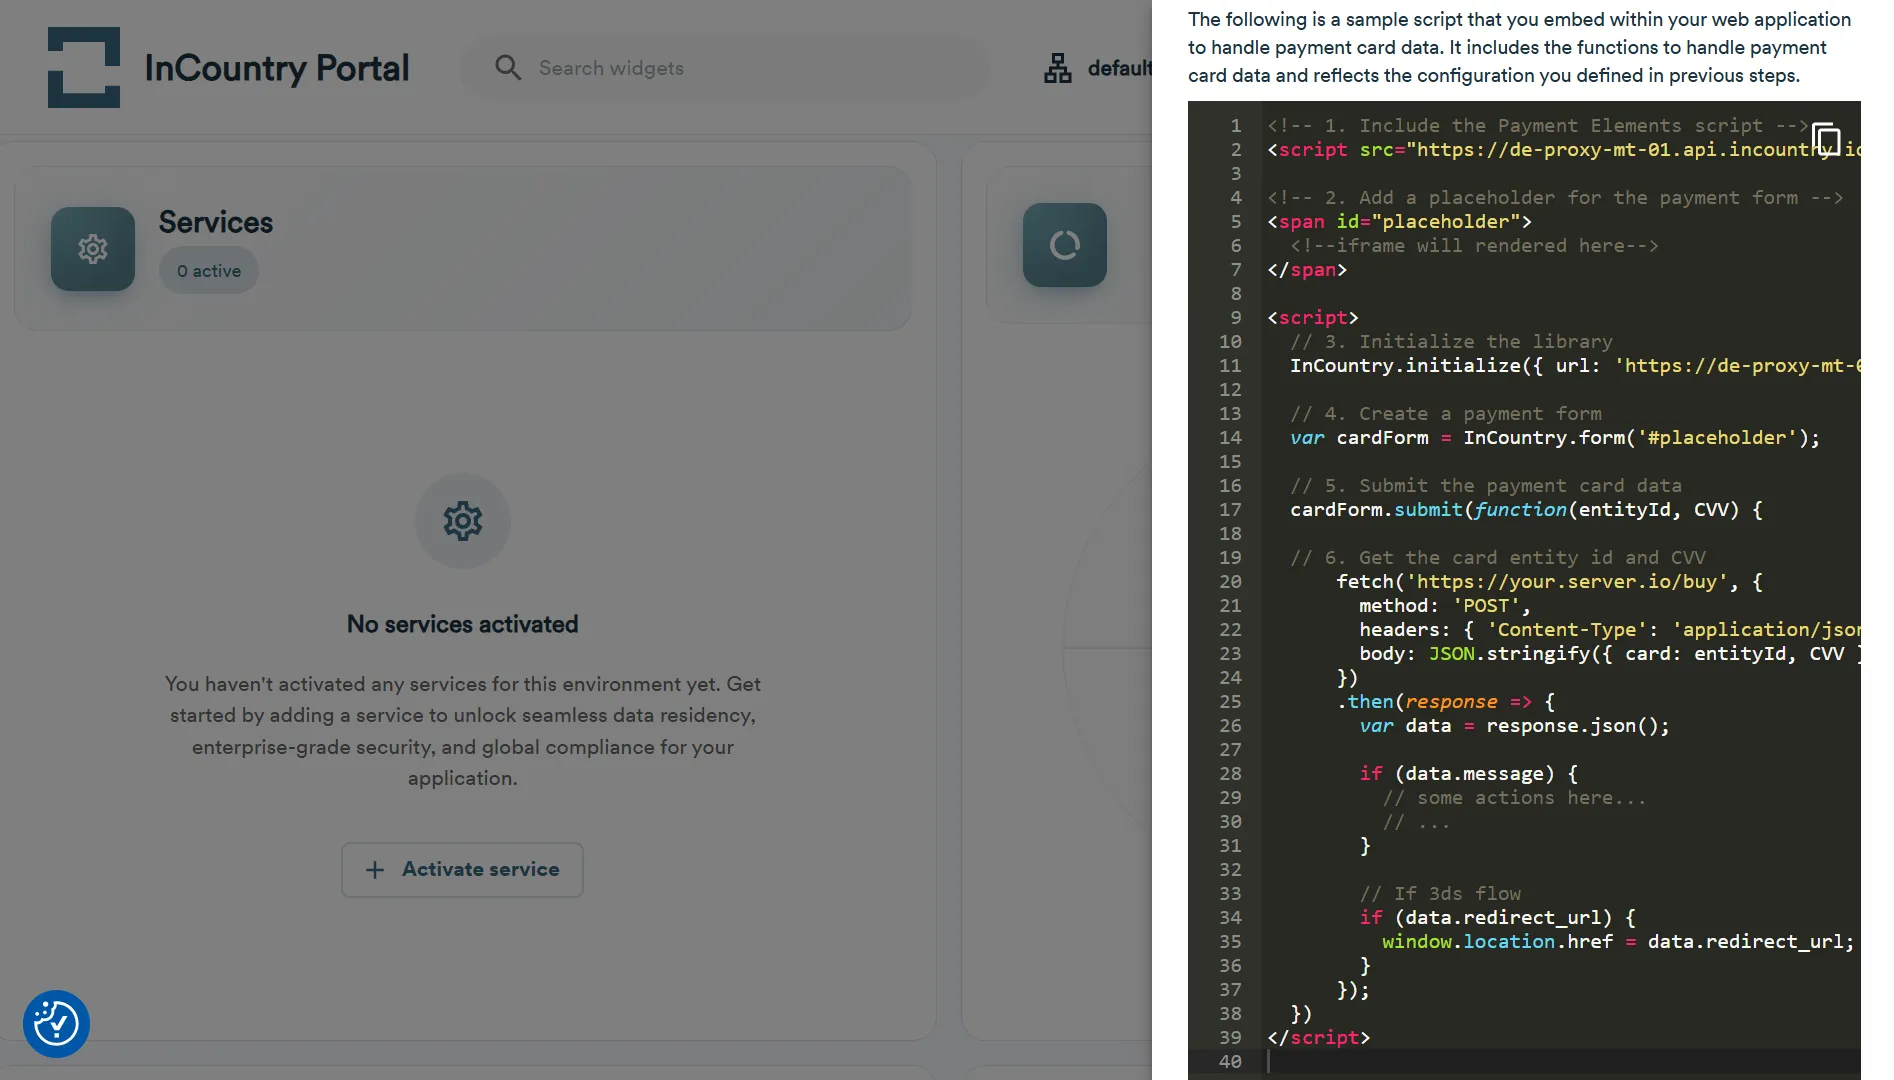
<!--
1. Include the Payment Elements script
-->
<script src="<INCOUNTRY_EMBEDED_CODE>"></script>

<!--
2. Add a placeholder for the payment form
-->
<span id="placeholder">
  <!--iframe will rendered here-->
</span>

<script>
  /// 3. Initialize the library
  InCountry.initialize({ url: '<INCOUNTRY_IFRAME_SOURCE>' });

  /// 4. Create a payment form
  var cardForm = InCountry.form('#placeholder');

  /// 5. Submit the payment card data
  cardForm.submit(function(entityId, CVV) {

  /// 6. Get the card entity id and CVV

    fetch('https://your.server.io/buy', {
        method: 'POST',
        headers: { 'Content-Type': 'application/json' },
        body: JSON.stringify({ card: entityId, CVV }),
      })
      .then(response => {
        var data = response.json();

        if (data.message) {
          // some actions here...
          // ...
        }

        // If 3ds flow
        if (data.redirect_url) {
          window.location.href = data.redirect_url;
        }
      });
  })
</script>
<INCOUNTRY_EMBEDED_CODE> and <INCOUNTRY_IFRAME_SOURCE> values can be obtained from the InCountry Portal after creating of the Stripe Payments service.
When the cardFrom.submit() function is called, the request with payment card data goes through InCountry that redacts this data. Then the request with redacted payment card data comes to your server to the POST /cards endpoint. On your server, the redacted payment card data can be linked to a specific user, etc. The POST /cards method should return a unique entity id in the JSON response in the following way:
{
  "x-inc-entity-id": "<generated_entity_id_by_your_app>"
}
Then an entity id and CVV can be passed to the server. In the example above, a request is performed tohttps://your.server.io/buy.
CVV is passed in the plain text form the cardForm function.
cardForm.submit(function(entityId, CVV) {
  // ...
});
Client-side validation
The client-side validation is implemented on the basis of the https://github.com/medipass/react-payment-inputs JavaScript library.
This library validates the following:
-
card number:
-
payment card number
-
length of the payment card number
-
-
expiry date:
-
date format
-
validity of the card (non-expired date)
-
-
card’s СVС code:
-
number format
-
code length up to 4 digits
-
Server-side validation
Each payment provider has its own payment data validation. As InCountry Payments only passes requests to the payment provider and in some cases may store, redact, and unredact the payment card data, all backend validation is implemented by the payment provider.
Upon the passed client-side validation, the payment provider’s backend may return a payment data error. By knowing the entity id, InCountry Payments can update the invalid payment card data on the InCountry platform by itself as of the moment of redacting/unredacting data.
Integrating Stripe with Payments
This section provides instructions on how to integrate Payments with Stripe.
Without InCountry Payments
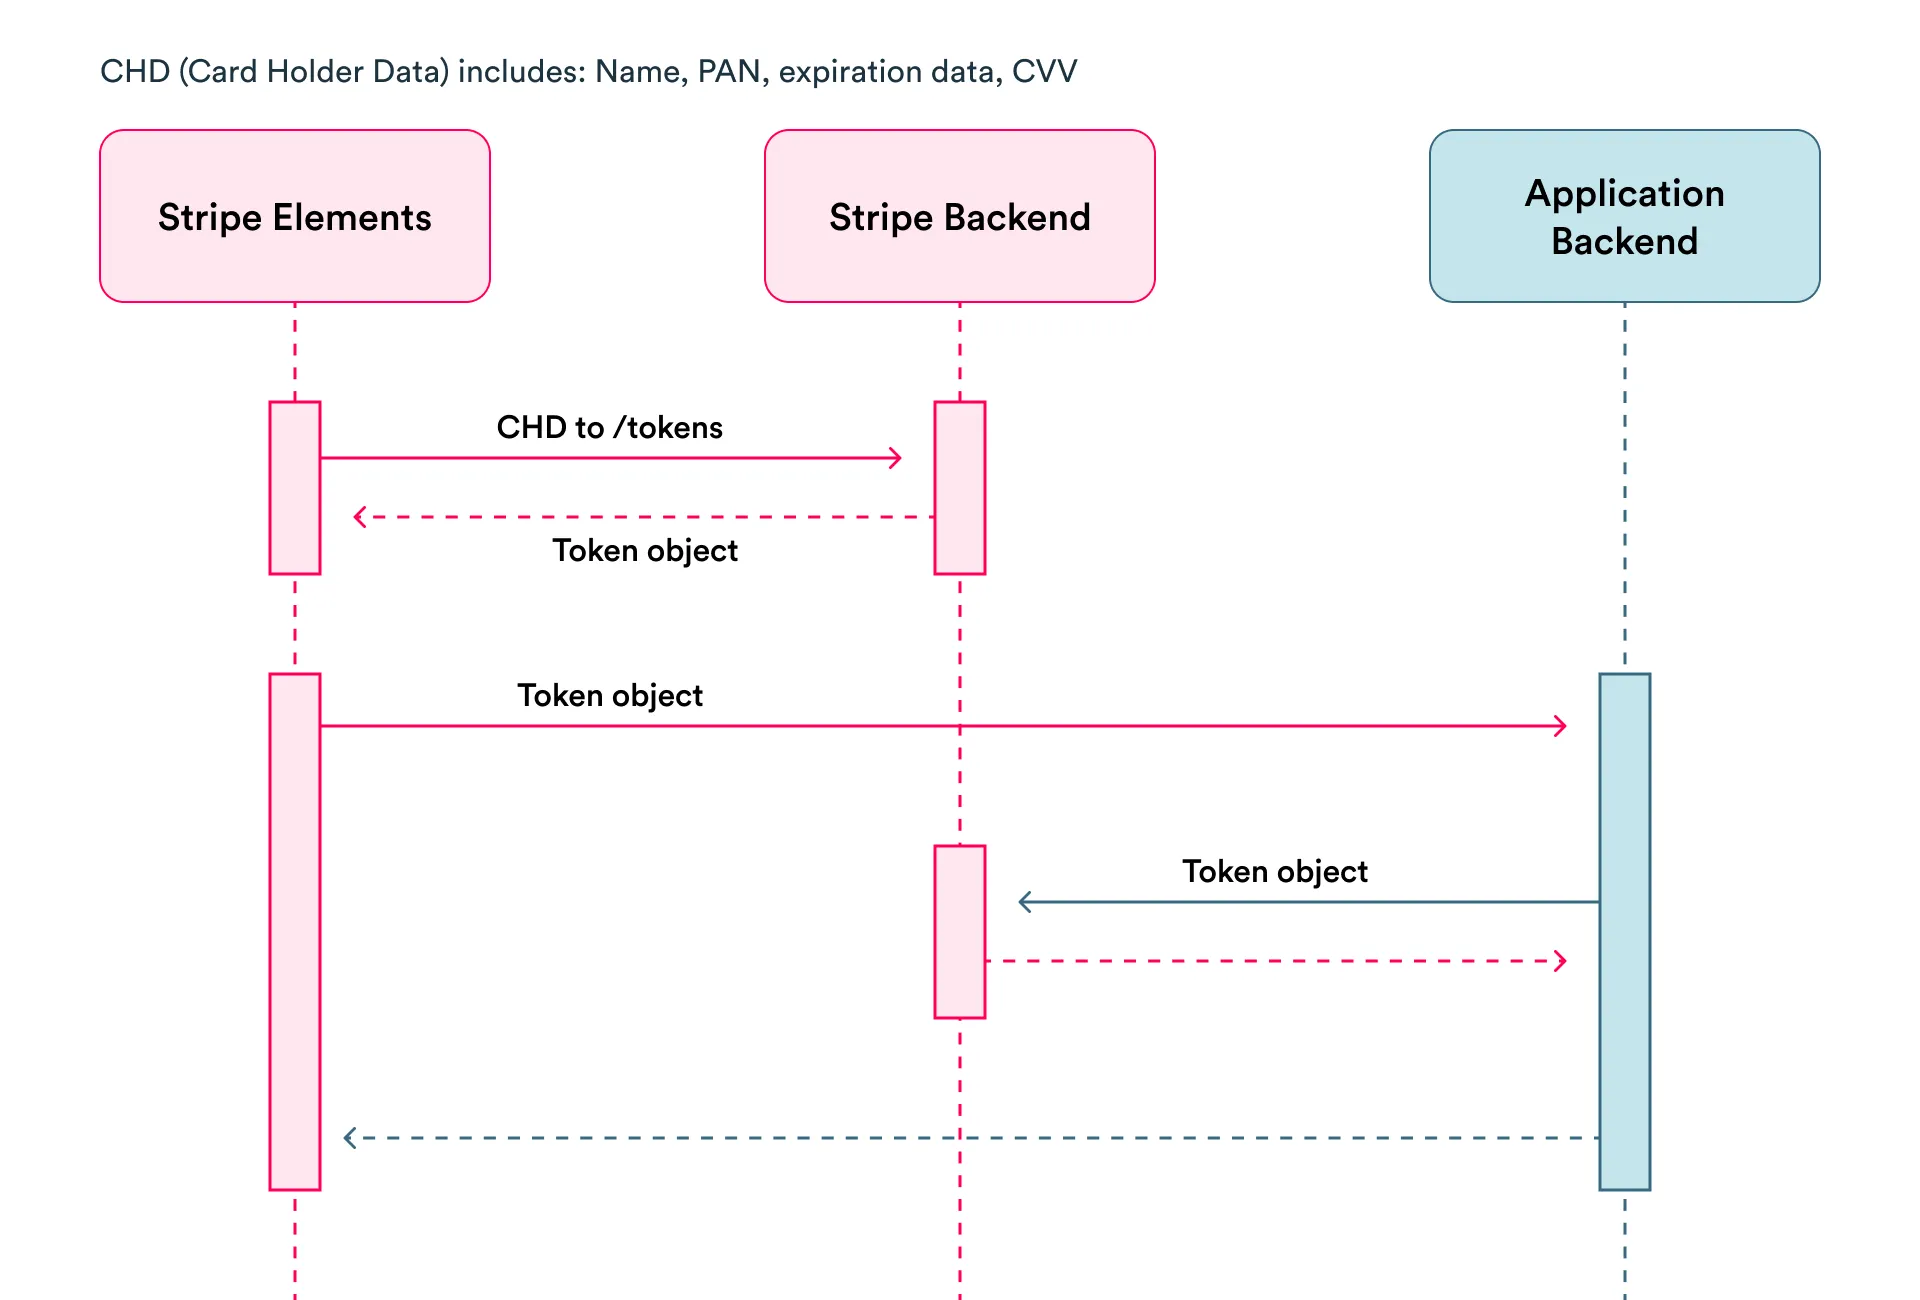
-
Stripe Elements in your application frontend collect the payment card data.
-
Stripe Elements send the payment card data to the Stripe’s
/tokensendpoint to get the token object that represents a payment card. For the details, please see the create card token article in the Stripe documentation. -
With the token object, the application frontend fetches data from its backend, gets the Stripe credentials, and initiates a payment.
-
Stripe returns the result of the payment transaction.
-
The application backend returns the transaction result to the application frontend.
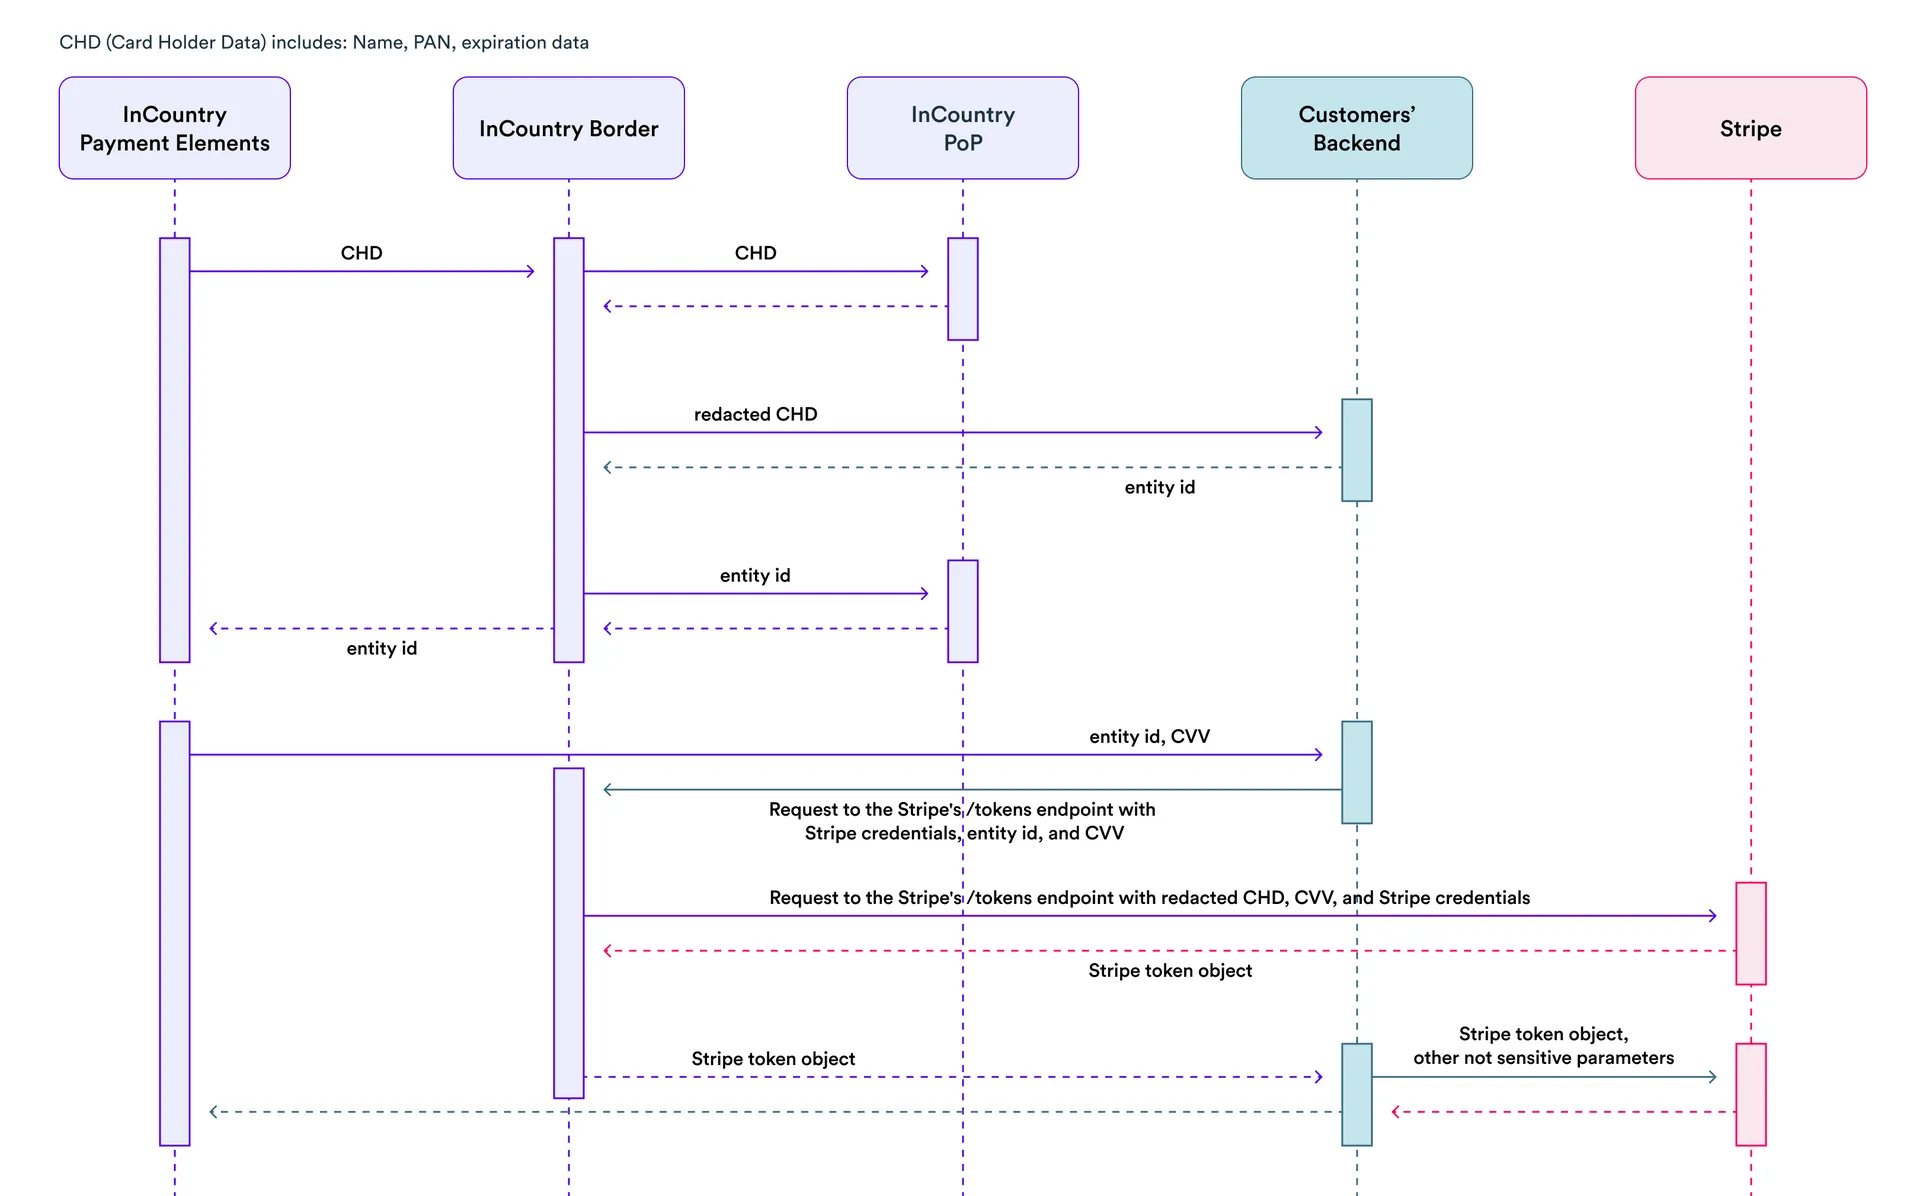
With InCountry Payments
To make a payment transaction in Stripe, you need to create a token object through the Stripe’s /tokens endpoint that represents the payment card data. To create it, you need to pass an entity id to the /tokens endpoint through InCountry Payments that will fill out the request payload with payment card data in the pre-defined format. Then Stripe will create a token and return it back. With that token object, you can charge money from your customers, create recurrent payments, or make direct requests to Stripe.
The following diagram shows the payment flow when using Payments with Stripe:
Example of using Stripe API with InCountry Payments
Below, you can find an example of how to create a token object (with payment card data) for your application backend (the POST /buy endpoint). For example, with Node.js using axios:
const axios = require('axios');
const querystring = require('querystring');

app.post('/buy', async function(req, res) {
  const entityId = req.body['x-inc-entity-id']
  const cardCvc = req.body.cardCvc

  const a = axios.create({
    baseURL: `${INCOUNTRY_PAYMENTS_URL}`,
    headers: {
      'Authorization': `Bearer ${STRIPE_SECRET_KEY}`,
      'Content-Type': 'application/x-www-form-urlencoded',
    }
  });

  // Here the request to Stripe will go through InCountry Payments and empty strings will be filled out.
  const token = await a.post('tokens', querystring.stringify({
    entityId,
    'card[number]': '',
    'card[exp_month]': '',
    'card[exp_year]': '',
    'card[cvc]': cardCvc,
  }));


  // some more actions (charge money from your customer, create recurrent payment, or make direct requests to Stripe)

});
The request to the Stripe’s /tokens endpoint will go through InCountry Payments which will unredact the redacted payment card data and pass it to Stripe for performing a payment transaction.
Moving from One Payment Provider to Another
You may want to add support for another payment provider besides Stripe. InCountry Payments provides provider-agnostic aliases which enable the routing of payment traffic to any number of payment providers you work with. You do not need to secure the sensitive data by yourself.
Data Retention and Deletion
Records with payment card data can be removed on demand and according to our data retention policy (pt. 9.3).
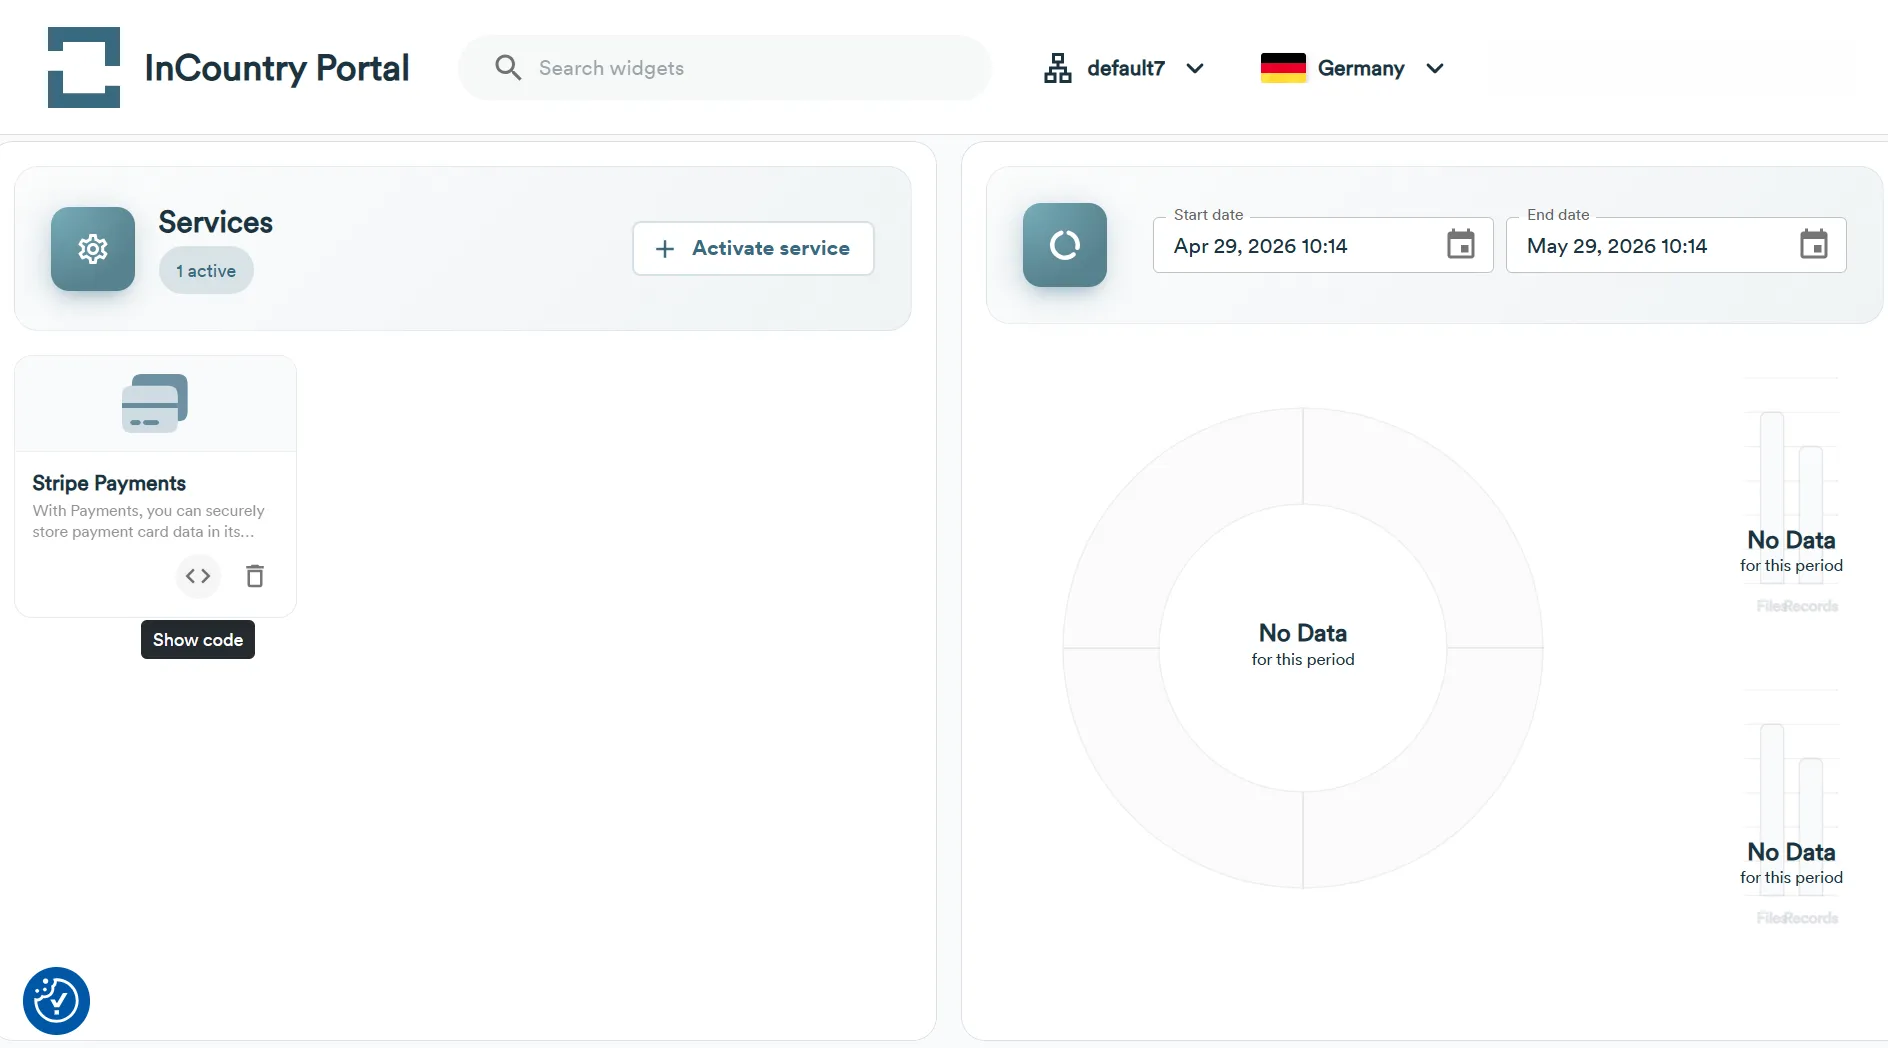
Managing Stripe Payments service through Portal
Creating a new Stripe Payments service
Payment Vault operates in the experimental mode with the limited support of payment providers and countries. Help us prioritize our roadmap with payment providers and countries you want to have by dropping an email to us.
You can create one Stripe Payments service per each activated country within an environment.
-
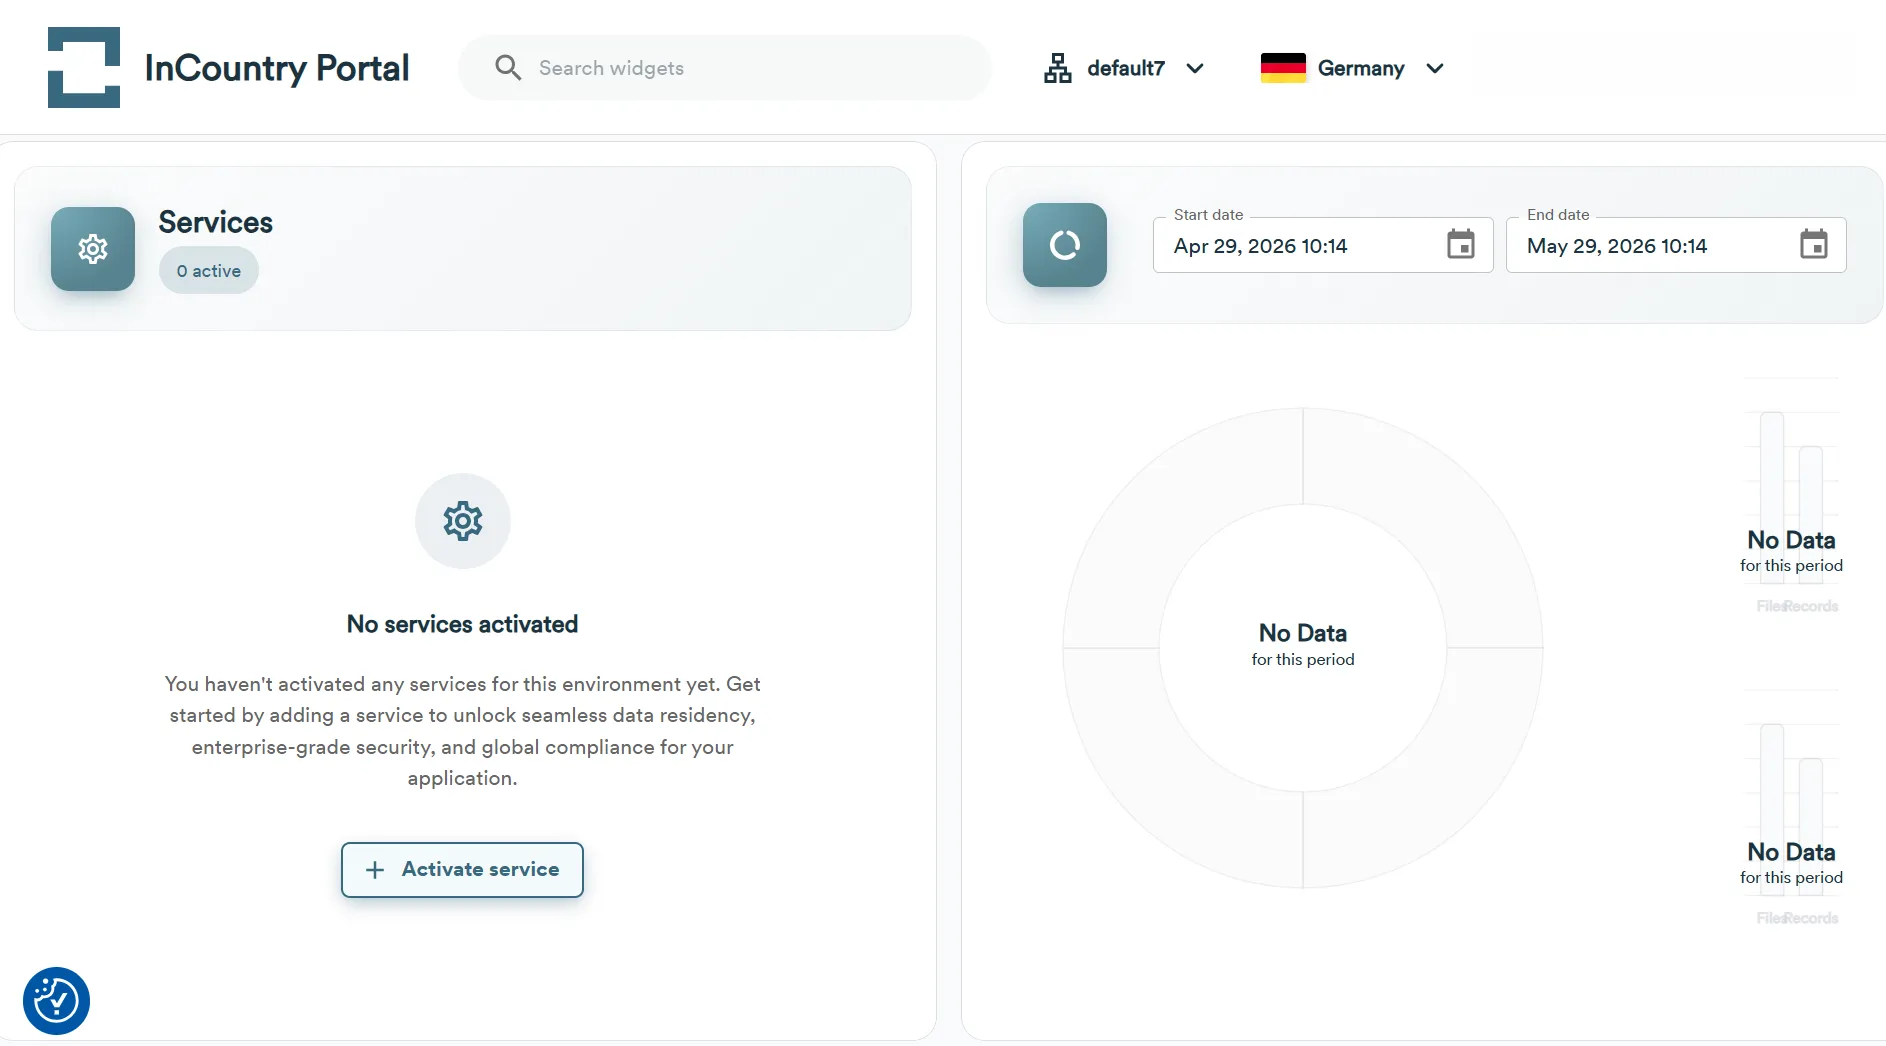
Select the environment and country where you wish to create the Stripe Payments service, then navigate to the Services widget.

-
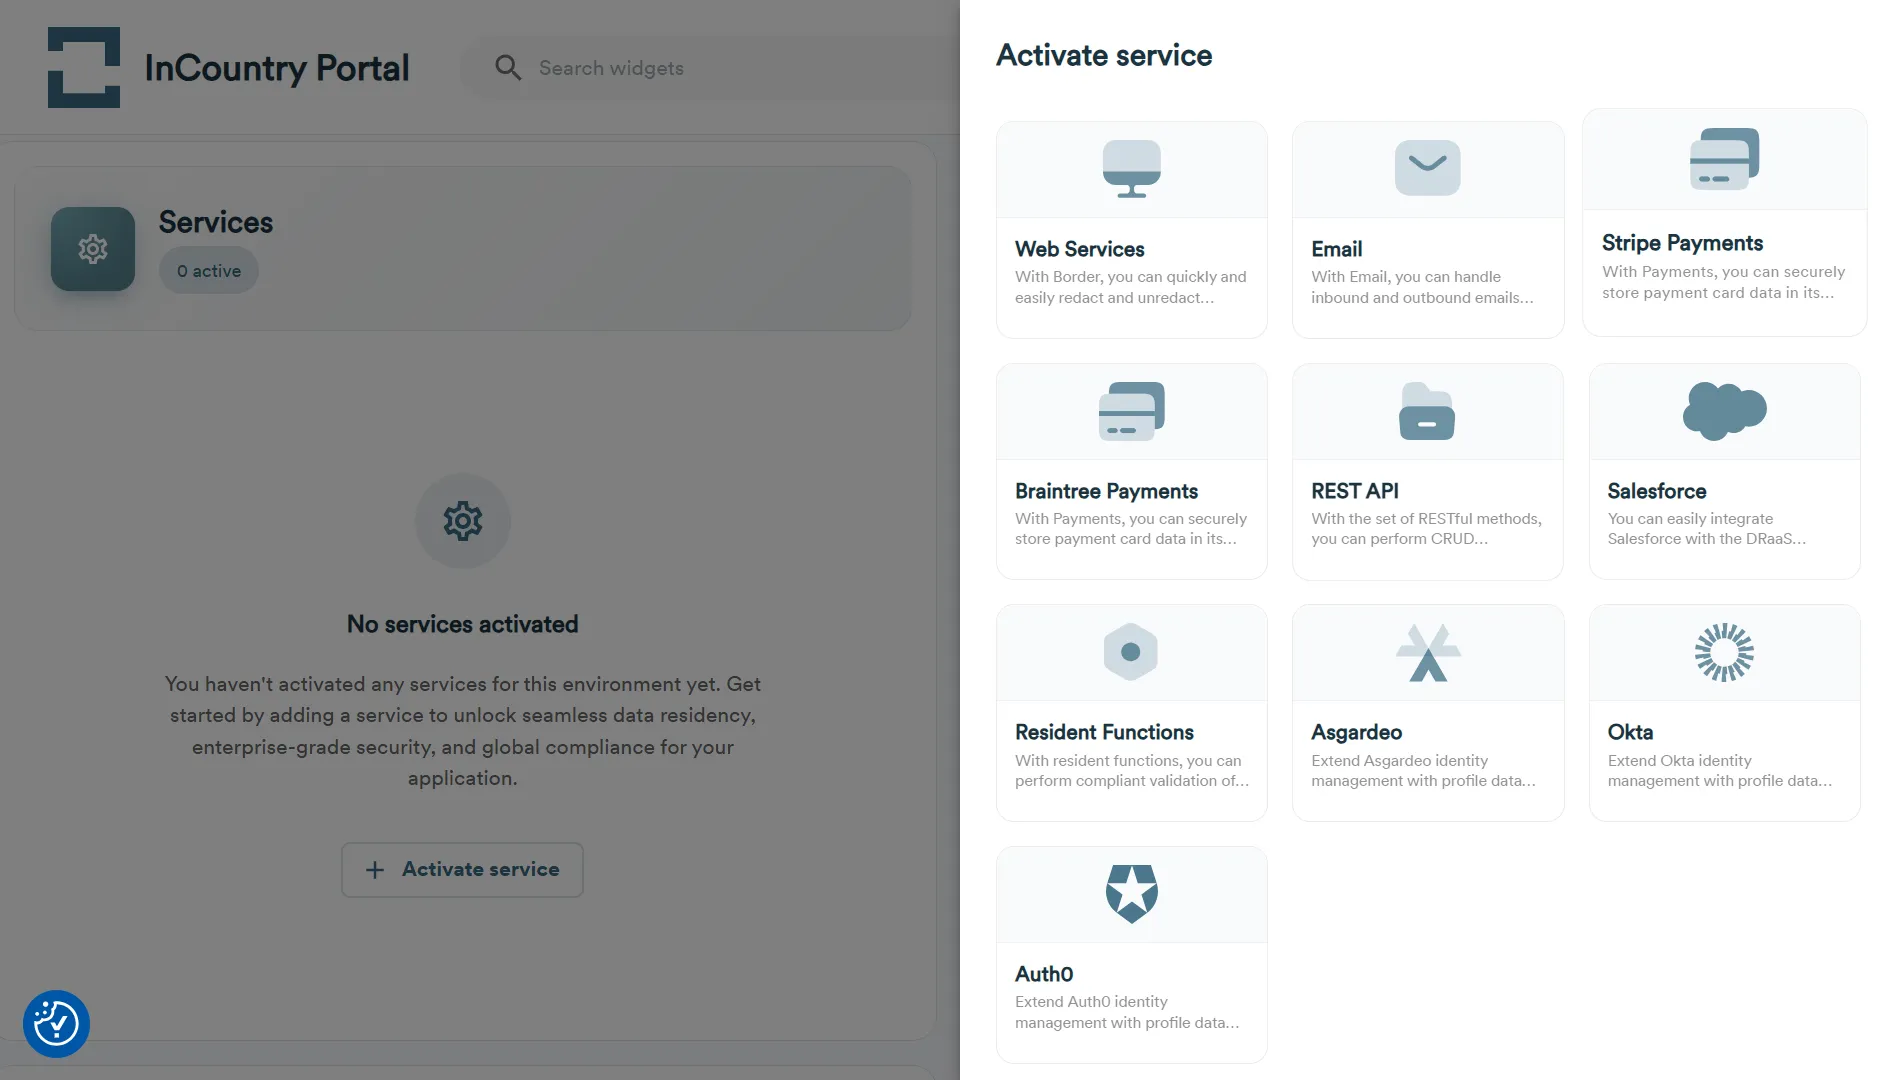
Click the Activate service button.
-
At the Activate service step, select Stripe Payments.
-
At the Create Payment Vault step, define the following parameters:
- Application endpoint for payment cards data – enter the path to the endpoint which payment card data from the payment form is submitted to.
- Application endpoint for payment cards data – enter the path to the endpoint which payment card data from the payment form is submitted to.
-
Click Create.
-
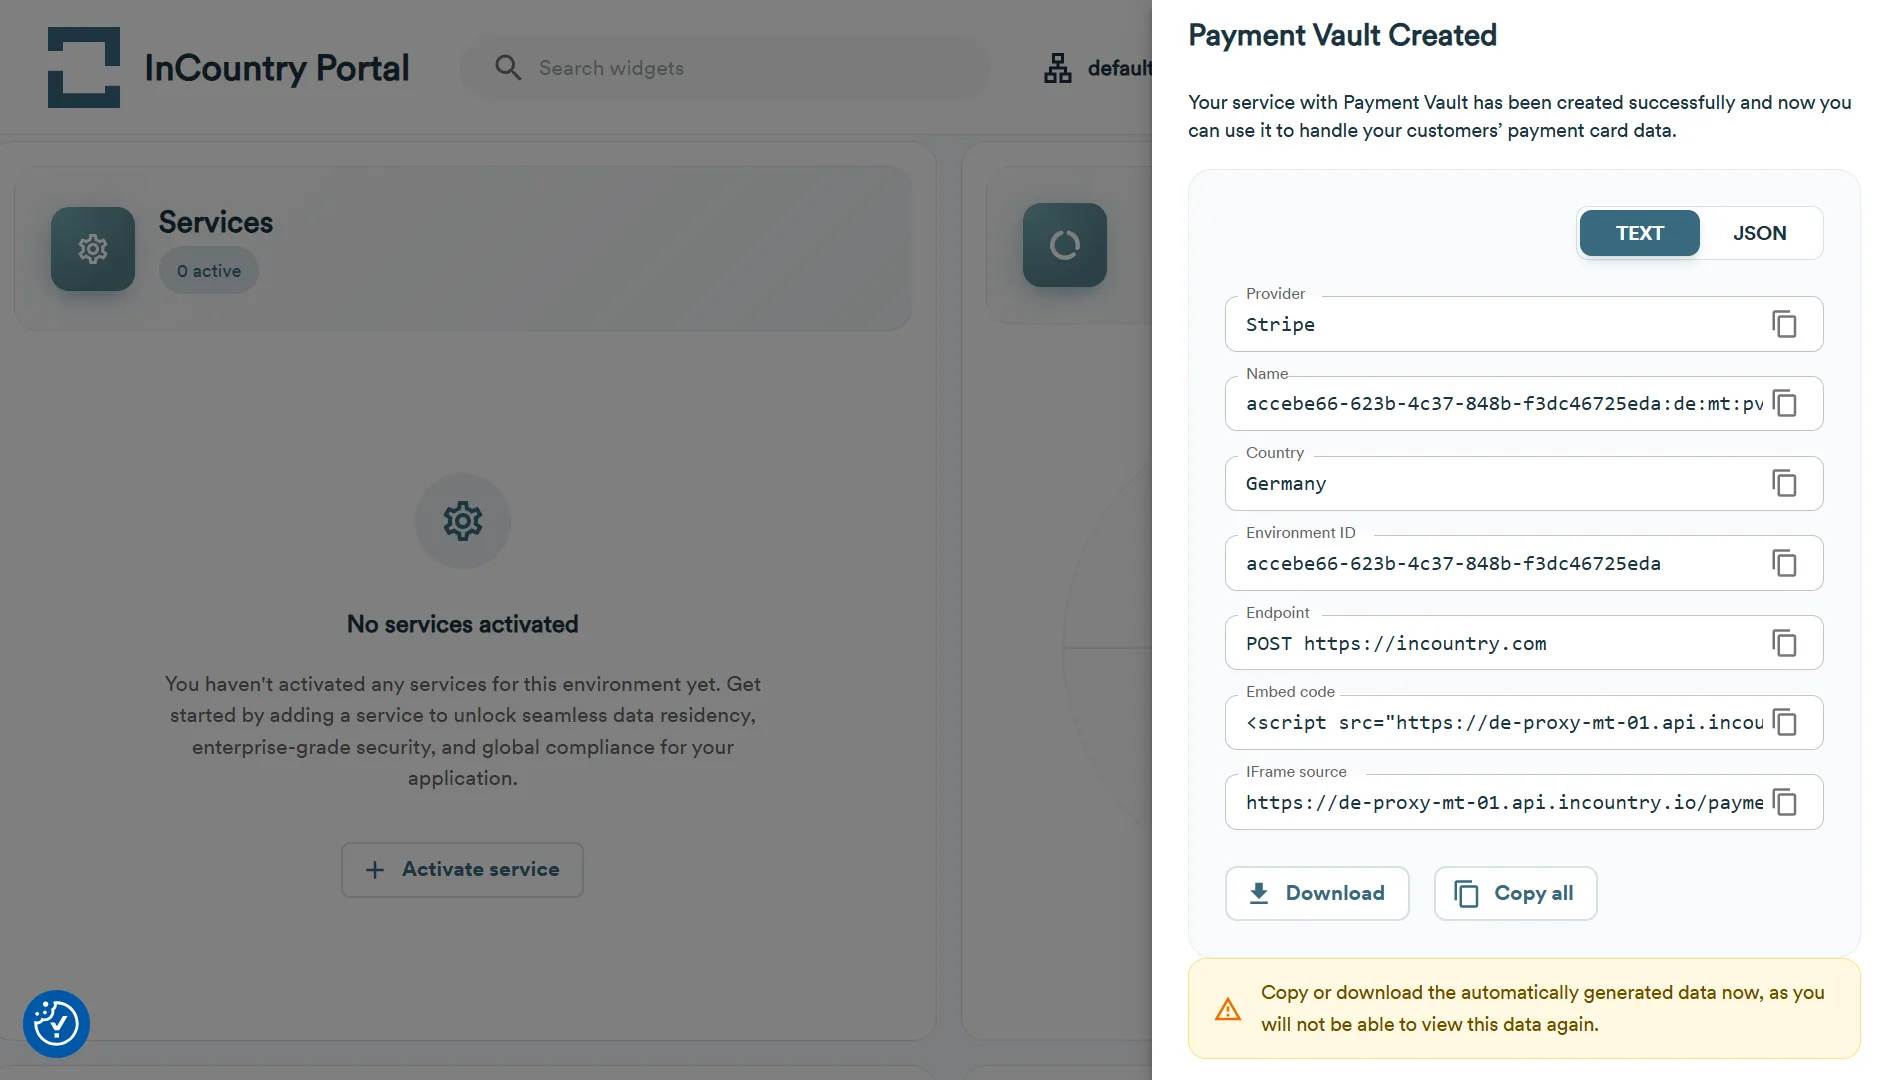
On the Payment Vault Created page, you can see all required parameters to use the Stripe Payments service:
Save the automatically generated data, as you will not be able to view this data again. To download a text file with all these credentials, click the Download button. To copy these credentials to the clipboard, click the Copy all button.
-
When complete, click Close.

Deleting a Stripe Payments service
- In the Services widget for the activated country, locate the Stripe Payments service you want to delete.
- Click the Delete icon.
- Enter the verification code and click Delete.
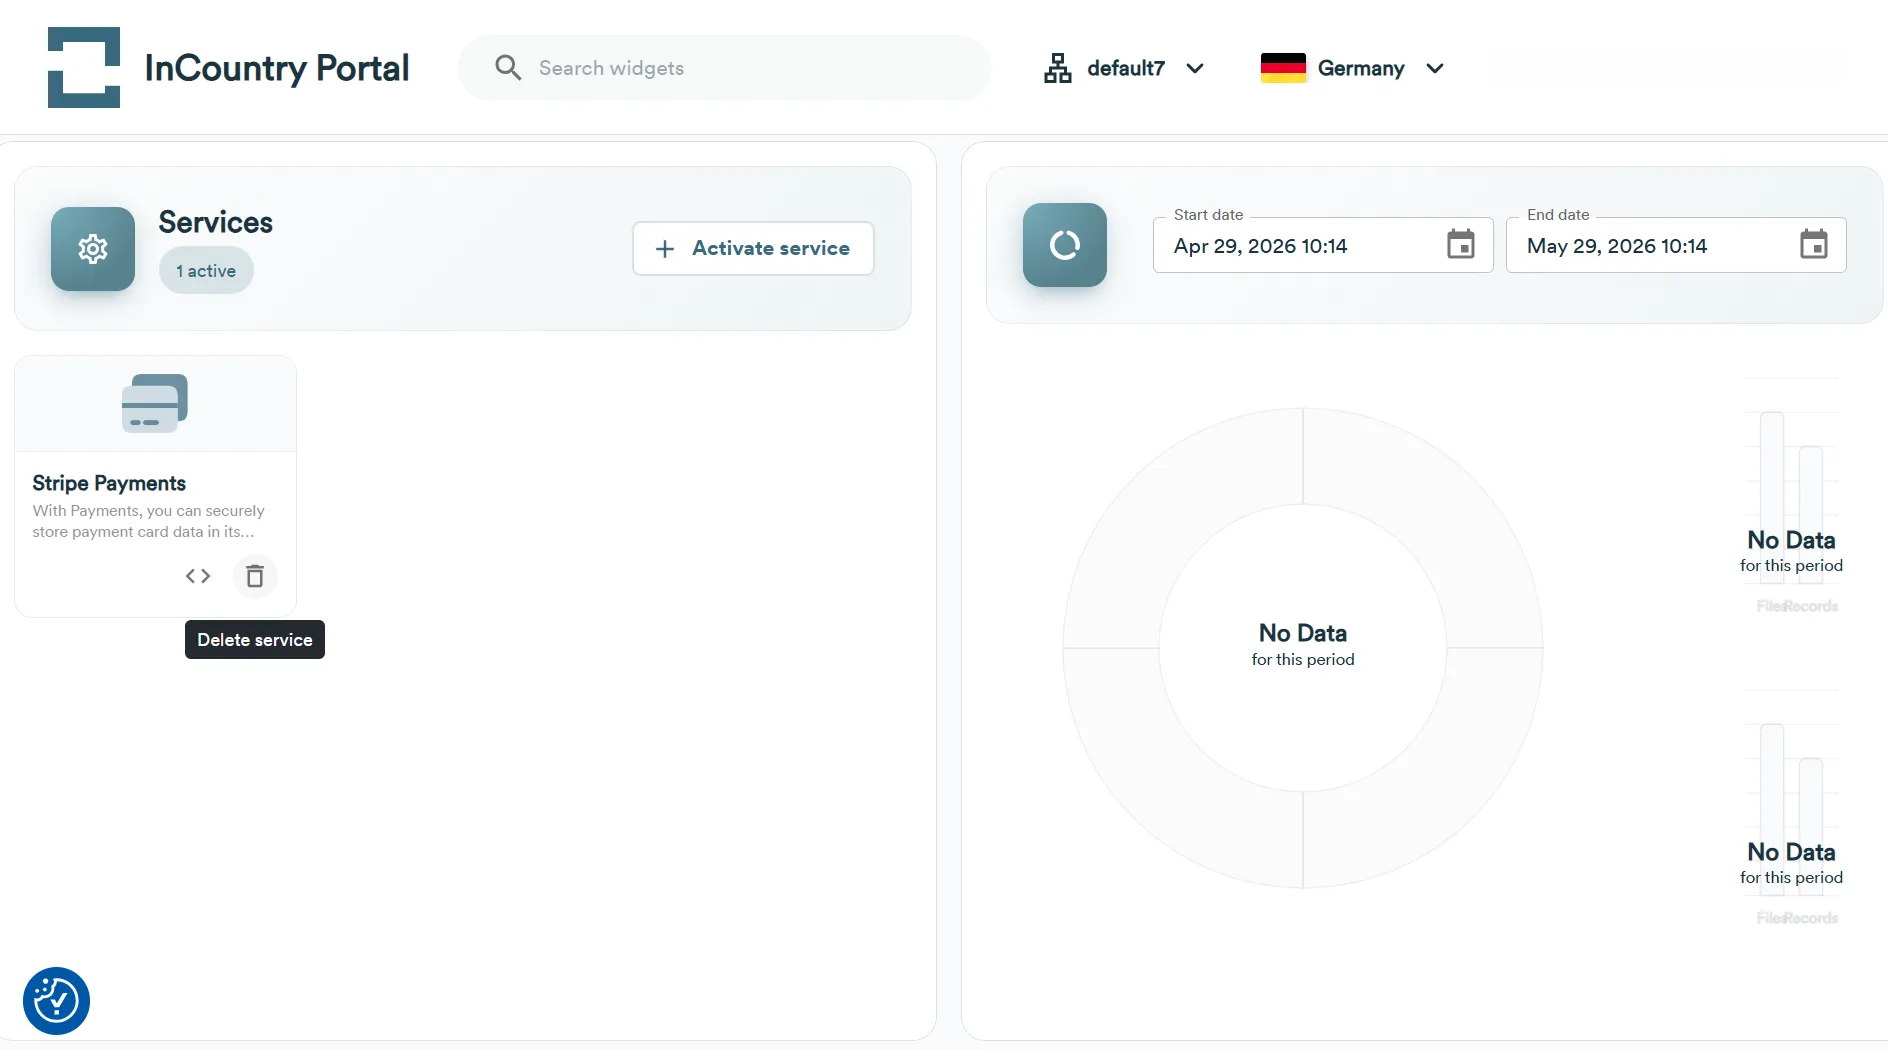
Viewing Stripe Payments service details
- In the Services widget for the activated country, locate the Stripe Payments service you want to see details.
- Click the Show code icon.
- On the next page, you can see all service details that you need to integrate the Stripe Payments service.