n8n Demo — Step-by-Step Setup Guide
This guide walks you through creating an n8n workflow that uses an MCP Client tool with AgentCloak to anonymize PII data.
Step 1: Launch n8n
-
Start your n8n instance using one of the following methods:
-
Docker:
docker run -it --rm -p 5678:5678 n8nio/n8n -
Desktop App: Open the n8n desktop application.
-
Server Deployment: Start your server-based n8n instance as configured.
-
-
Confirm n8n is running by opening the UI in your browser (default:
http://localhost:5678).
Step 2: Add a Chat Trigger
-
In your workflow editor, click Add Node.
-
Select Chat Trigger.
-
Configure it to receive incoming messages.
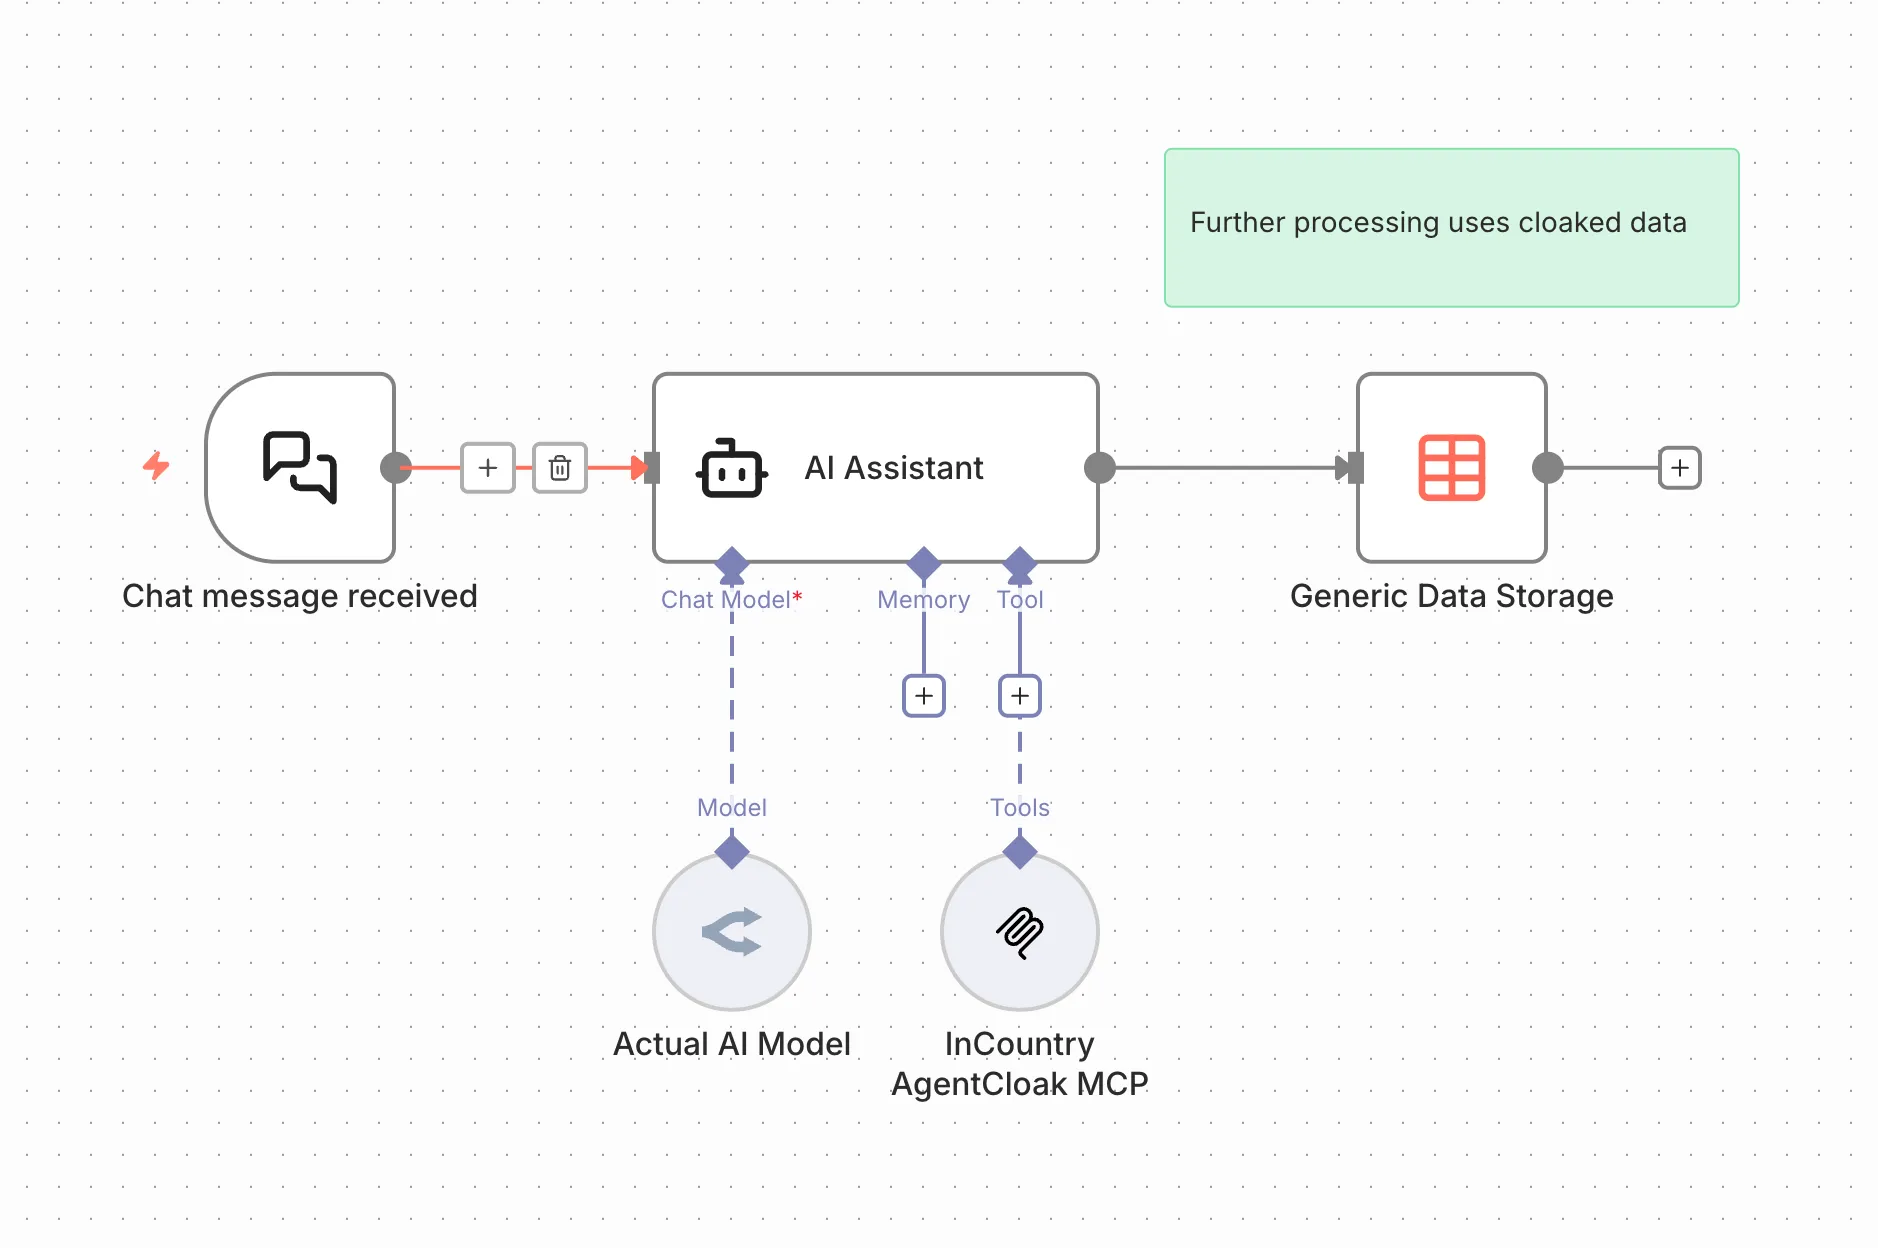
- This node will start the workflow whenever a chat message is received.
Step 3: Add an AI Agent
-
Click Add Node and select AI Agent.
-
Connect the Chat Trigger node output to the AI Agent node input.
-
Open the Prompt section of the AI Agent node.
-
Configure the User Prompt:
Anonymize all PII data from the message below
{{ $json.chatInput }}
This ensures the AI will process incoming messages and remove sensitive data.
Step 4: Add a Chat Model
-
Click Add Node and select a Chat Model (e.g., OpenAI, Anthropic, or another supported provider).
-
Connect the Chat Model to the AI Agent.
-
Configure the model with your provider credentials and any required parameters.
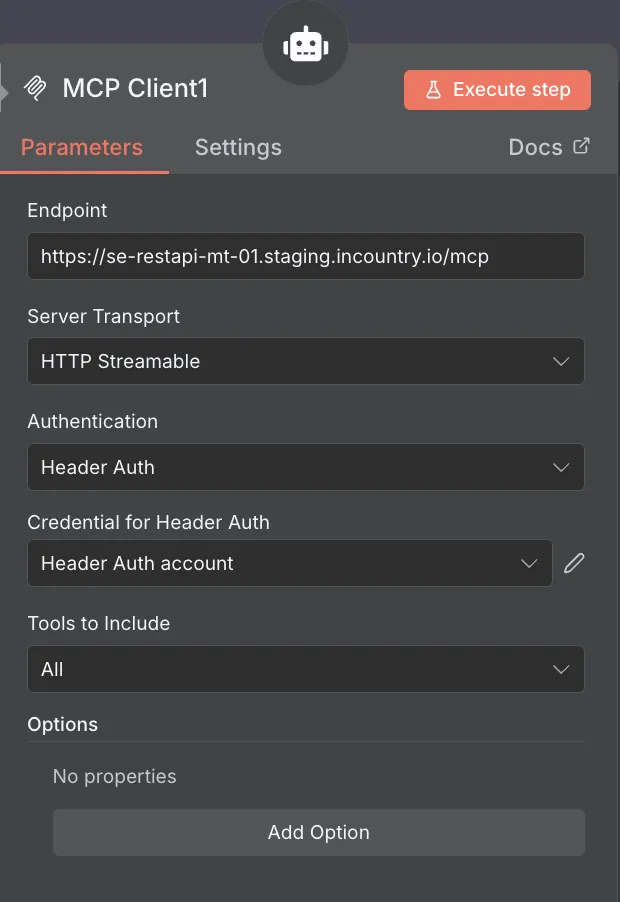
Step 5: Add an MCP Client Tool
-
Click Add Node and select MCP Client Tool.
-
Connect the MCP Client Tool to the AI Agent.
-
Configure the MCP Client Tool with the AgentCloak server parameters:
- Endpoint
- Server Transport
- Authentication method
- Credential for Header Auth
- Tools to include

- Add a header
x-inc-agentcloak-api-key:
-
Test the node to ensure it successfully communicates with your AgentCloak server.

Step 6: Save and Activate Workflow
-
Review the workflow to confirm all nodes are properly connected.
-
Click Save and then Activate the workflow.
-
Send a test message to the Chat Trigger and verify that the workflow:
-
Receives the message.
-
Anonymizes PII via the AI Agent.
-
Processes the message through the Chat Model.
-
Sends it to the MCP Client Tool with AgentCloak.
✅ Workflow Complete – Your n8n workflow is now configured to securely anonymize chat messages using AgentCloak.
-