Tutorial
This tutorial walks you through creating an AgentCloak service, setting up the MCP Server, and testing it using the MCP Inspector.
-
Create an AgentCloak service
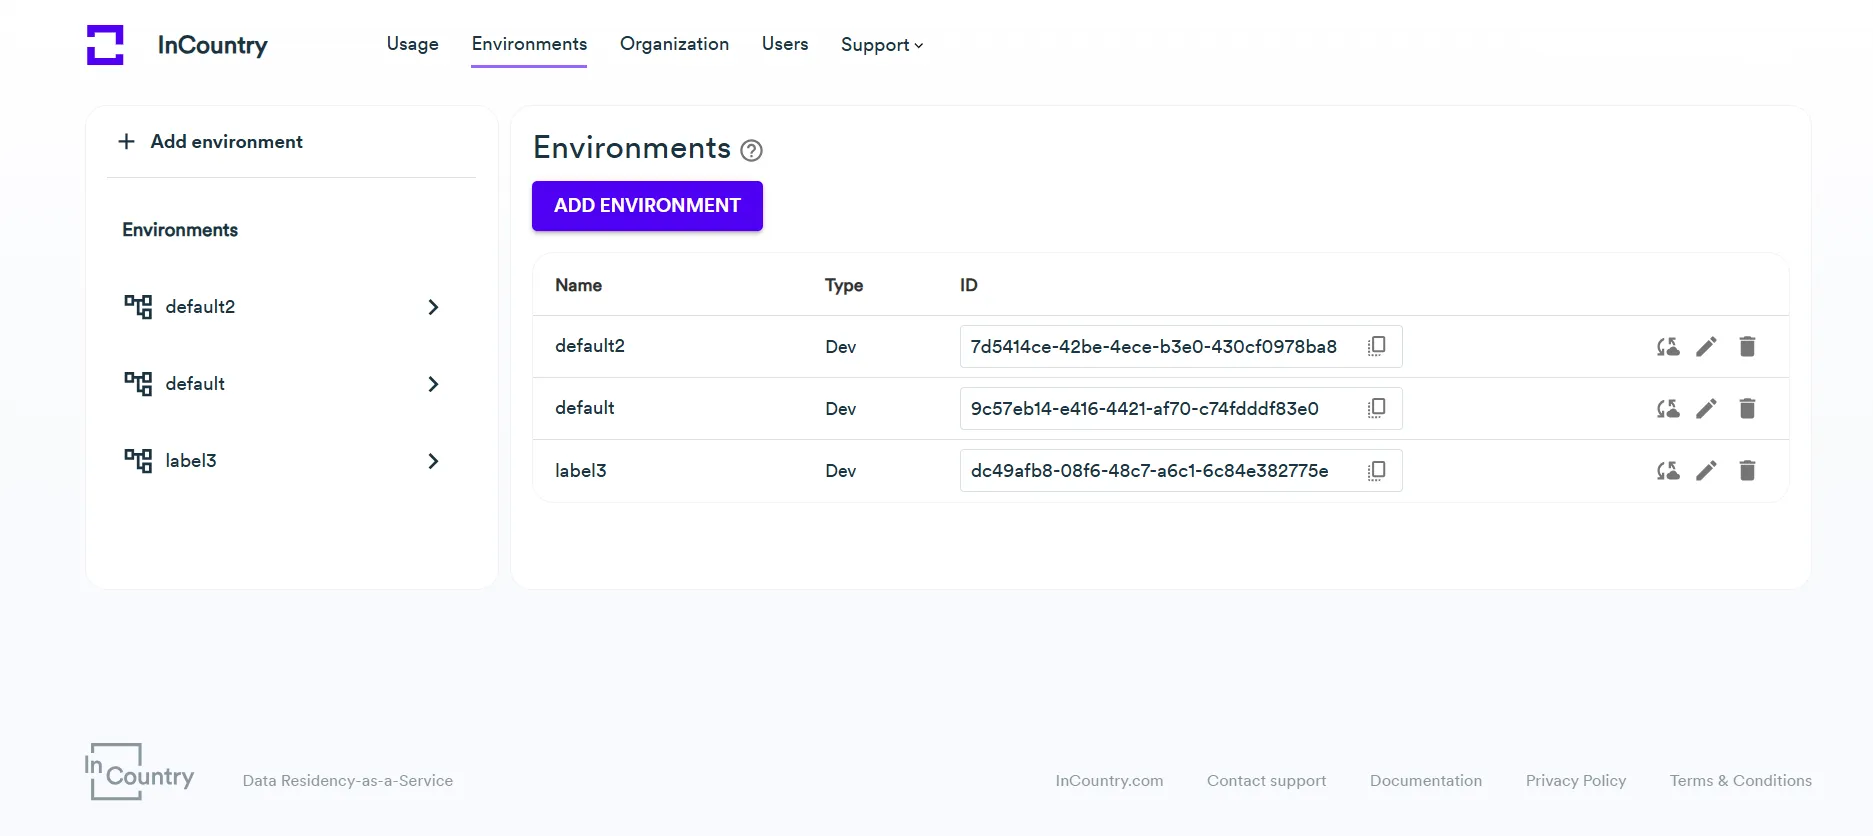
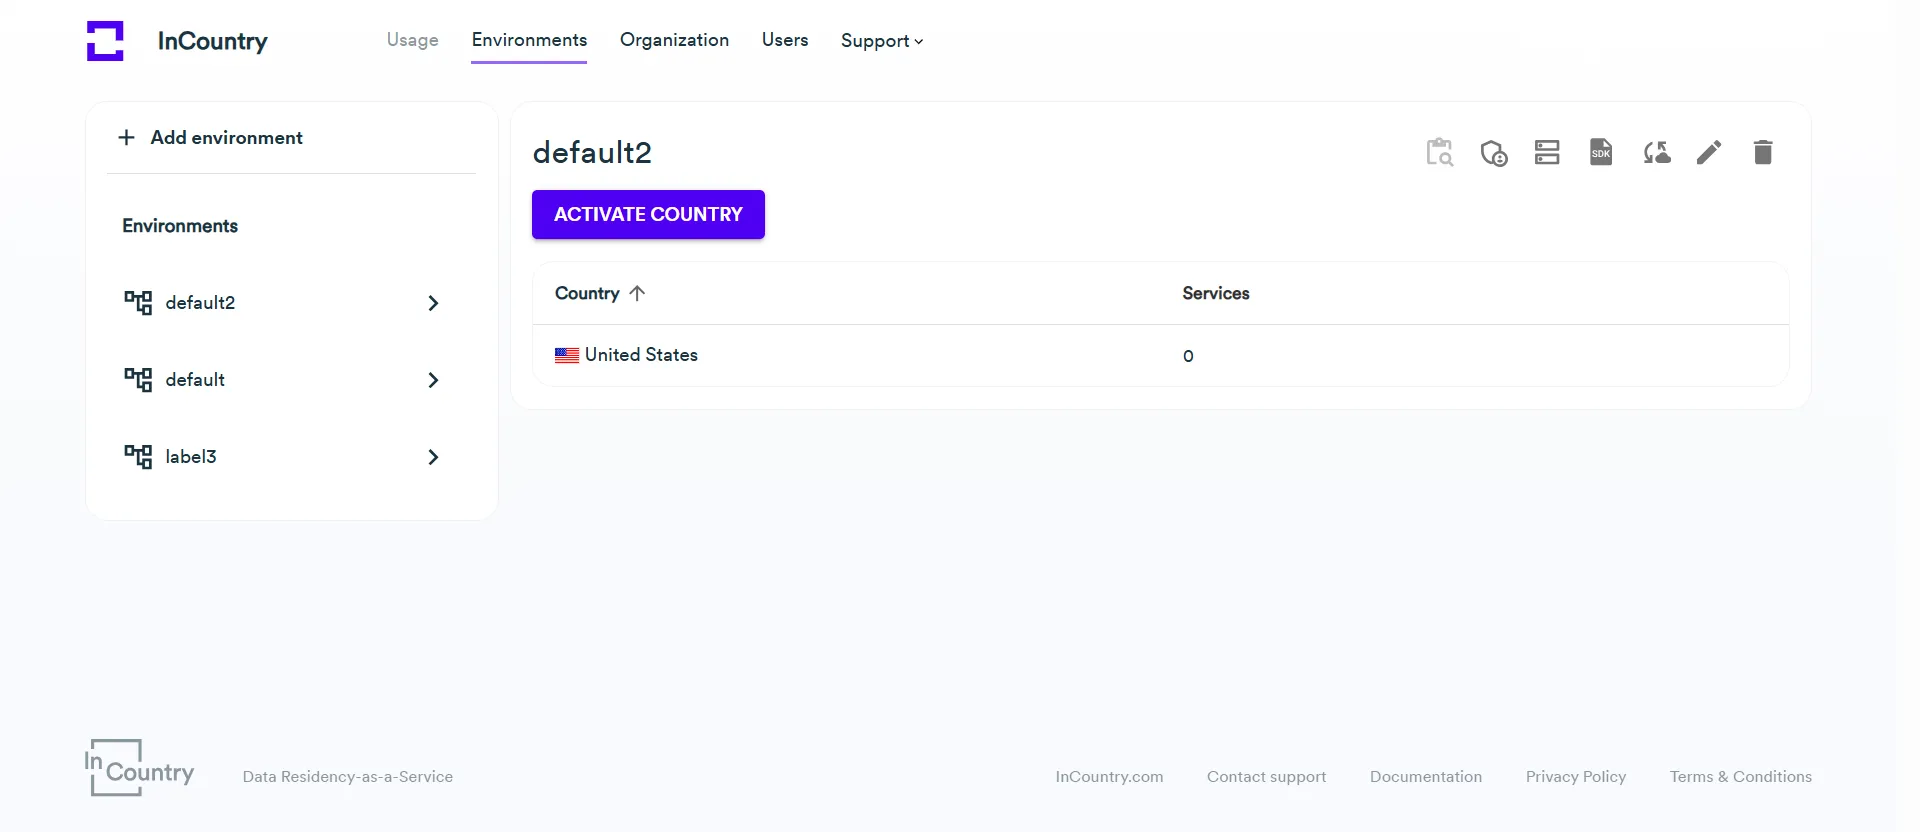
- Open the Environments page and select the environment where you want to create an AgentCloak service.

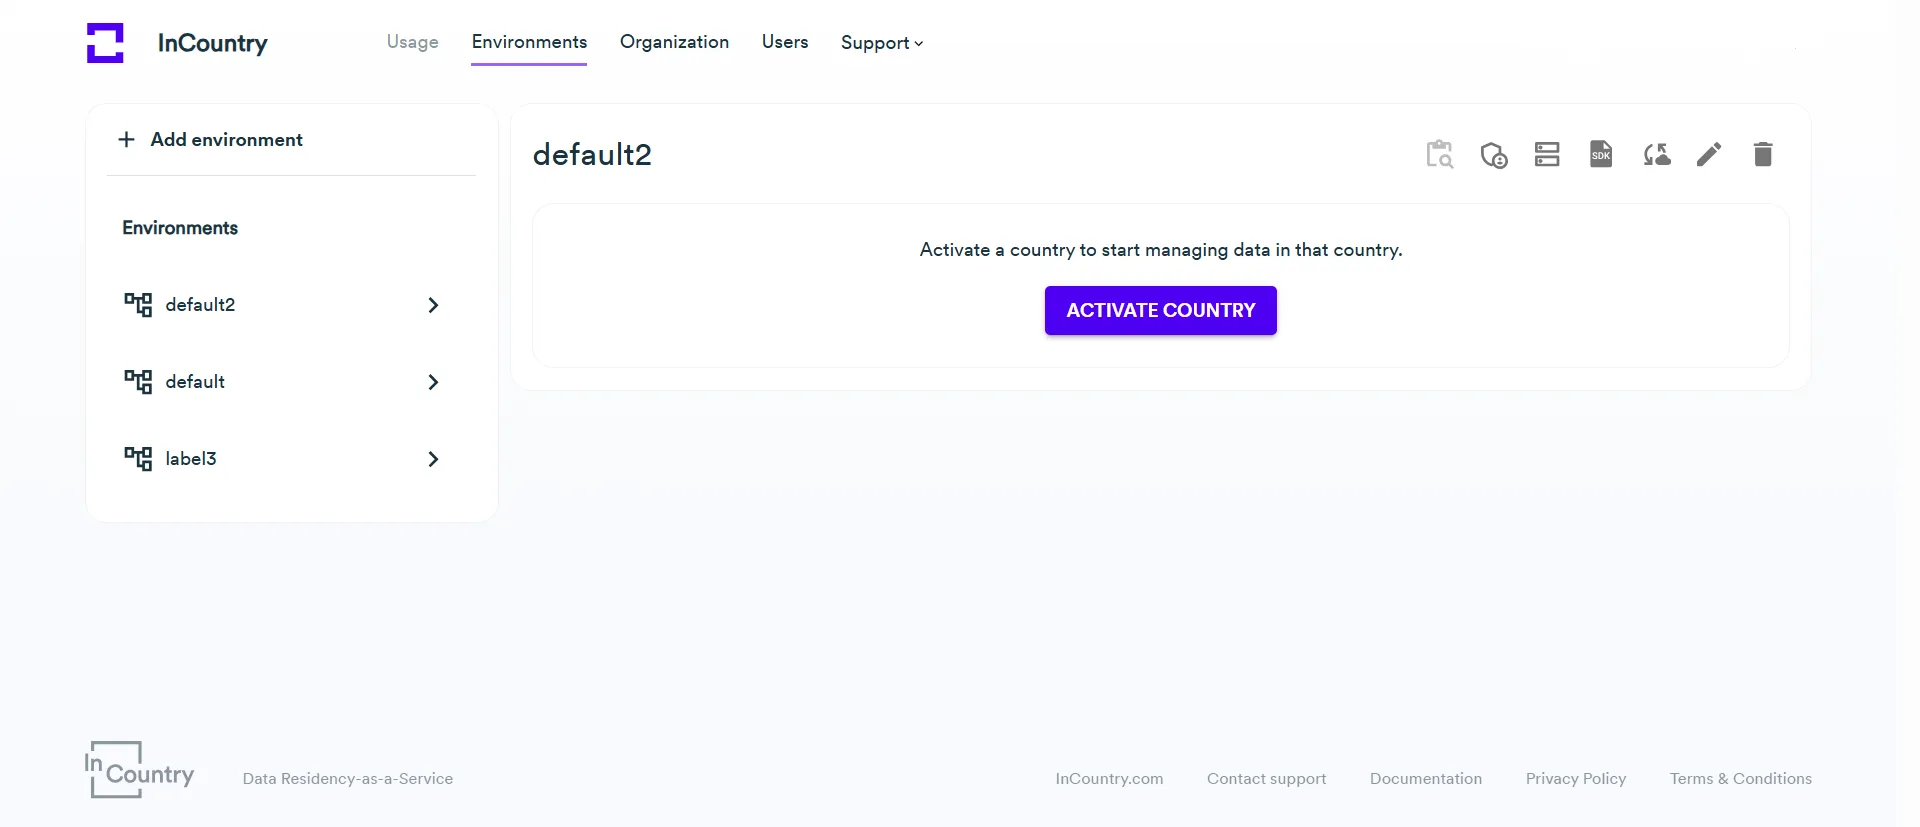
- On the Environments page, click the Activate country button.
- On the Activate country page, select the country where you want to manage data and click Activate.
- On the Environments page, click the country you previously activated.
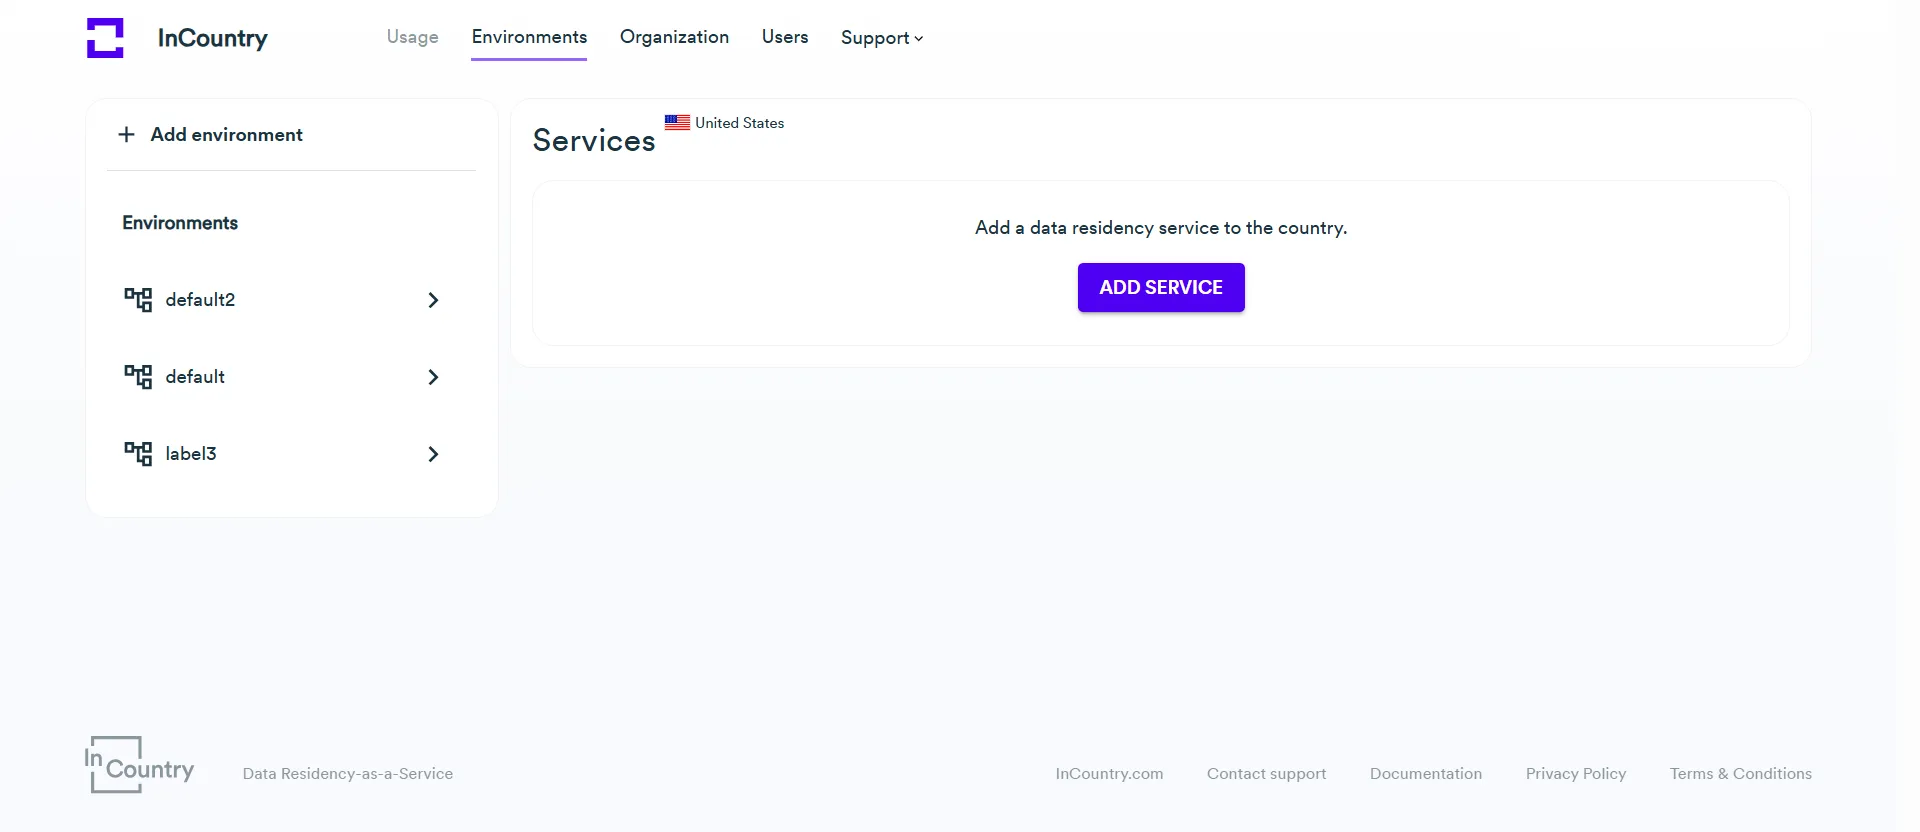
- On the Services page, click the Add Service button.
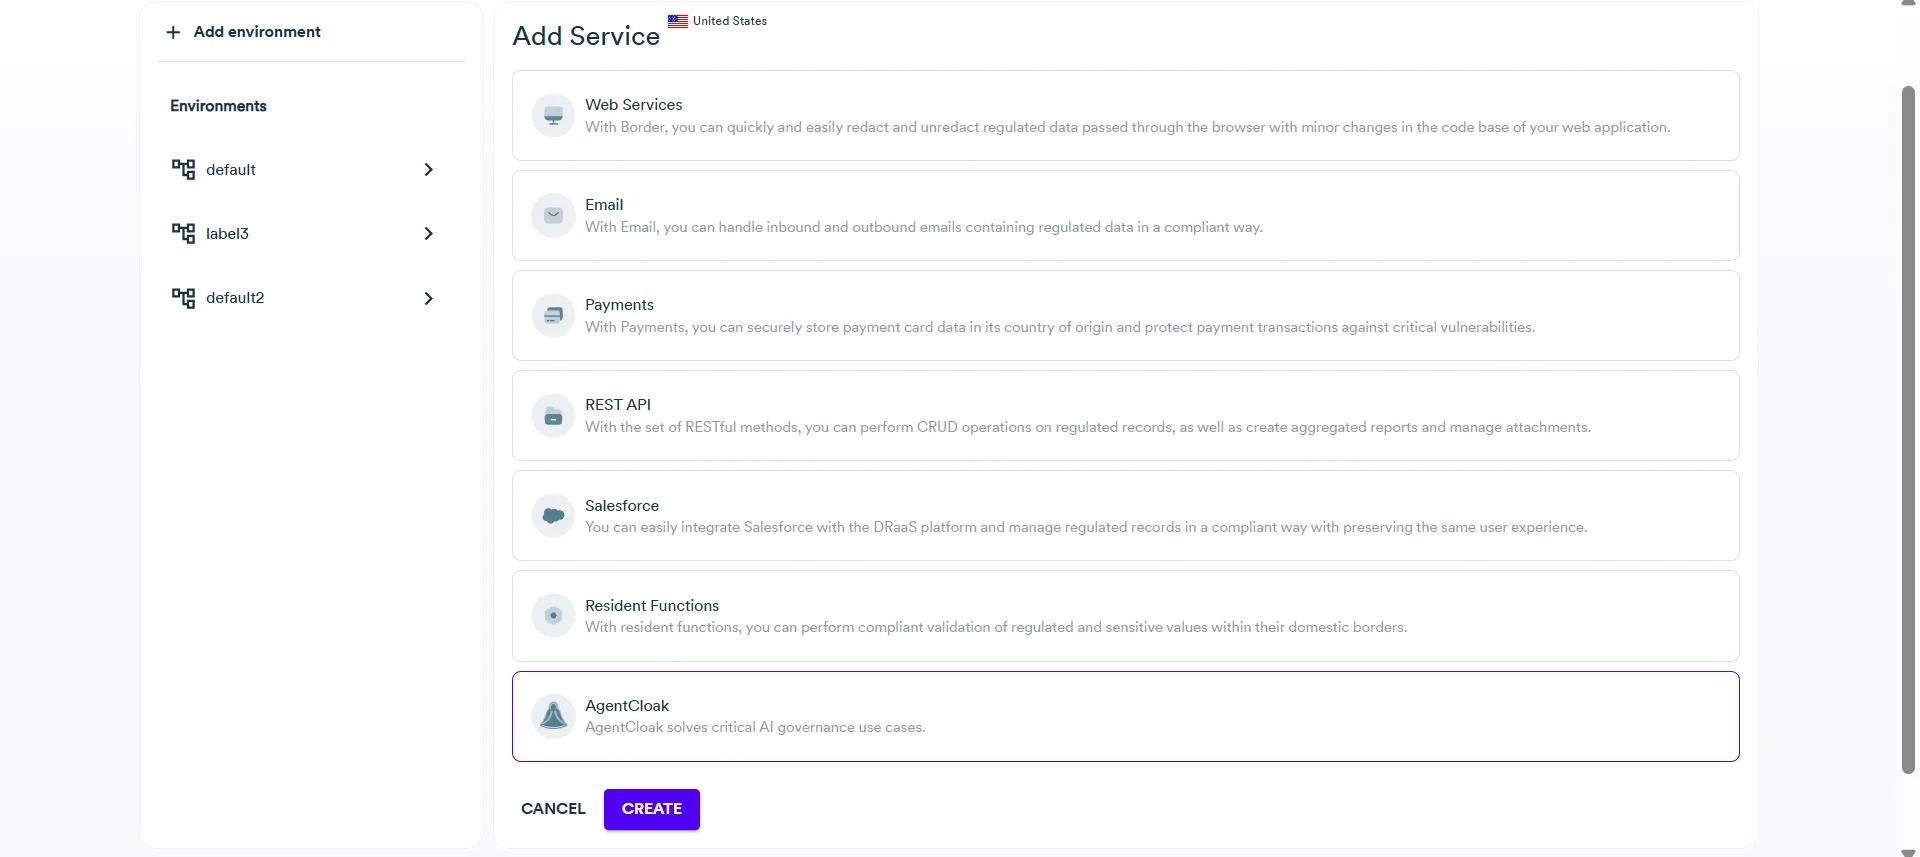
- On the Add Service page, select the AgentClock service.
- Click the Create button.
- Open the Environments page and select the environment where you want to create an AgentCloak service.
-
Create the MCP Server
-
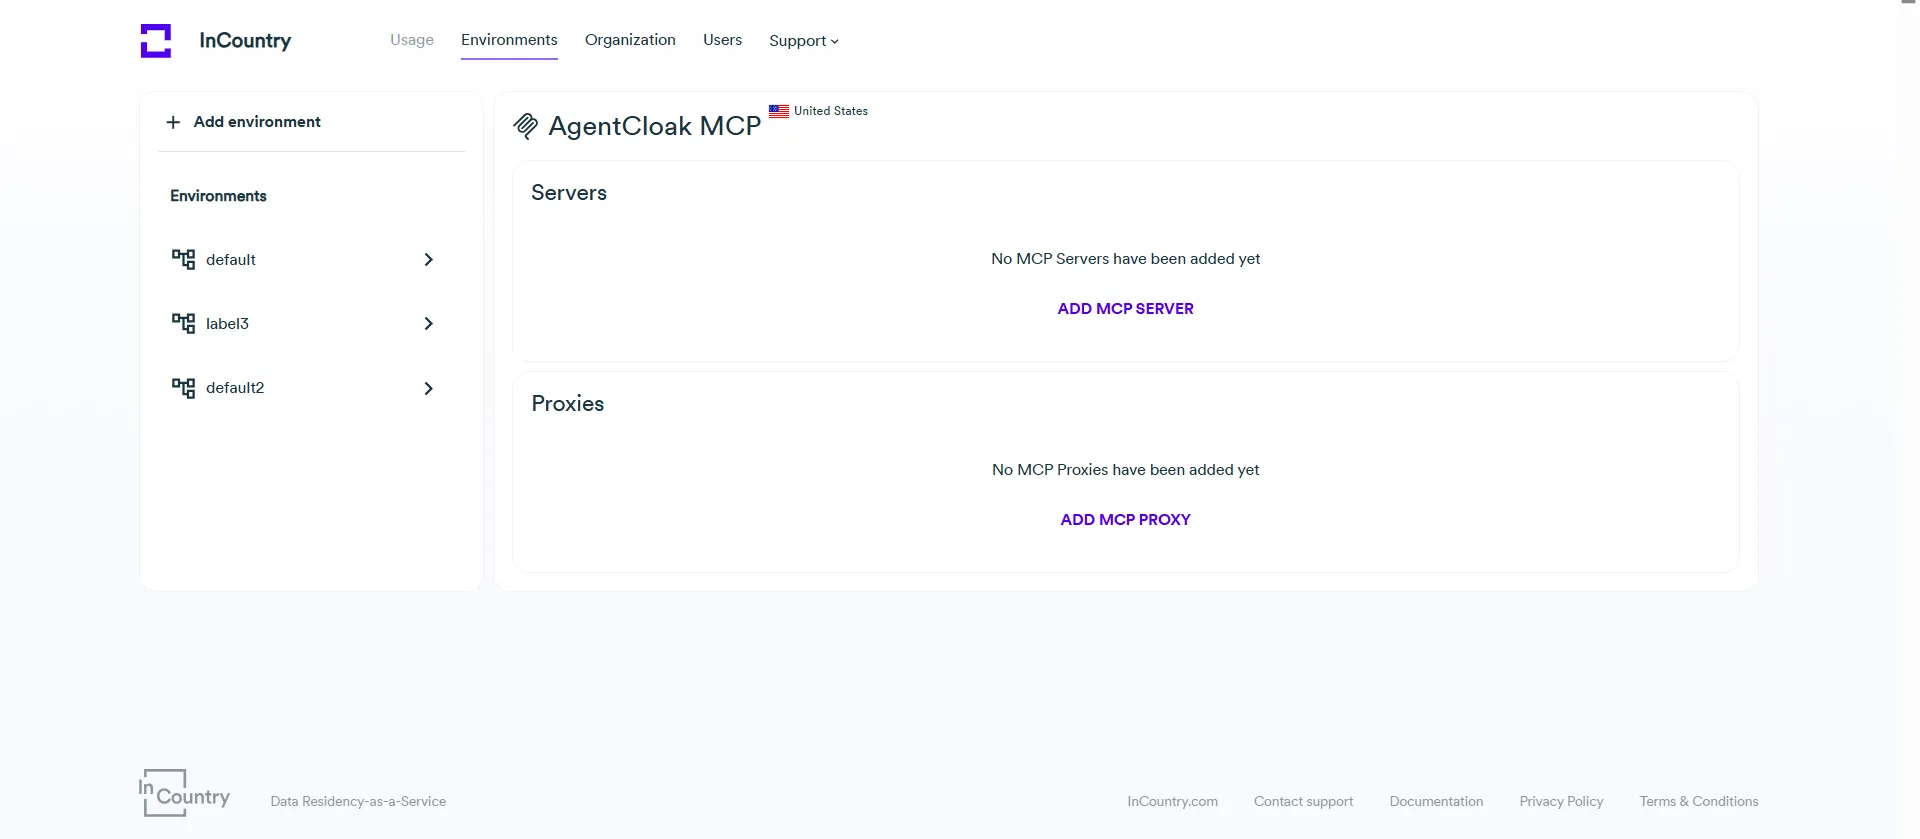
On the the AgentClock MCP page, click Add MCP Server.
-
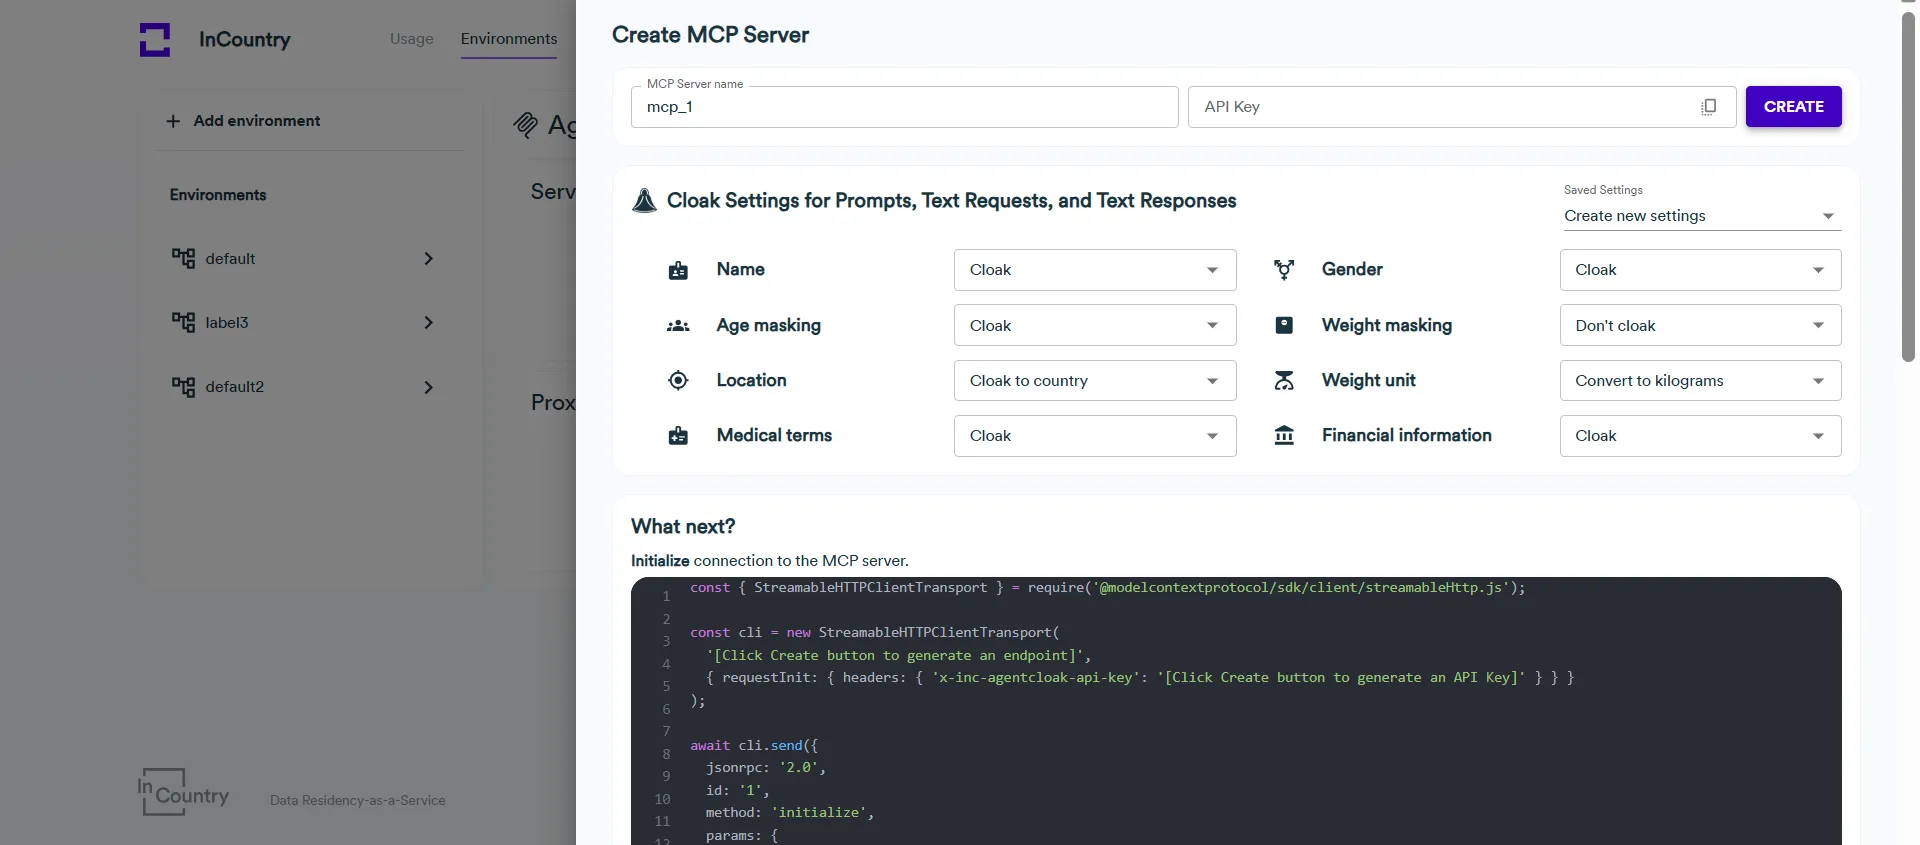
In the Create MCP Server form, enter the MCP Server name and select the Cloak Settings for Prompts, Text Requests, and Text Responses:
Data Category Cloak Options Description Name - Cloak
- Don’t cloakCloak: Replaces names with placeholders (e.g., {{NAME}}).
Don’t cloak: Leaves names unchanged.Age - Don’t cloak
- Age categories
- Age brackets
- CloakDon’t cloak: Leaves age as-is.
Age categories: Converts to general groups like "child", "adult", "senior".
Age brackets: Converts to ranges (e.g., "20–29").
Cloak: Fully replaces age with a placeholder.Location - Don’t cloak
- Cloak to city
- Cloak to country
- Cloak to region
- CloakDon’t cloak: No changes to location.
Cloak to city/country/region: Generalizes location to specified level.
Cloak: Fully removes or replaces all location data with a placeholder.Medical Terms - Don’t cloak
- Generalize medical terms
- Cloak medical terms
- CloakDon’t cloak: No changes.
Generalize medical terms: Replaces specific conditions (e.g., “Type 1 Diabetes”) with broader terms (e.g., “chronic illness”).
Cloak medical terms: Replaces medical terms with placeholders.
Cloak: Same as above; full anonymization.Gender - Don’t cloak
- CloakCloak: Replaces gender references with neutral placeholders (e.g., male,female).
Don’t cloak: No changes.Weight Masking - Don’t cloak
- Weight brackets
- CloakDon’t cloak: Keeps weight as-is.
Weight brackets: Groups into ranges (e.g., “150–160 lbs”).
Cloak: Replaces with a placeholder.Weight Unit - Don’t cloak
- Convert to pounds
- Convert to kilogramsDon’t cloak: Leaves units unchanged.
Convert to pounds/kilograms: Standardizes all weights into selected unit.Financial Information - Don’t cloak
- Cloak amounts and account numbers
- CloakDon’t cloak: Leaves financial data intact.
Cloak amounts and account numbers: Masks sensitive parts like dollar amounts and account numbers (e.g.,$####,****1234).
Cloak: Fully replaces financial information with placeholders. -
Click the Create button.
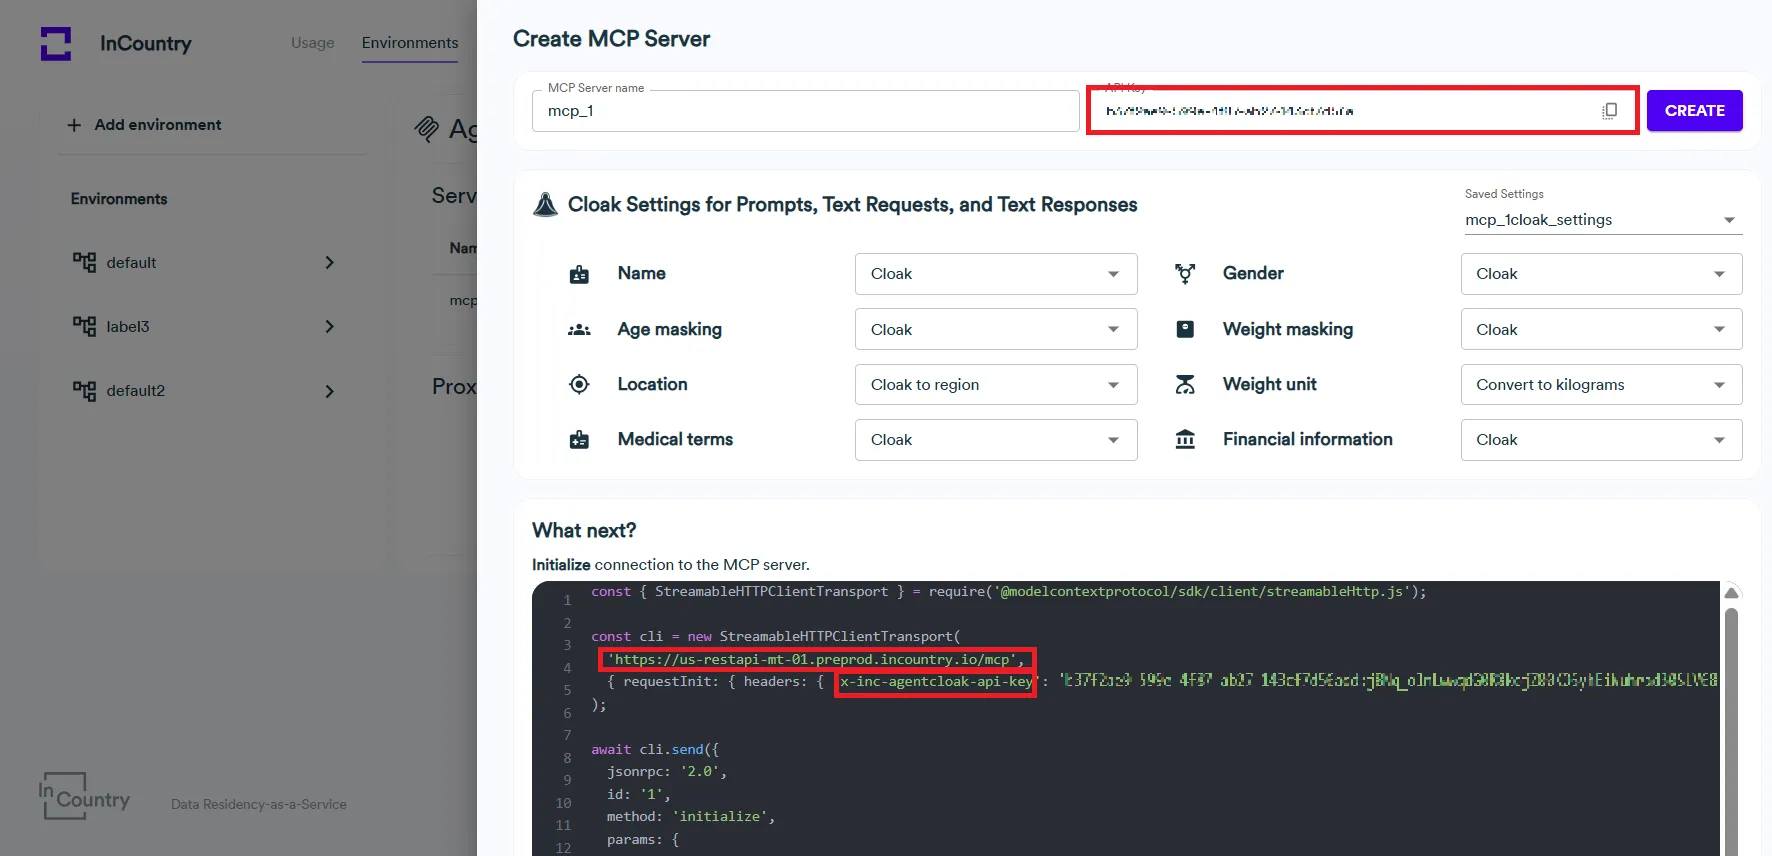
noteMake sure to copy the API key immediately after creating the MCP Server, as it will not be accessible later. Once you leave the creation screen, the key cannot be retrieved, and you'll need to generate a new one if it's lost.
-
-
Test the MCP Server using the MCP Inspector
- On the Create MCP Server page, copy the API key, the MCP Server URL and the header name.
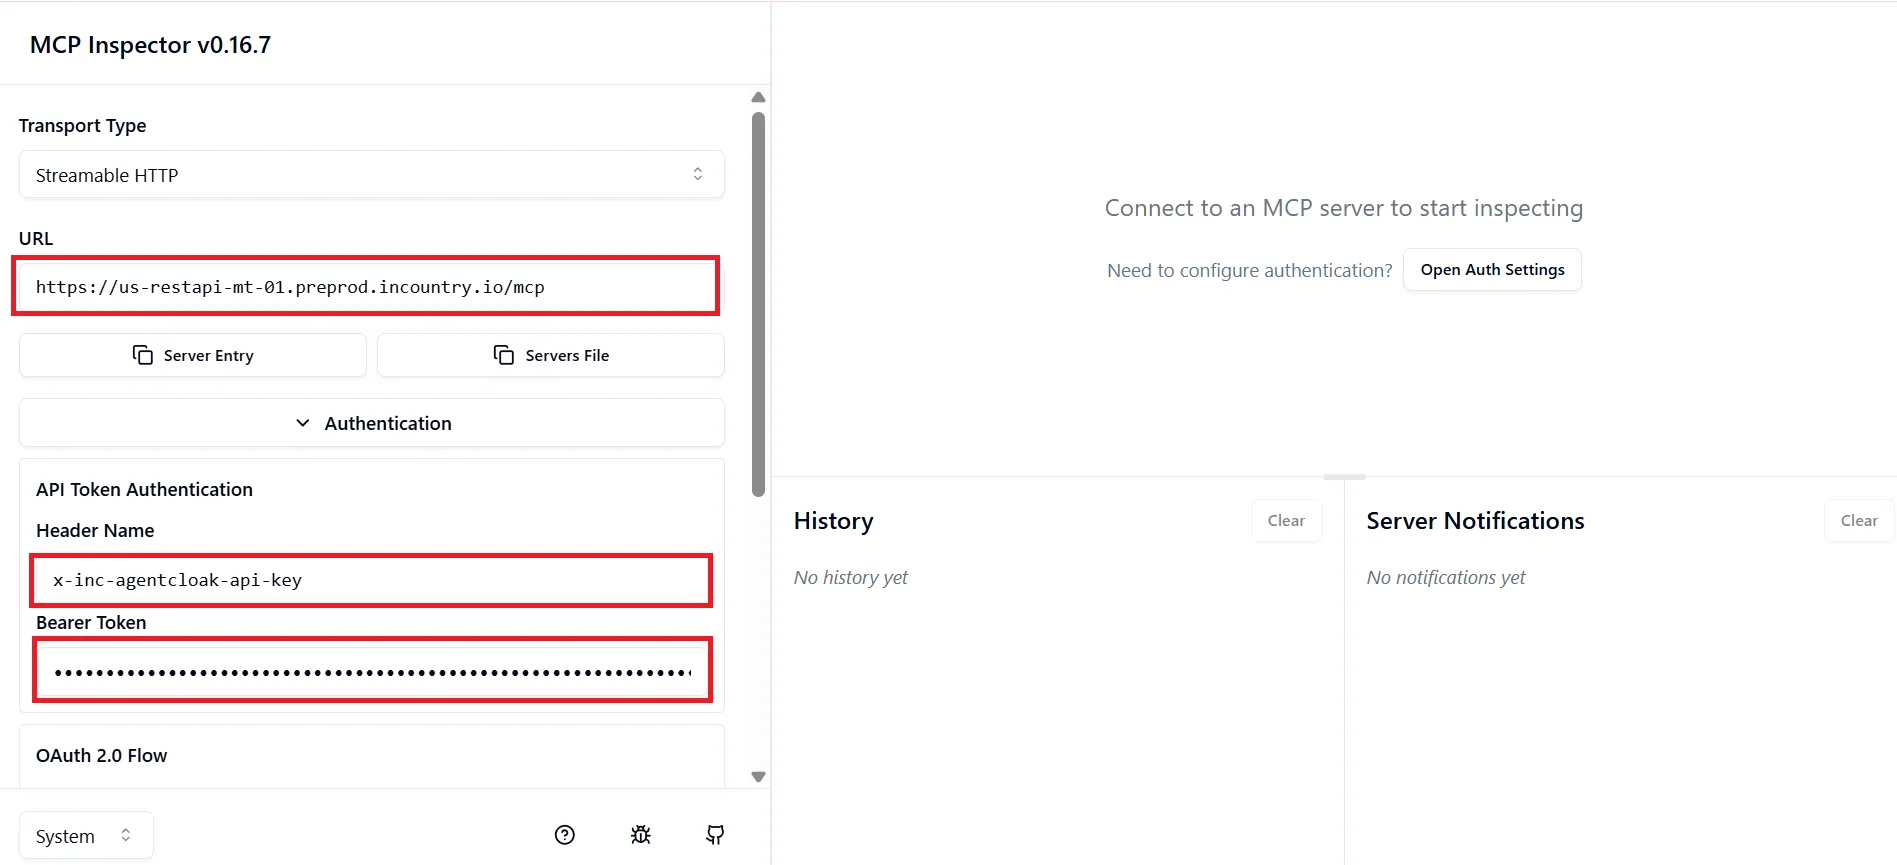
- Open the MCP Inspector tool.
- Paste the MCP Server URL, the header name and the API Key, then click Connect.
- Under List Tools, do the following:
- On the Create MCP Server page, copy the API key, the MCP Server URL and the header name.

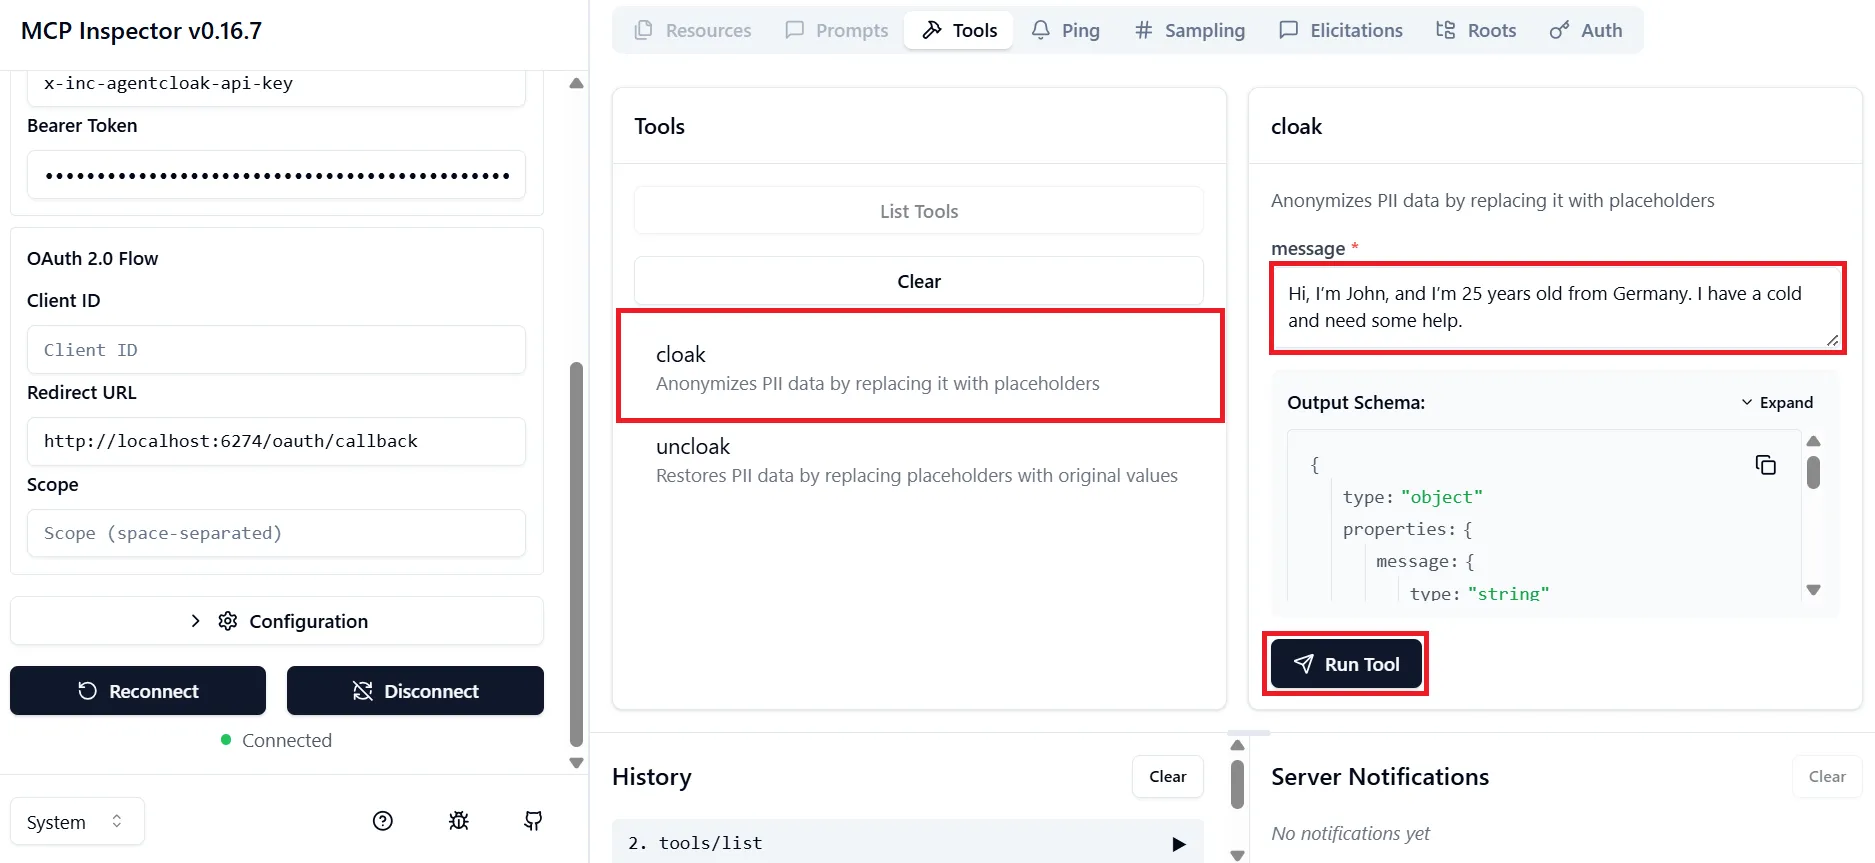
Cloak Test
- Select the cloak tool.
- Enter a test message containing PII (e.g., name, age, location).
- Click Run Tool.
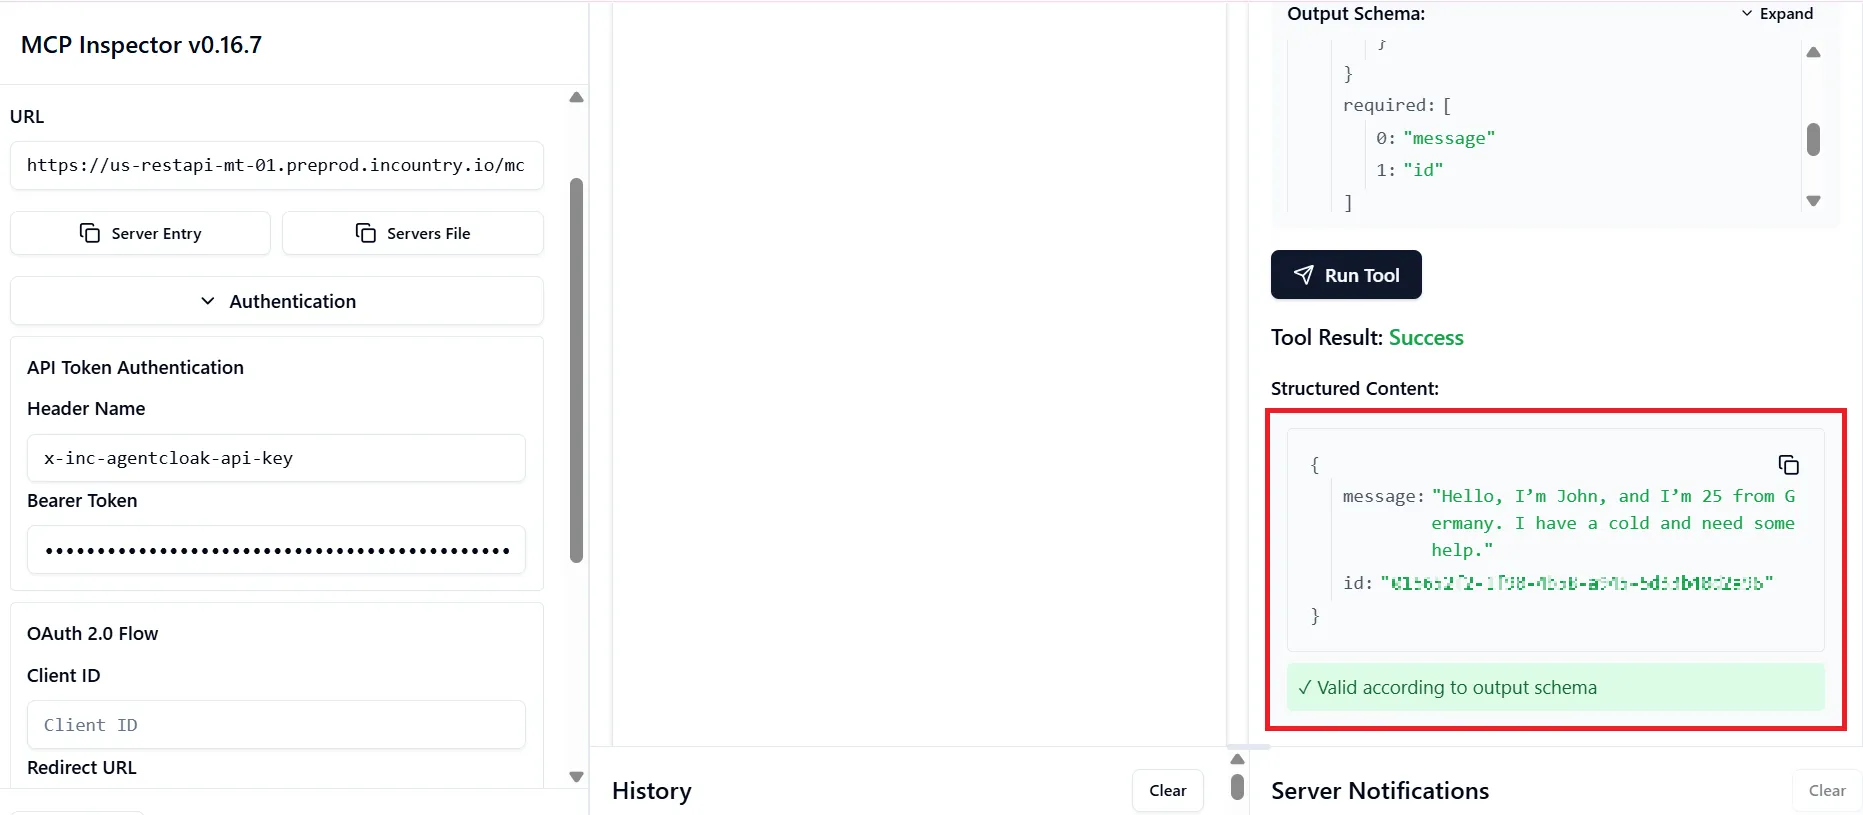
✅ Result: PII data is replaced with anonymized placeholders.
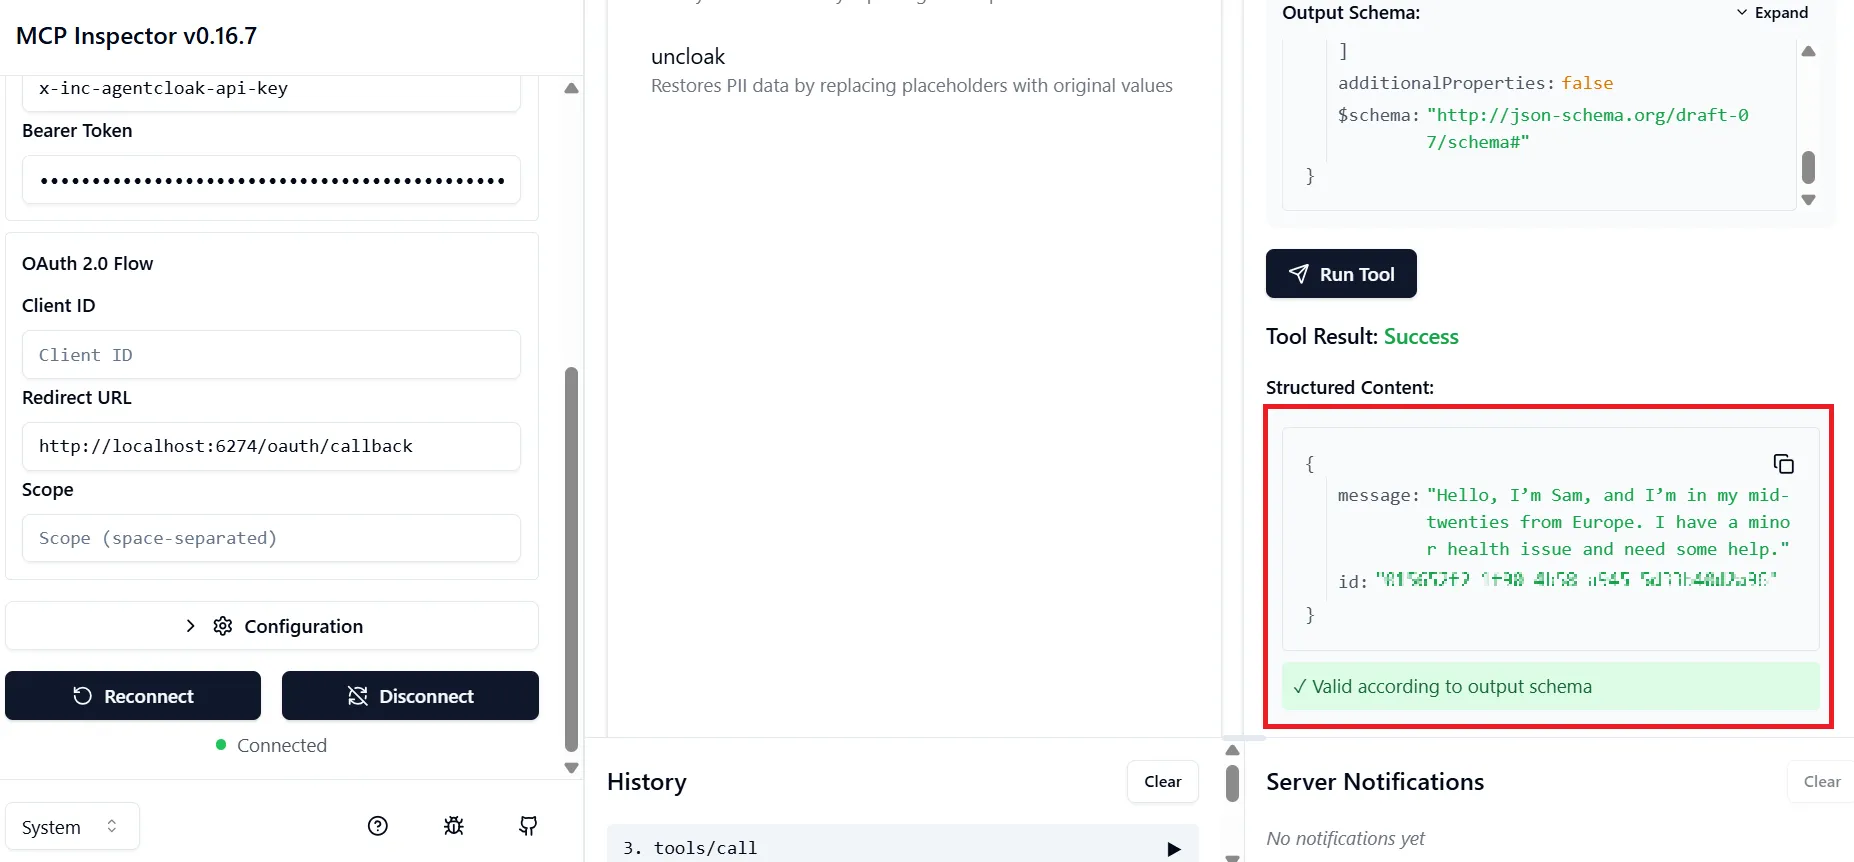
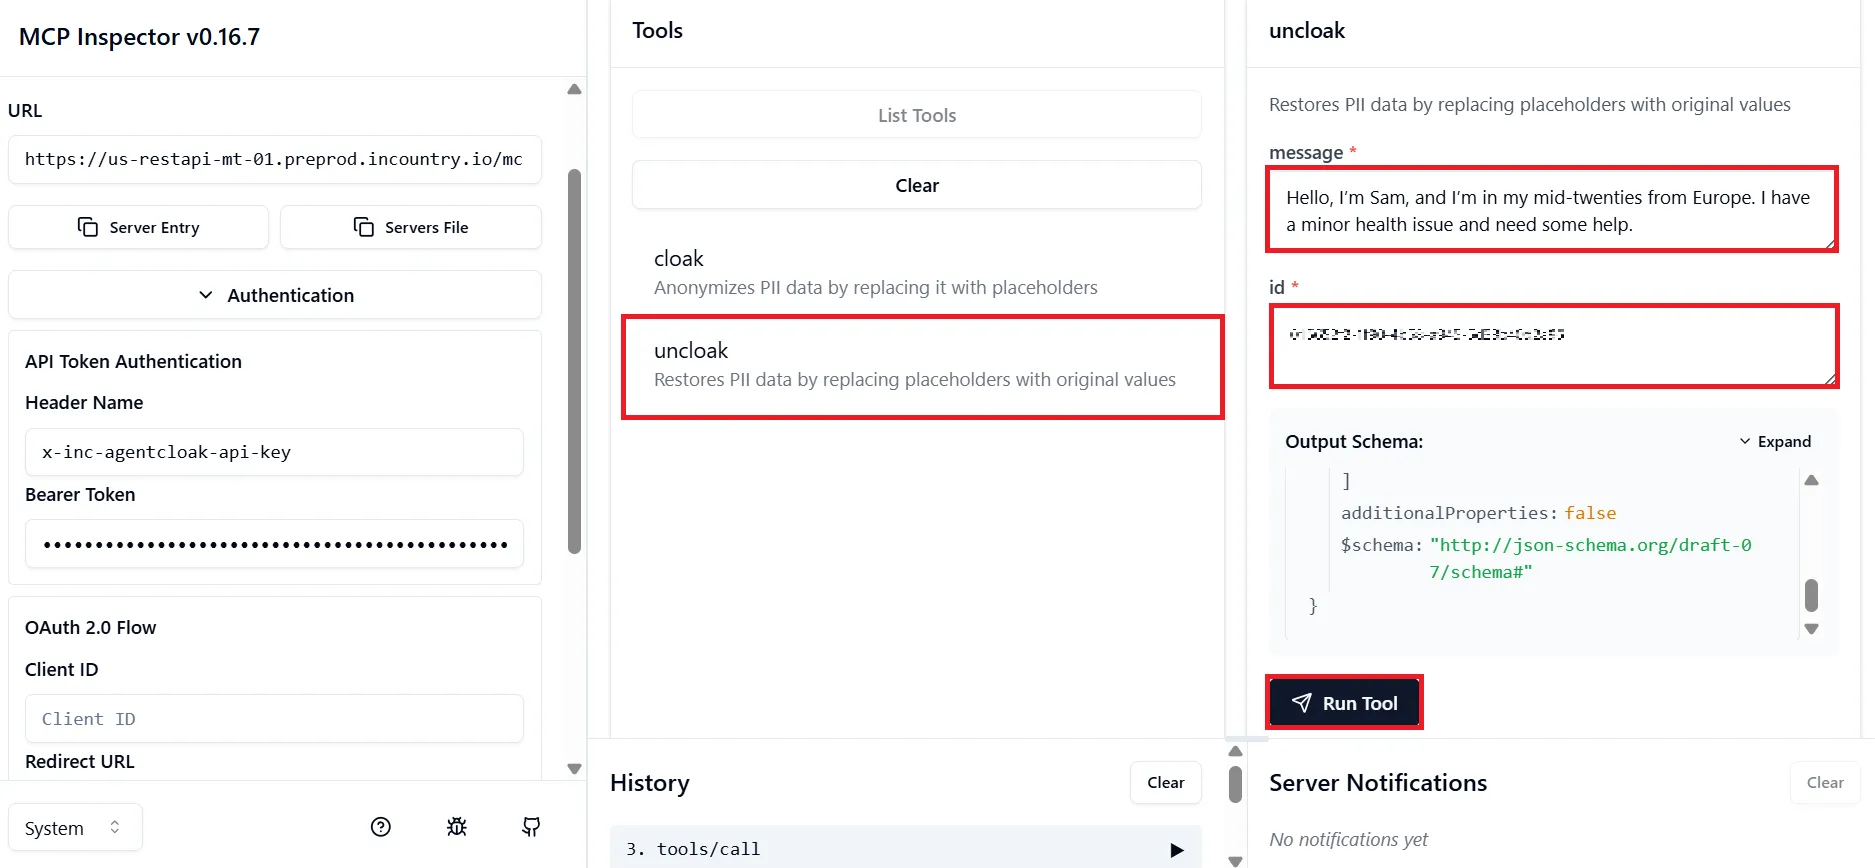
Uncloak Test (Restore Data)
- Copy the ID and the cloaked message from the result of the cloak test.
- Select the uncloak tool.
- Paste the ID and the cloaked message you previously copied.
- Click Run Tool.